Since we first introduced our recurring weekly Wednesday technical webinars back in November 2019, we’ve been proud to share over 78 brief, but meaningful deep-dives into many areas of our products and managing Collaboration environments and operations.
In response to a popular request from attendees, we’ve added the ability for users to opt in to be automatically registered for new webinars as they are announced.
Early each month, our webinars team posts a new set of weekly webinars for the next calendar month. During this process, users which have opted in will be automatically registered and approved for each of the new upcoming webinar events and should receive corresponding Webex calendar invites.
Here’s How to Opt-In to be Automatically Registered for New Variphy Webinars
There are 2 methods illustrated below, which both require you to first login with your variphy.com user account.
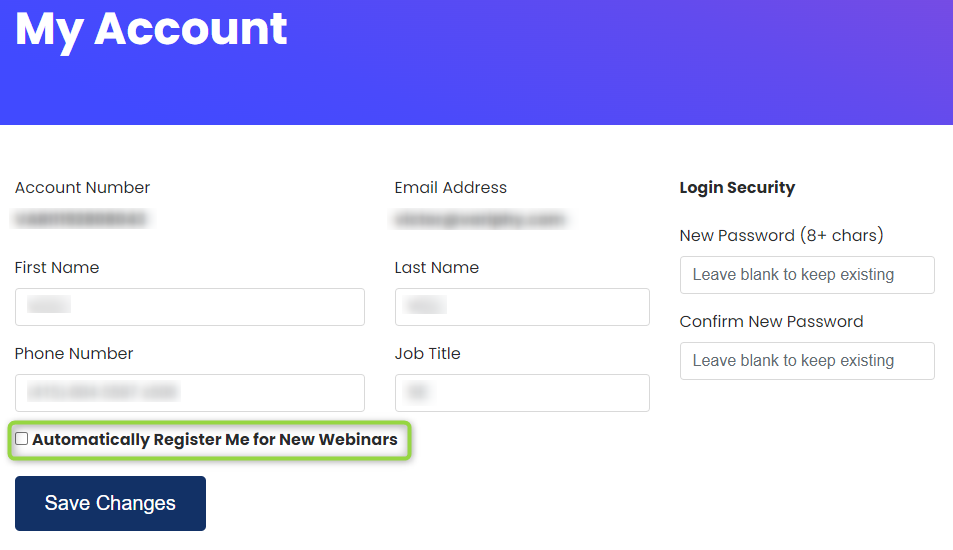
Method 1: My Account
Log in at https://www.variphy.com/support/login, select My Account from the Logged In drop down menu in the upper right of the main navigation on variphy.com.

On the resulting page, select the new checkbox option next to Automatically Register Me for New Webinars and then click the Save Changes button.

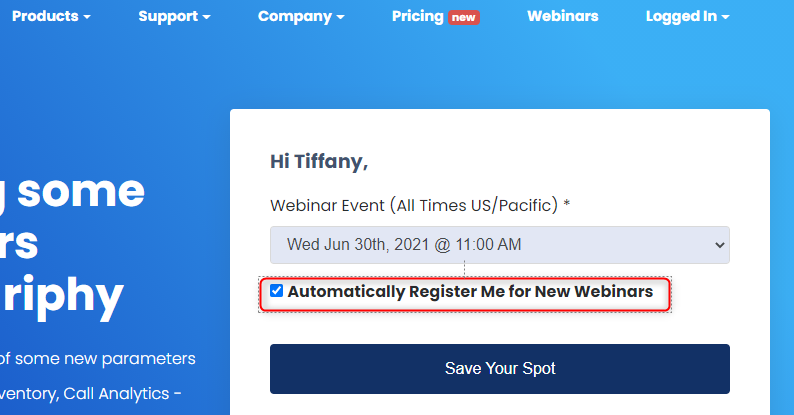
Method 2: Webinar Registration Form
When registering for a specific upcoming webinar event (https://www.variphy.com/company/webinars/) , select the new checkbox option next to Automatically Register Me for New Webinars and then click the Save Your Spot button.
Note the following option will only appear if you’re logged in via your user account on variphy.com.
How to Opt-Out of New Webinar auto registration.
Once logged in, select My Account from the Logged In drop down menu in the upper right of the main navigation on variphy.com. (https://www.variphy.com/support/my-account)
On the resulting page, de-select the Automatically Register Me for New Webinars and then click the Save Changes button.