Google Workspace offers reliable cloud based SAML Identity Provider. This article will discuss the setup in both Google Workspace (IdP) and Variphy (Service Provider) to enable SAML Authentication. You will need a browser tab pointing to your Variphy instance and also another pointing to your Google Workspace Admin portal to achieve this setup.
Variphy SAML Setup
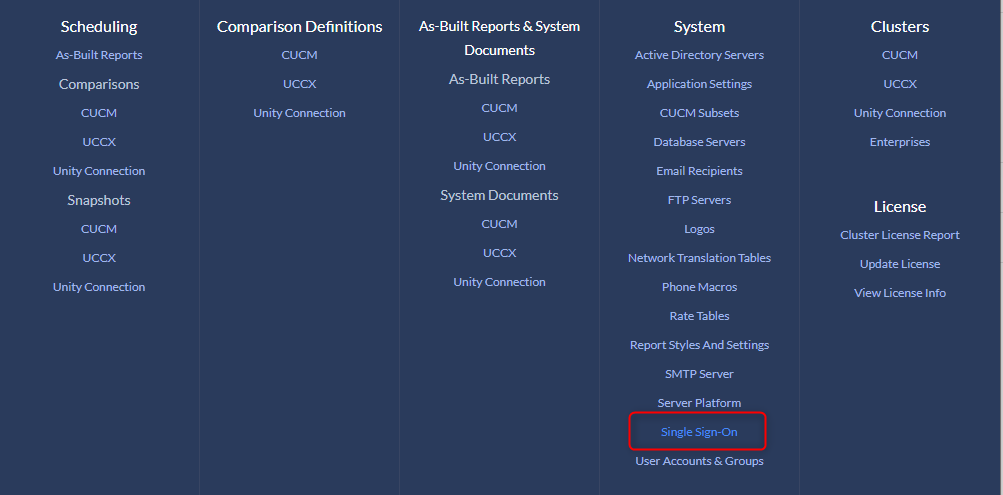
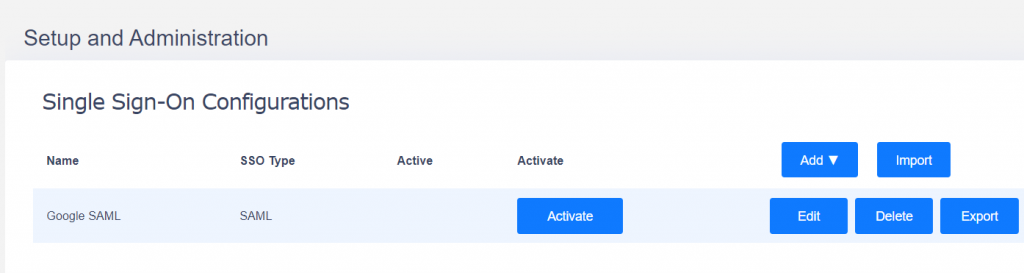
- Login to Variphy as a System Administrator
- Browse to Settings > User Authentication > Single Sign-On
- Click Add > SAML
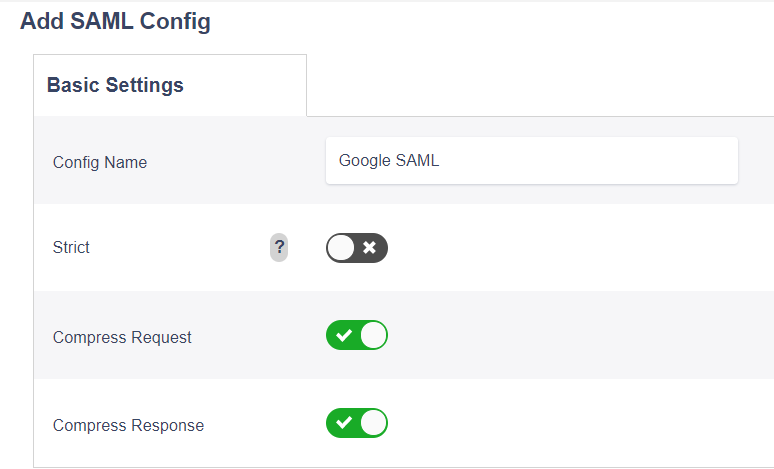
- Supply a config Name
- Uncheck ‘Strict’ Enforcement
Okta SAML Setup
Following this article, you will gain insight where/how to setup your Variphy SAML Application to the Google Identity Provider. https://support.google.com/a/answer/6087519?hl=en
- Verify that you are logged into Google Workspace Admin Portal. If you are using the Developer Console, you need to switch over to the Admin Console. If you see < > Developer Console in the top left corner of your console, click it, then click Classic UI to switch.
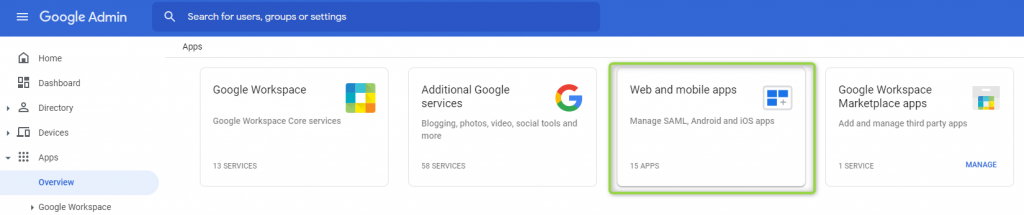
- In the Admin Console, go to Apps > Overview.
- Click Web and mobile apps.
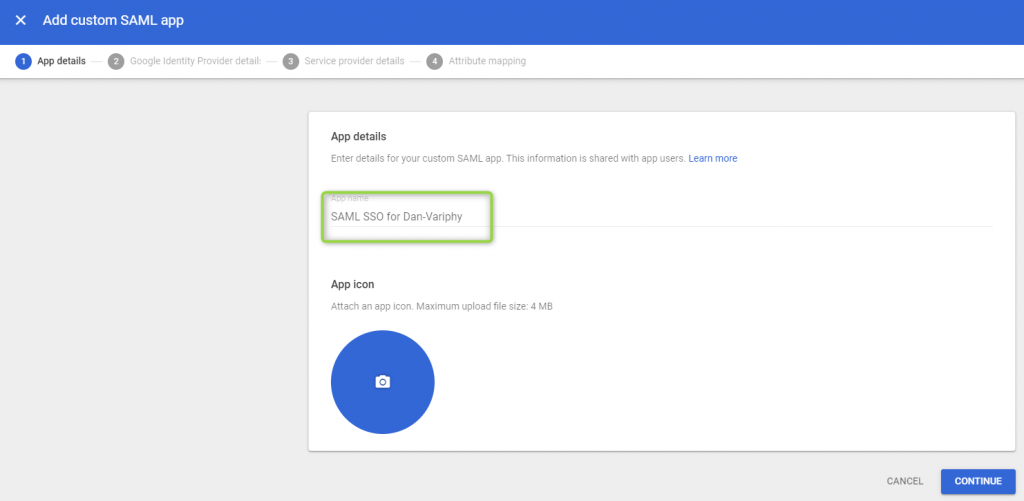
- On the new screen click Add App > Add custom SAML app.
- Supply an App name and an optional App icon (image)
- Click Continue.
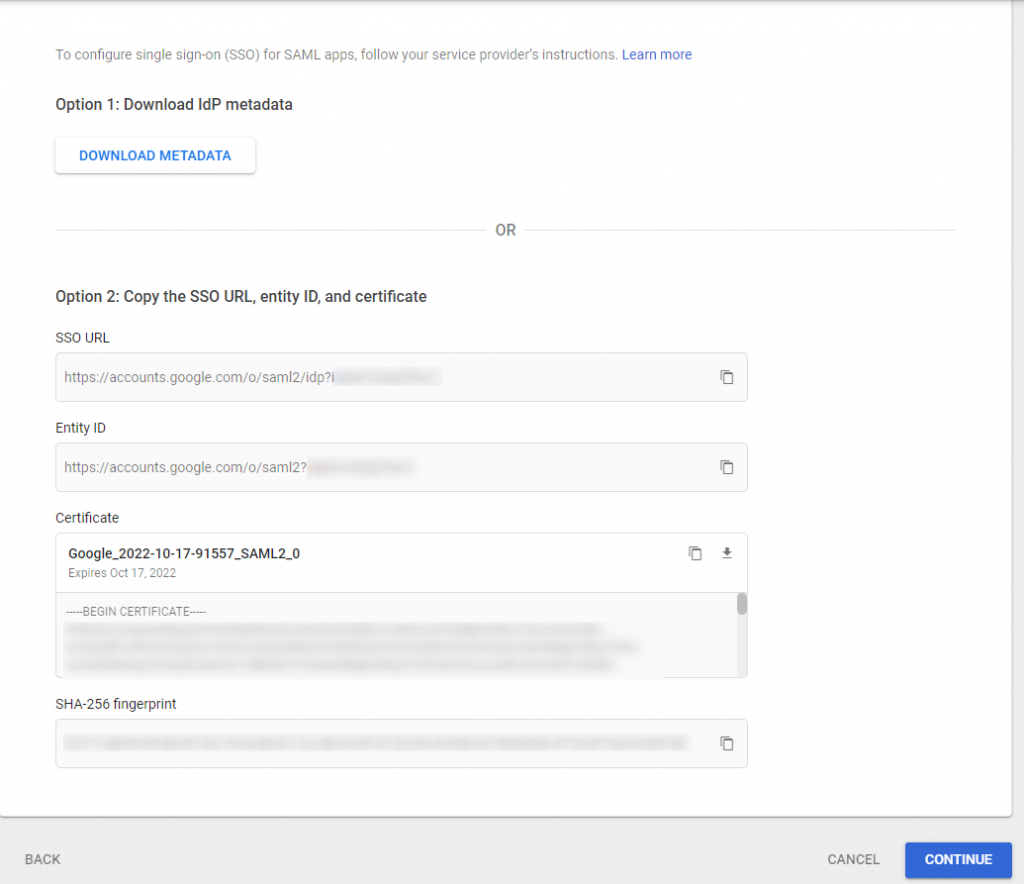
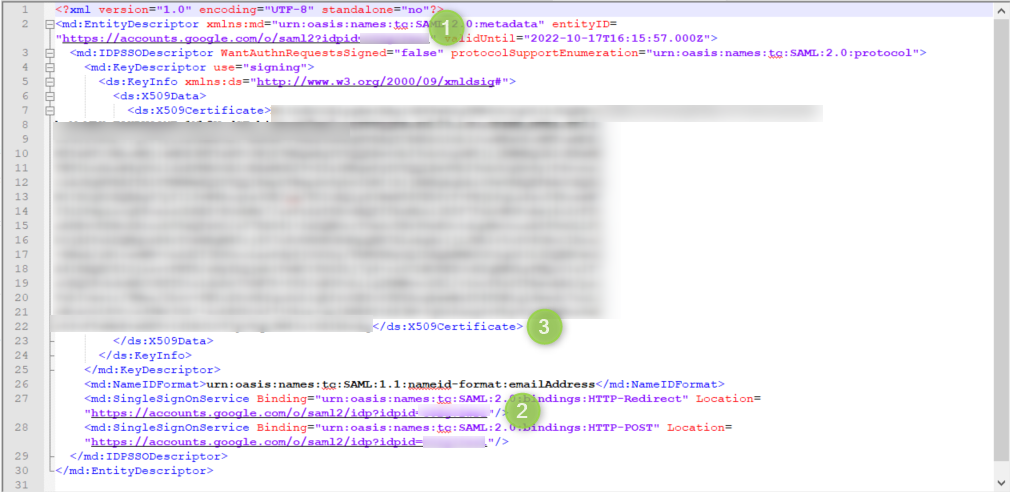
1. IdP Metadata Info
Option 1 — Download IdP metadata.
Option 2 — Copy individual settings, supplied within the downloadable metadata file.
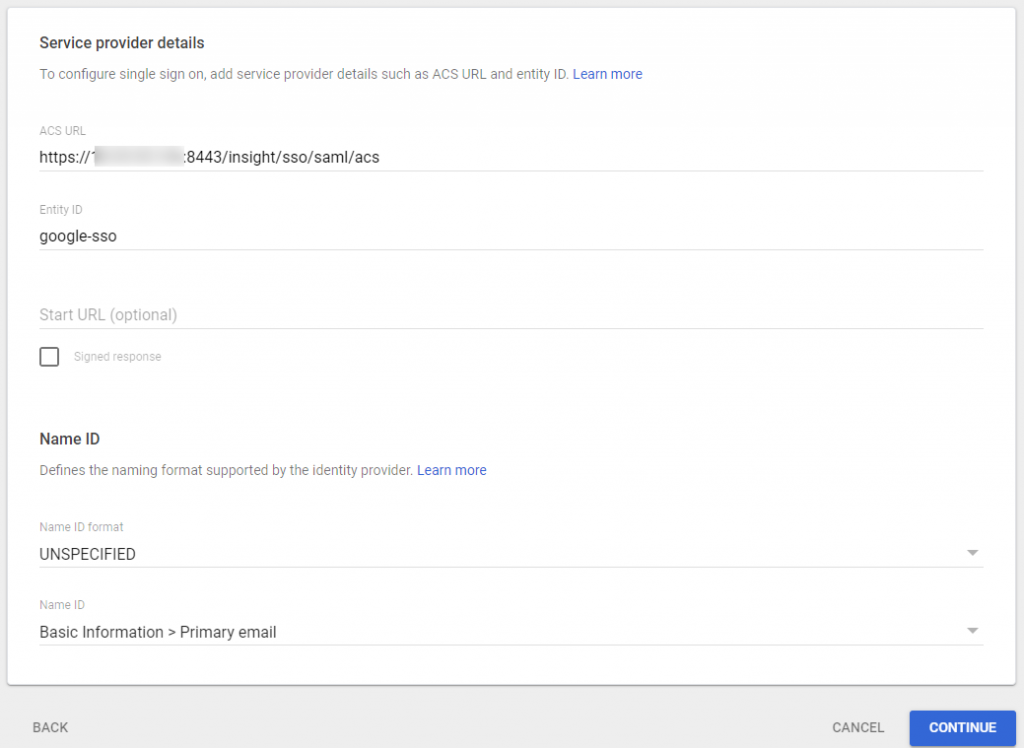
2. Service provider details
ACS URL — The location where the SAML assertion is sent with a POST operation. This URL is required and serves as the default ACS URL value for the Service Provider (SP). This URL is always used for IdP-initiated sign-on requests.
This should be in the format of –https://Variphy FQDN or IP:8443/insight/sso/saml/acs
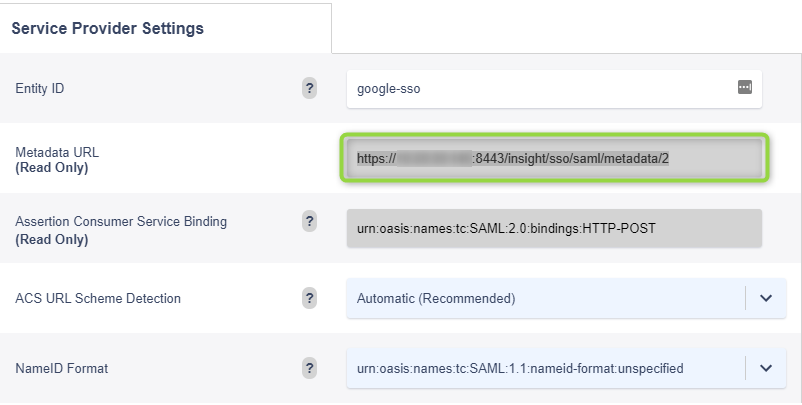
Audience URI (SP Entity ID) — The intended audience of the SAML assertion. This is usually the Entity ID of your application.
*NOTE* This can be named anything you would like, but must be unique and match the configured Entity ID on the Variphy Service Provider Settings, to be configured in just a minute.
Name ID format — The username format you are sending in the SAML Response. Consult the SP documentation to determine which format to use, but use the default (Unspecified) if the application does not explicitly specify a format.
Application username — The default value to use for the username with the application (Basic Information > Primary email.
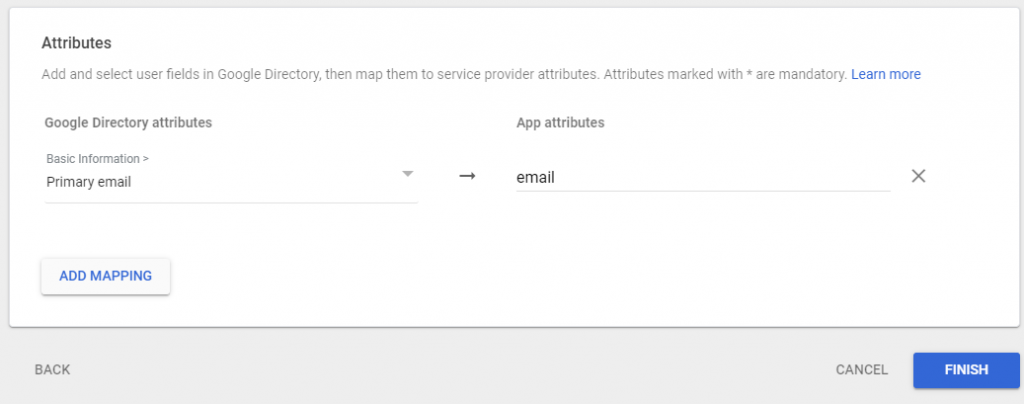
3. Attribute mapping
Attribute Mapping allows you to peogram the SAML response back to Variphy with a field-to-attribute mapping needed for login into Variphy. Select Add Mapping
Google Directory attributes – Select the Google attribute that you will want to bring into the SAML response. For this example we will use Primary email.
App attributes – Supply an attribute name that we will code into the Vatiphy SSO config. For the example we will type in the attribute email.
Click Finish.
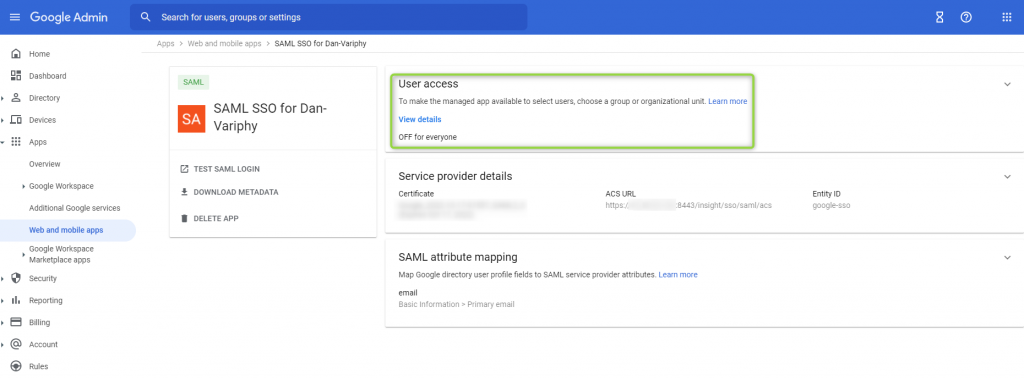
4. User Access to App
Click into your completed SAML application to allow users to access.
Select the User access section of the summary
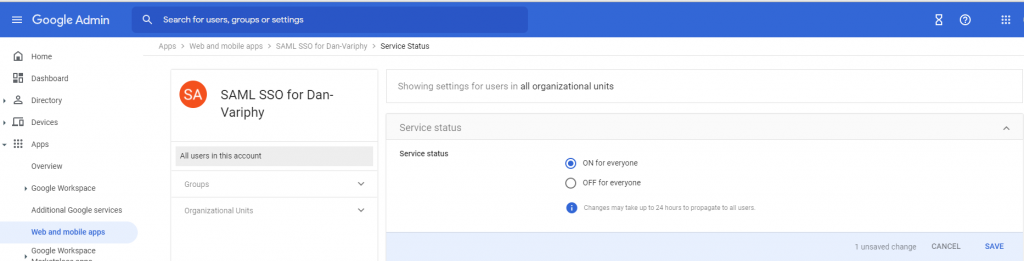
To enabled this application for everyone in the domain click ON for everyone in the Service status box.
To enable this application for specific groups or Organizational Unity, you may search for, and select them on the left side of the screen
5. IdP Settings in Variphy Config
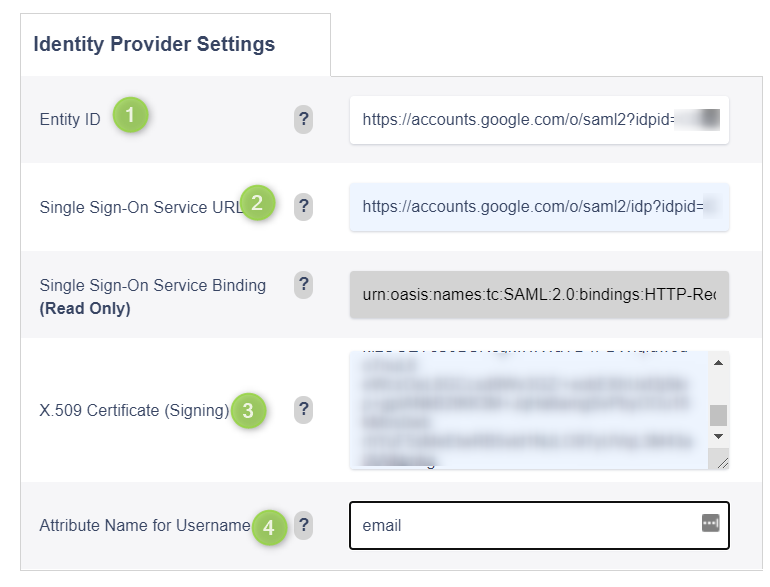
In a previous step we either selected Option 1 to download the IdP metadata or Option 2 to see the IdP Service URLS, Entity ID, and .509 Certificate. We will now need that info to populate the SSO IdP config inside of Variphy.
- Identity Provider Entity ID Single Sign-On URL – Copy this custom Okta URL to be used in Variphy SAML config
- Identity Provider Sign-On Service URL – Copy this value and provide it within the IdP’s Entity ID to be used in the Variphy SAML config
- x.509 Certificate – Copy into the IdP Settings section of the Variphy SAML config.
- Name Attribute – Previously we associated the attribute mapping in Google Workspace. We will need to indicate teh attribute you assigned previously. In this example we used attribute called email.
Click Create to save your Variphy SSO configuration.
On the next screen click Activate your SAML configuration.
Once activated a prompt will appear, asking you to setup SSO Bypass. This allows the current signed-in ‘My Account’ to use a dedicated URL to be able to login locally in the event, that SSO in non-functional. Click ‘Allow My Account to Bypass Single Sign-On‘
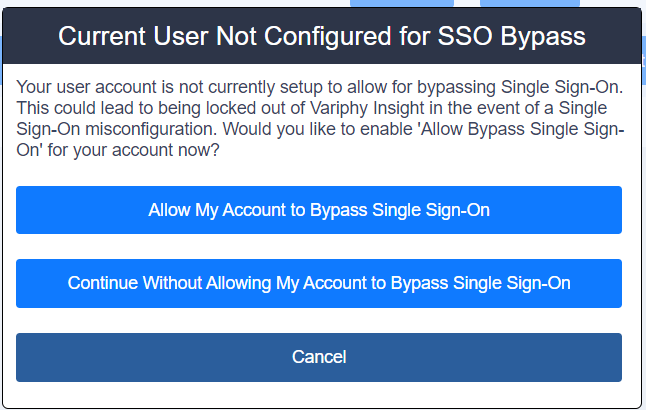
***Note*** SSO ByPass URL is as follows”
https://Server IP or Hostname:8443/insight/login.jsp
Troubleshooting Tips
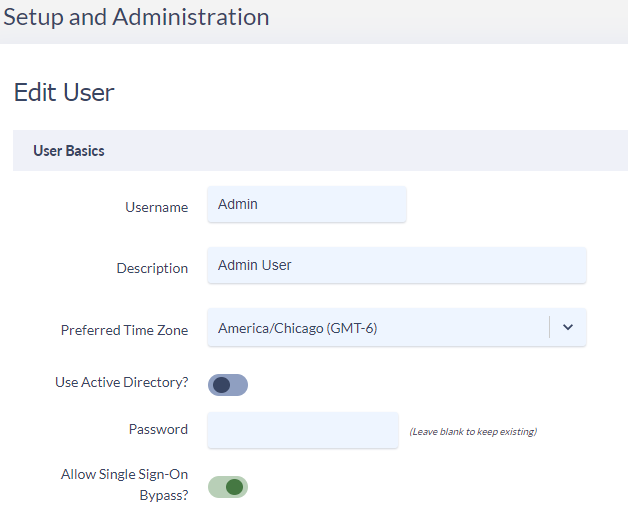
By-Pass Users
On the Variphy User or Variphy Group level in Variphy, you can define local users/groups that should be able to bypass SSO with the above mentioned link and sign in locally by selecting the ‘Allow Single Sign-On Bypass‘ checkbox.
Invalid redirect to ACS URL
In the case that after authentication and redirect back to Variphy server you get a white screen, check your supplied ACS URL inside of Variphy’s metadata file. After saving your Variphy SSO config you may edit once more to retrieve the URL to download the metadata file.
When copying that URL into a browser it will download the Variphy metadata file. In that file you can confirm the ACS URL that should be used inside of the Google SAML app settings.
