Applies to:
- Microsoft Teams Phone administrators
Background
This article outlines how to add and configure your Microsoft Tenant in the Variphy application.
How to Add Your Microsoft Tenant in Variphy
1. Configure the Microsoft Tenant in Variphy.
Note: The account that is authorizing the Variphy app will need to be either a Global Administrator or Privileged Role Administrator.
Log in to Variphy and hover over the setup (gear) icon in the upper right. In the Platforms section, click on Microsoft Tenants.
Note: This will only appear and be accessible for system administrator users, and if your instance of Variphy is licensed for Microsoft Teams Phone.

On the resulting page, click the Add New button.

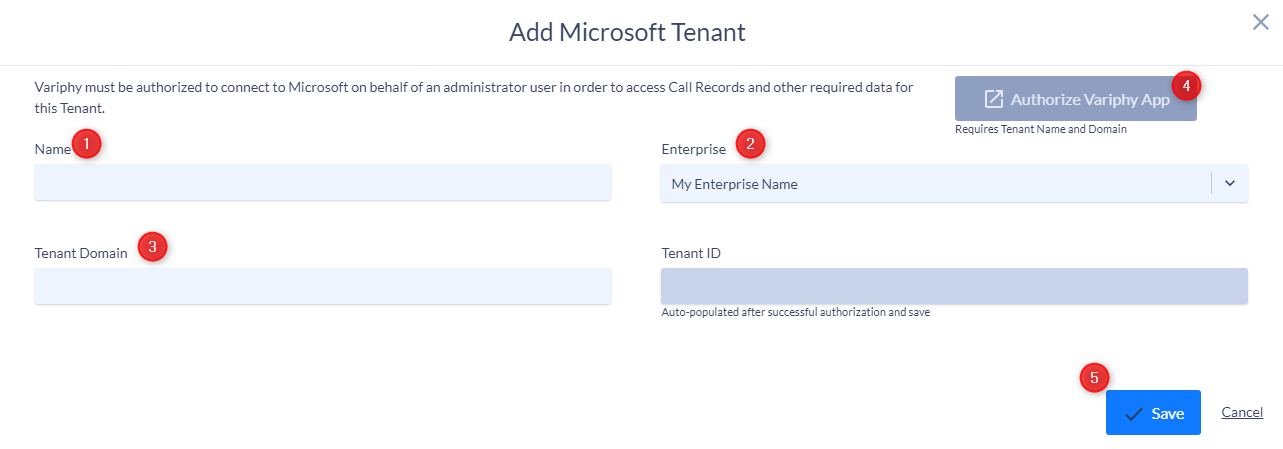
Clicking the Add New button will open the following simple configuration model. To complete the creation of your Microsoft Tenant in Variphy:
- Enter the desired name for your Microsoft Tenant in Variphy, which will be used for display.
- Select the appropriate enterprise group to assign this tenant.
- Enter your tenant domain (e.g., variphy.com).
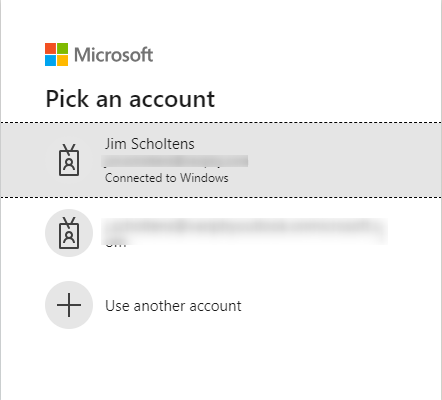
You will be asked to select an account to use to authorize the Variphy app.
This user must be either a Global Administrator or Privileged Role Administrator.
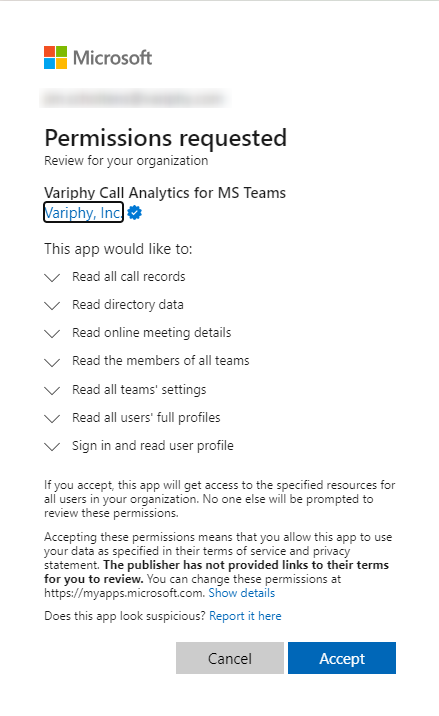
Permissions Used by Marketplace App
The Microsoft Marketplace App named Variphy Call Analytics for MS Teams Phone utilizes the following required permissions as they define what types of data the Variphy application can access via the API.
- Read all call records: Allows the app to read call records for all calls and online meetings, without a signed-in user.
- Read directory data: Allows the app to read data in your organization’s directory, such as users, groups and apps, without a signed-in user.
- Read online meeting details: Allows the app to read online meeting details in your organization, without a signed-in user.
- Read the members of all teams: Read the members of all teams, without a signed-in user.
- Read all teams’ settings: Read all teams’ settings, without a signed-in user.
- Read all users’ full profiles: Allows the app to read user profiles, without a signed-in user.
- Sign in and read user profile: Allows users to sign in to the app, and allows the app to read the profile of signed-in users. It also allows the app to read basic company information of signed-in users.
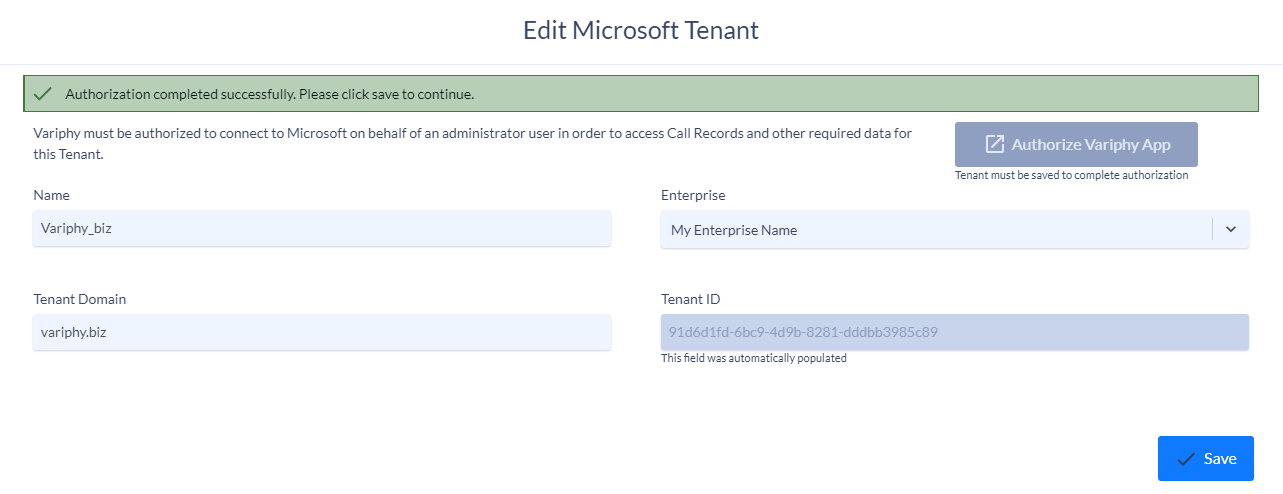
If Variphy is able to successfully connect to and communicate with the Teams APIs, the Tenant ID for your Microsoft Tenant will be displayed on the page. Click Save.

2. Configure CDR Processing.
Navigate to the CDR Processing tab and click the gear icon to edit your Microsoft Tenant.

On the resulting CDR Processing Settings & Activation page, adjust the following configurations:
- Enable Data Processing: Toggle ON to enable processing of Teams data.
- Primary Database Server: Select your SQL Server from the list of available options.
- Primary Database Name: Add the name you wish to use for the primary database.
- Click Save and Continue.
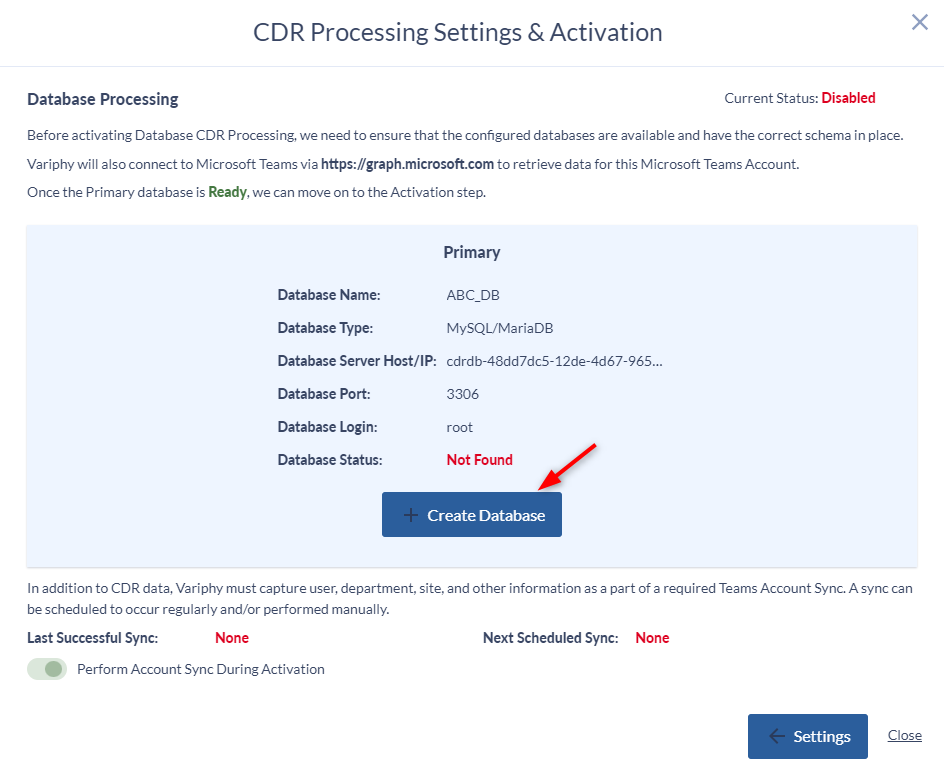
- On the resulting page, click Create Database.
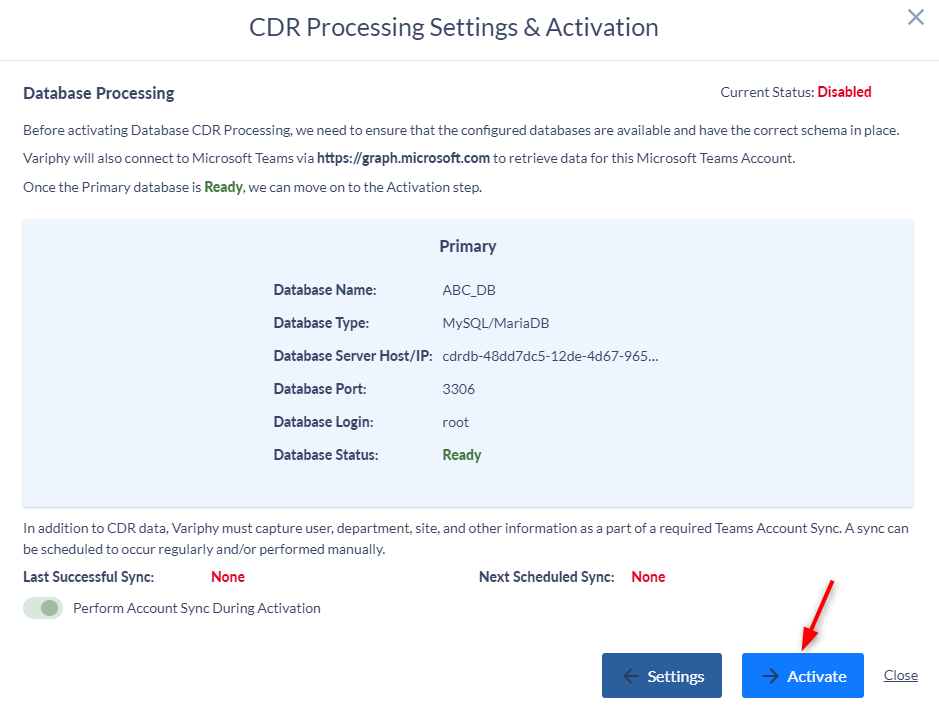
- On the resulting page, click Activate.
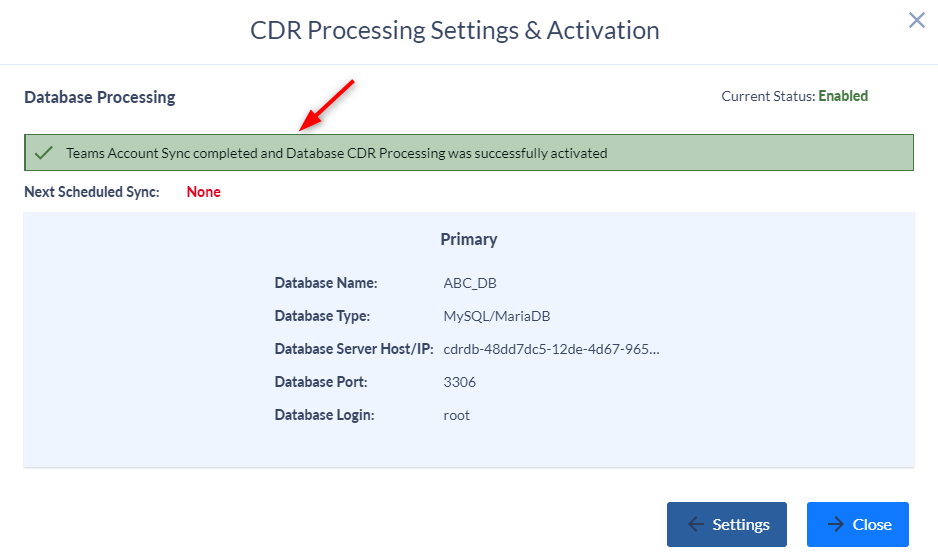
You will see a message stating Database CDR Processing was successfully activated. Click Close.
3. Schedule your automatic data sync.
Scheduled syncs are used to pull Teams metadata into the Variphy database for reporting. Unlike call data, which is pulled on the CDR Processing Schedule, metadata includes info such as new Teams Phone users, groups, and departments.
Navigate to the Sync tab.

Once your Teams Tenant integration has been successfully activated, Variphy will automatically sync metadata to Variphy. It may take up to several minutes for your first sync to complete depending on the size of your Teams Tenant. Once complete, your “Status” will display “Enabled” and your “Last Sync Attempt” and “Last Sync Success” will be updated.

Multiple sync schedules can be created to import metadata more frequently.
In the Sync tab click the Calendar Icon.

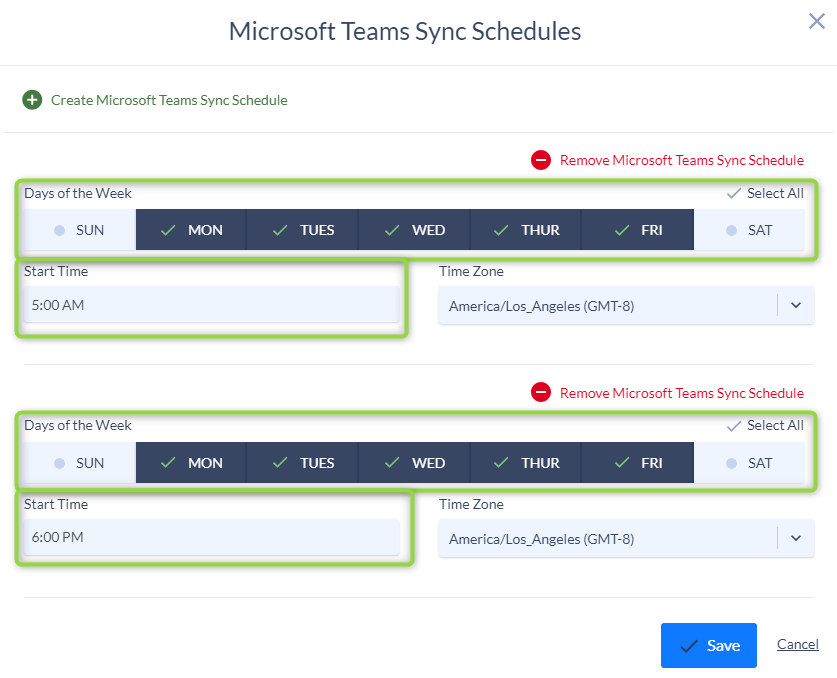
Click Create Microsoft Teams Sync Schedule.
Select the Days of the Week the sync should run.
Select the Start Time and Time Zone for the sync to run.
If creating multiple sync schedules, click the Create Microsoft Teams Sync Schedule.
Click Save once you have added all your sync schedules.
The example below runs a sync twice a day — once at 5:00 a.m. and again at 6:00 p.m. Monday through Friday.
Still Need Help?
Email our support team at support@variphy.com or click the button below to access our ticket portal.
Please provide details about your question or issue, including any applicable screenshots, reports, or Variphy application log files.