There may be times where you need to reprocess CDR data back into the database after it has been purged out. Or you may even need to reprocess all CDR to a new database. The following steps will accomplish this task more quickly than attempting to copy paste from windows explorer. The first section will cover the process in Windows, and the remaining section will cover the Linux process.
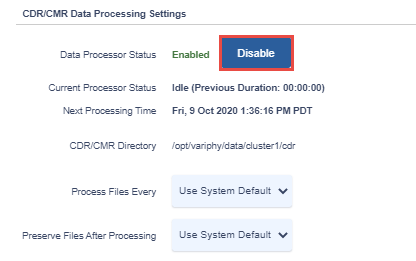
NOTE: While you are importing records into the CDR repository folder, it is advisable to stop the Variphy CDR processing until the copying process is complete. This can be done it 2 ways:
- Stop the Variphy service: In Linux, use the command sudo service variphy stop. In Windows, simply stop the Variphy service from the services.msc window.
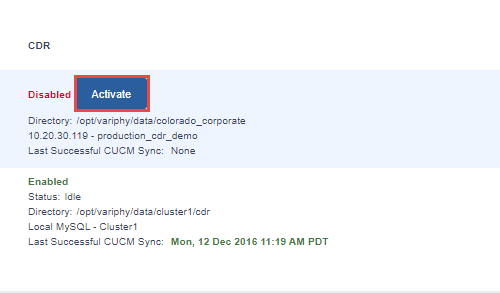
- You can also leave the Variphy service running so that dashboards and other functions remain available. To do so, go to Settings > Clusters > CUCM, edit the cluster, and choose the “disable” option, then save the changes.
Once the records are copied, restart the Variphy service (Linux: sudo service variphy start) or activate the cluster, accordingly.
Windows
Reprocess all of the CDR files by copying them back into the root CDR folder:
Open Power Shell and run the following command:
Get-ChildItem 'cdr processed folder path' -Recurse -filter "*.dat" | %{Move-Item -Path $_.FullName -Destination 'cdr root folder path'}
Example:
Get-ChildItem 'C:\CDR\Cluster1\processed' -Recurse -filter "*.dat" | %{Move-Item -Path $_.FullName -Destination 'C:\CDR\Cluster1'}
This will move all the .dat cdr files out of your processed folder back into the root folder for re-processing. Depending on the number of files it may take some time to move all the files, but it is much quicker than manually moving/copying those files in Windows Explorer. If you wish to just copy the files instead of moving them (slower, but leaves originals in their folders), use the Copy-Item syntax instead of Move-Item.
Reprocess select CDR files by date range:
If you want to move/copy CDR files for a specific date range from the processed folder back to the root CDR folder (e.g. March 1, 2020 to April 30, 2020) you can use the following syntax in Power Shell:
Get-ChildItem 'cdr processed folder path' -Recurse -filter "*.dat" | Where-Object { $_.CreationTime -ge "mm/dd/yyyy" -and $_.CreationTime -le "mm/dd/yyyy" } | %{Copy-Item -Path $_.FullName -Destination 'CDR root folder path'}
Example:
Get-ChildItem 'C:\Variphy\CDR\processed' -Recurse -filter "*.dat" | Where-Object { $_.CreationTime -ge "03/01/2015" -and $_.CreationTime -le "04/30/2015" } | %{Copy-Item -Path $_.FullName -Destination 'C:\Variphy\CDR'}
Migrating the Processed CDR Files with the Folder Structure:
If you need to move the entire processed folder to another drive, while keeping the subfolder structure intact, you can use the following commands in Power Shell:
$sourceDir = 'source root folder path'
$targetDir = 'destination root folder path'
Get-ChildItem -Path $sourceDir | Move-Item -Destination $targetDir -Recurse -Container
The three lines should be entered separately, the first mapping the source folder location, the second mapping the destination folder, and the third executing the recursive move command. The -Container switch recreates the subfolder structure in the destination path identically to that of the source path. If you want to copy the files instead of moving them, replace the syntax Move-Item with Copy-Item.
Example:
$sourceDir = 'C:\Variphy\CDR\processed'
$targetDir = 'E:\Variphy\CDR\processed'
Get-ChildItem -Path $sourceDir | Move-Item -Destination $targetDir -Recurse -Container
Linux
Reprocess all of the CDR files by copying them back into the root CDR folder:
To copy and reprocess ALL old CDR files in the processed folder, use the following command, substituting the appropriate source and target directory paths and run in SUDO mode:
find /source/directory -name '*.dat' -type f -exec cp {} /target/directory/ \;
Example:
find /opt/variphy/data/cluster1/cdr/processed -name '*.dat' -type f -exec cp {} /opt/variphy/data/cluster1/cdr/ \;
Reprocess select CDR files by date range:
To copy files from a certain date range back to the processed folder, use the following command, substituting the appropriate dates and target paths.
find /source/directory -name '*.dat' -type f -newermt yyyy-mm-dd ! -newermt yyyy-mm-dd -exec cp {} /target/directory/ \;
Example:
find /opt/variphy/data/cluster1/cdr/processed -type f -newermt 2016-04-01 ! -newermt 2016-10-31 -exec cp {} /opt/variphy/data/cluster1/cdr/ \;