To backup Variphy Insight for restore/recovery and migration/relocation purposes:
Step 1) Identify Snapshot and Phone Macro
Screenshot Result storage directory locations.
Click Application Settings from the System section in the Setup menu in Variphy.
This will load the Application Settings page.
At the top of the page, if licensed, the following values will appear:
- Snapshot Directory
- Phone Macro Screenshot Directory
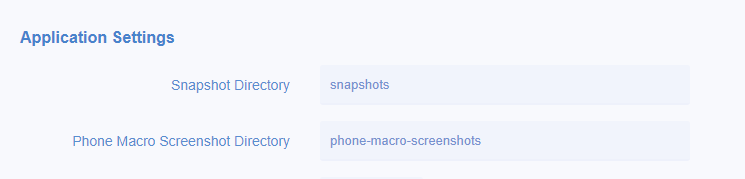
If either of the directory values are different than these defaults, note the directory locations as you will need them in Step 3) below.
Step 2) Shutdown the Variphy Application
On Windows
Stop the ‘Variphy Insight’ Windows Service
On OVA/Linux
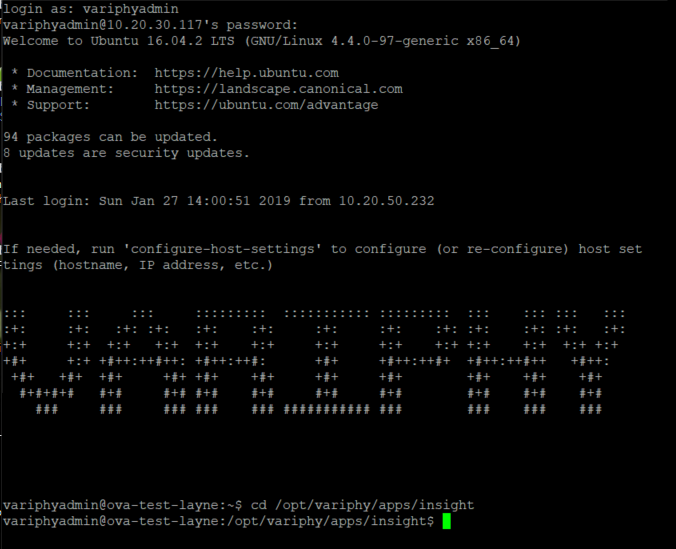
SSH to the Variphy server and then CD to the Variphy Insight installation location:
cd /opt/variphy/apps/insight

Run the following command to stop the Variphy service:
sudo systemctl stop variphy.service
if prompted, enter the sudo password
Step 3) Copy the following folders and contents, if they exist, from the ‘Variphy Insight’ install directory to another location, as this is where the data and settings are stored.
Not all folders may exist, in which case, they can be skipped.
- broadcast (directory)
- config
- db
- license
- logos
- logs
- phone-macro-screenshots
- settings
- snapshots
- systemDocuments
- variphy.vmoptions
- **The Snapshot and/or Phone Macro Screenshot directory locations identified in Step 1) above if they are not default locations
To restore Variphy Settings and Data to a Running Installation:
Step 1) Shutdown the Variphy Application
On Windows
Stop the ‘Variphy Insight’ Windows Service
On OVA/Linux
SSH to the Variphy server and then CD to the Variphy Insight installation location:
cd /opt/variphy/apps/insight
Run the following command to stop the Variphy service:
sudo systemctl stop variphy.service
when prompted, enter the sudo password
Step 2) In the installation directory of Variphy Insight (for example
/opt/variphy/apps/insight on OVA/Linux or C:\Program Files\Variphy Insight on Windows), replace the existing files and folders with the directories and files from the backup.
3) Start the ‘Variphy Insight’ Windows Service
On Windows
Start the ‘Variphy Insight’ Windows Service
On OVA/Linux
SSH to the Variphy server and then CD to the Variphy Insight installation location:
cd /opt/variphy/apps/insight
Run the following command to start the Variphy service:
sudo systemctl start variphy.service
when prompted enter the sudo password