Okta is a very popular cloud based SAML Identity Provider. This article will discuss the setup in both Okta (IdP) and Variphy (Service Provider) to enable SAML Authentication. You will need a browser tab pointing to your Variphy instance and also another pointing to your OKTA Admin portal to achieve this setup.
Variphy SAML Setup
- Login to Variphy as a System Administrator
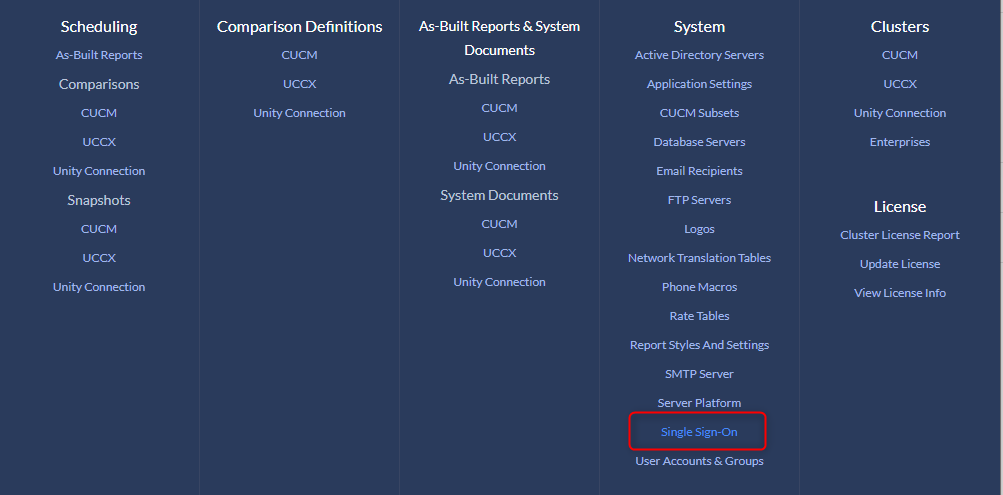
- Browse to Settings > User Authentication > Single Sign-On
- Click Add > SAML
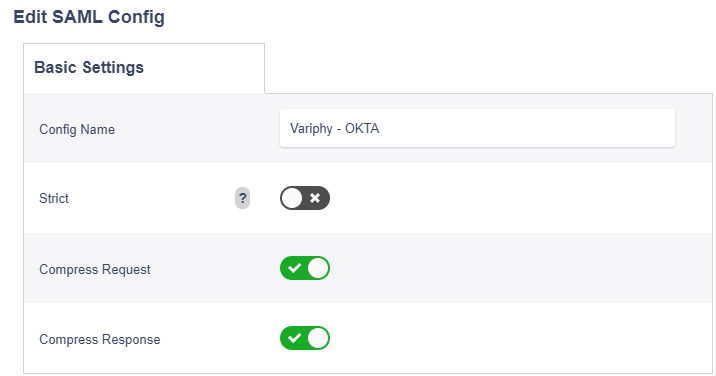
- Supply a config Name
- Uncheck ‘Strict’ Enforcement
Okta SAML Setup
Following this article, you will gain insight where/how to setup your Variphy SAML Application to the Okta Identity Provider. https://help.okta.com/en/prod/Content/Topics/Apps/Apps_App_Integration_Wizard_SAML.htm#
- Verify that you are using the Okta Admin Console. If you are using the Developer Console, you need to switch over to the Admin Console. If you see < > Developer Console in the top left corner of your console, click it, then click Classic UI to switch.
- In the Admin Console, go to Applications > Applications.
- Click Add Application.
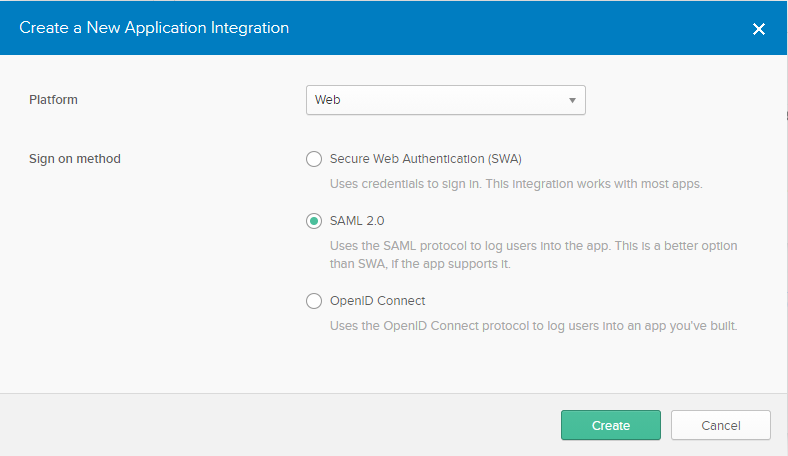
- Click Create New App.
- To create a SAML integration, select Web as the Platform and SAML 2.0 for the Sign on method.
- Click Create.

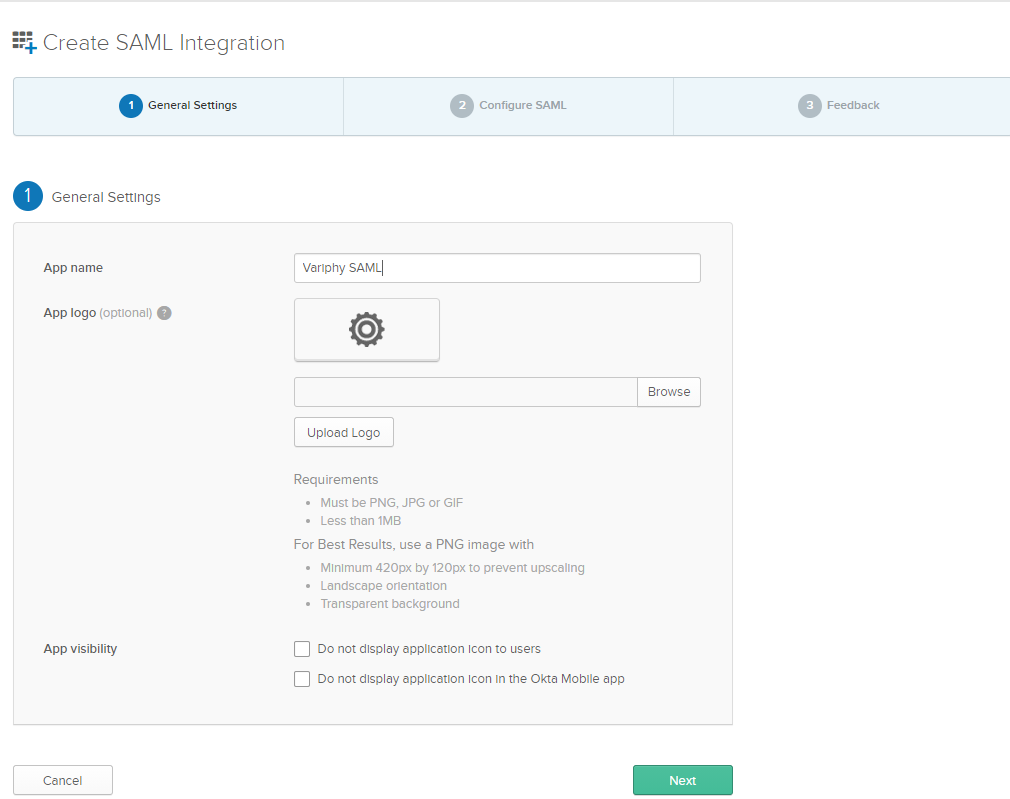
1. General Settings
Application name — Specify a name for your integration.
App logo (Optional) — Add a logo to accompany your integration in the Okta org. The logo file must be PNG, JPG, or GIF format and be smaller than 1 MB in size. Use a minimum resolution of 420 x 120 pixels to prevent upscaling.
App visibility — Choose whether to hide your integration from your end-users’ homepage. Choose whether to hide your integration from the Okta Mobile Apps Store on your end-users devices.
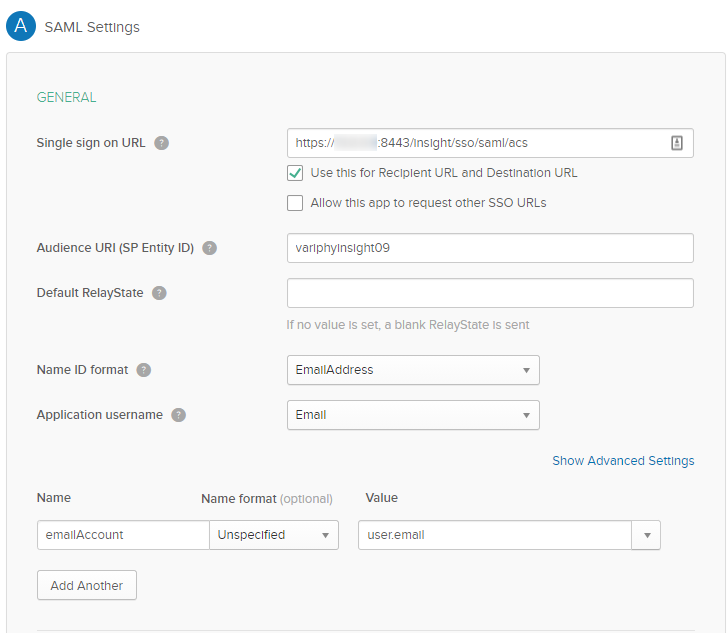
2. SAML Settings
Single sign on URL — The location where the SAML assertion is sent with a POST operation. This URL is required and serves as the default ACS URL value for the Service Provider (SP). This URL is always used for IdP-initiated sign-on requests. This URL can be found in the meta-data file provided by the Variphy Application within the ‘Location=‘ tag.
For On-Premises Variphy installations, this should be in the format of –https://Variphy FQDN or IP:8443/insight/sso/saml/acs/2
For Variphy Cloud installations, this should be in the format of –https://Customer.variphy.cloud/insight/sso/saml/acs/2
- Check mark Use this for Recipient URL and Destination URL
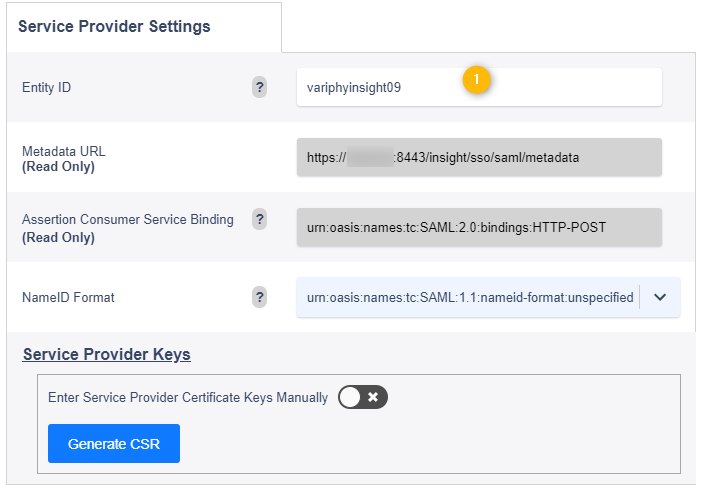
Audience URI (SP Entity ID) — The intended audience of the SAML assertion. This is usually the Entity ID of your application.
*NOTE* This can be named anything you would like, but must match the configured Entity ID on the Variphy config later.
Name ID format — The username format you are sending in the SAML Response. Consult the SP documentation to determine which format to use, but use the default (Unspecified) if the application does not explicitly specify a format.
Application username — The default value to use for the username with the application.
Attribute Statements (Optional) — When you create a new SAML integration or modify an existing one, you can define custom attribute statements. These statements are inserted into the SAML assertions shared with your app.
*NOTE* This can be named anything you would like but must match the configured Attribute Name for Username configured in the Variphy application later. (Figure 5)
*NOTE* The ‘Value’ used is the value from the OKTA account to be used. The expected format of the user must be the same format used as UserIDs in the Variphy application.
i.e. If you choose user.login as Value, then in Variphy the User IDs must be formatted to match the user.login within OKTA.
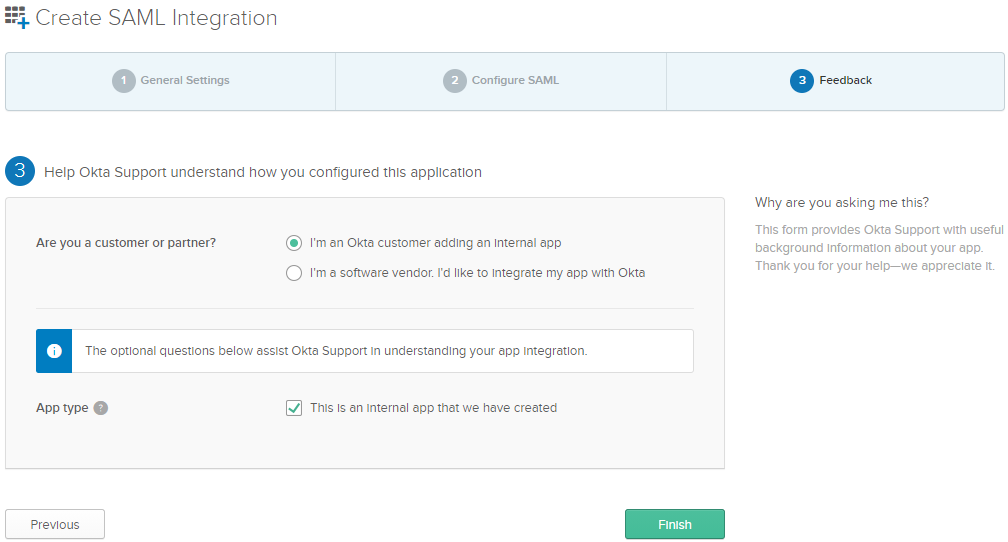
3. Feedback
Are you a customer or partner?— Select ‘I’m an Okta customer adding an internal app.
App Type – Select ‘This is an internal app that we have created’
4. Sign On Methods
To complete the setup on the Variphy SAML config (Service Provider) we will need to gather the IdP’s metadata. Within the newly created App in Okta, under the Sign On tab, Click ‘View Setup Instructions‘.
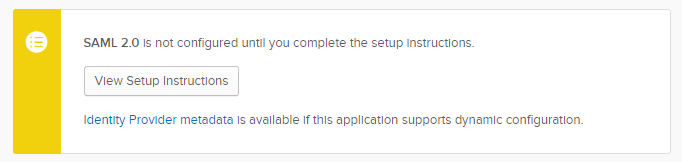
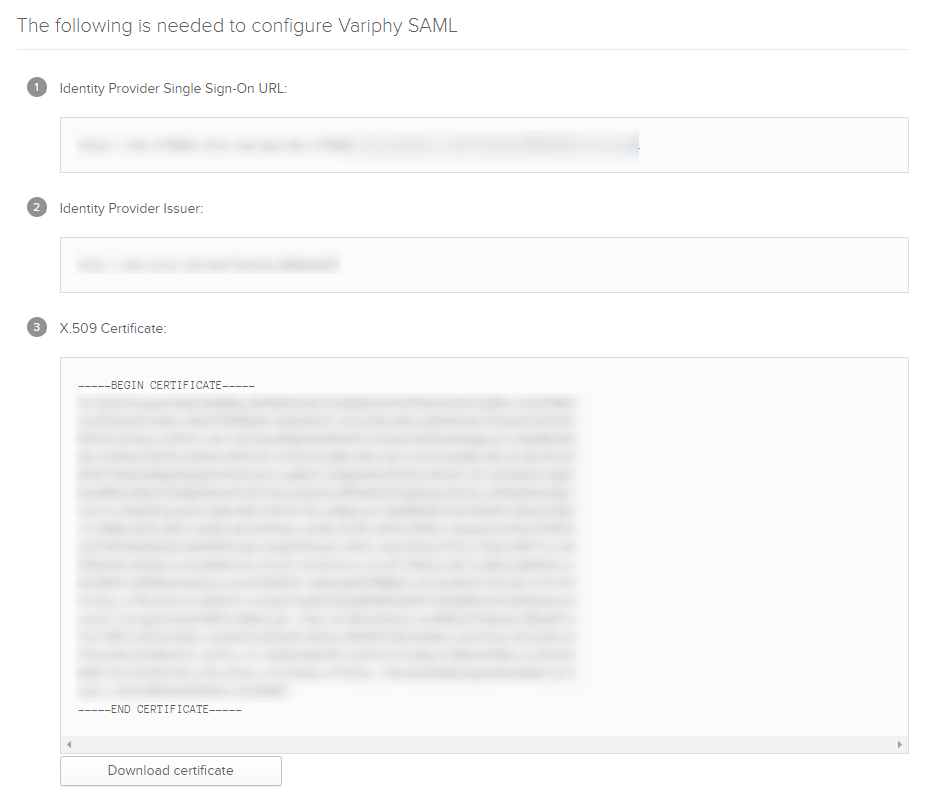
This will present you with a screen with 3 pieces of info that Variphy will need to complete the SAML setup.
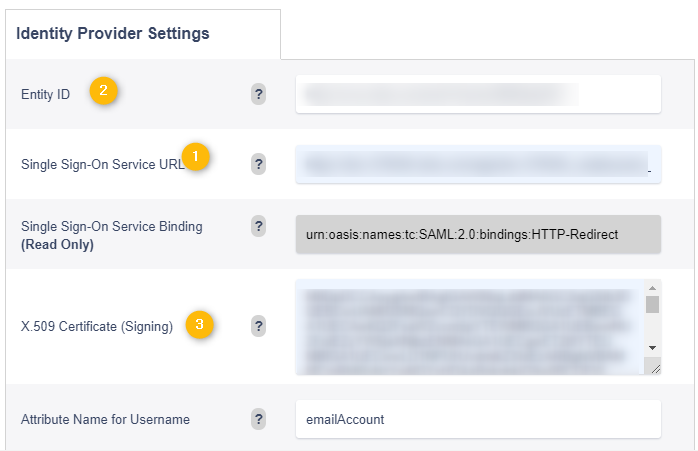
- Identity Provider Single Sign-On URL – Copy this custom Okta URL to be used in Variphy SAML config
- Identity Provider Issuer – Copy this value and provide it within the IdP’s Entity ID to be used in the Variphy SAML config
- x.509 Certificate – Copy into the IdP Settings section of the Variphy SAML config.
In Variphy Save your SAML config.
On the next screen Activate your SAML configuration.
5. Build User Assignments
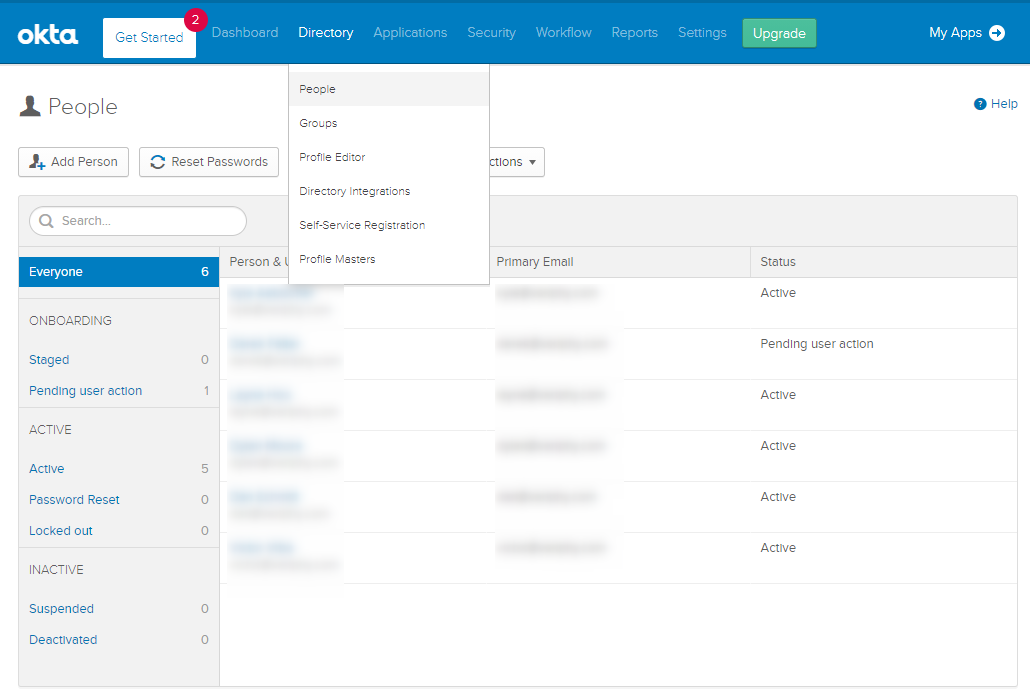
Once the SAML application has been built in Okta you will need to assign your Okta Users to the newly configured SAML Application.
- In the Admin Console. go to Directory > People or Group tab.
- Select the People or Group Accounts that you would like to associate to the newly configured SAML Application in Okta
- Hit the ‘Assign Applications‘ button and select the Variphy SAML Application desired

4. Remember to build out your users in the Variphy application again using the userID format selected in the OKTA configuration.
*NOTE* In this case we used email address as NameID format, so ensure the user IDs are the email addresses of those users in OKTA that were assigned to the Variphy SAML Application
Troubleshooting Tips
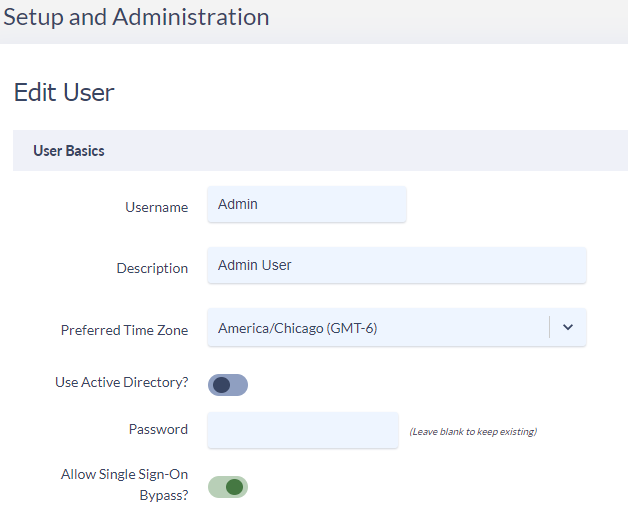
When activating your SAML Config within Variphy you will be given the option to include the local account you are using as a SSO bypass account.
This means that if SAML Authorization fails and you can’t get authenticated into Variphy, then you can browse to Variphy’s bypass URL and login with your local Admin account:https://Variphy FQDN or IP:8443/insight/login.jsp
On the Variphy User or Variphy Group level in Variphy, you can define local users/groups that should be able to bypass SSO with the above mentioned link and sign in locally by selecting the ‘Allow Single Sign-On Bypass‘ checkbox.