Microsoft Entra ID (aka Azure AD) is an increasingly popular way of managing an organization’s domain users/groups. Entra ID, being a cloud service, also allows the setup of Enterprise Applications, a means to use Entra ID as a SAML Identity Provider. This article will discuss the setup in both Entra ID (IdP) and Variphy (Service Provider) to enable SAML Authentication. You will need a browser tab pointing to your Variphy instance and also another pointing to your Azure Admin Portal to achieve this setup.
Additional Information can be found on our webinars page.
How to configure Variphy SAML SSO with Azure AD
Variphy SAML Setup
- Login to Variphy as a System Administrator
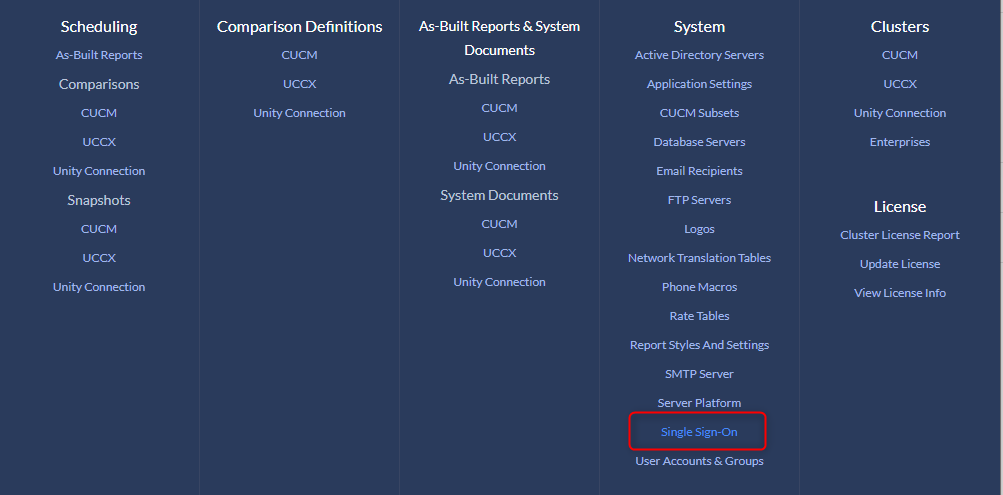
- Browse to Settings > User Authentication > Single Sign-On
- Click Add > SAML
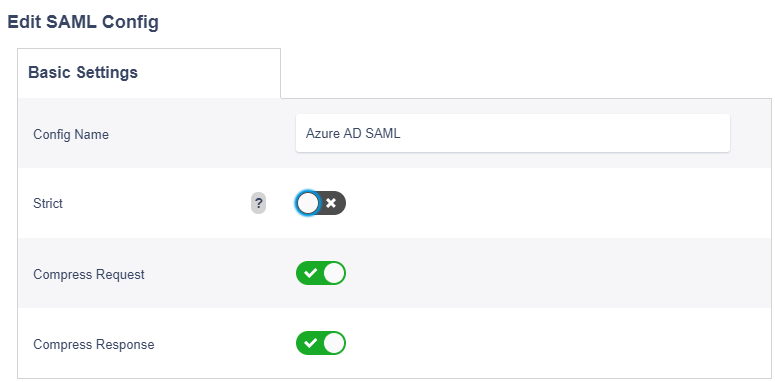
- Supply a config Name
- Uncheck ‘Strict’ Enforcement
Service Provider Settings
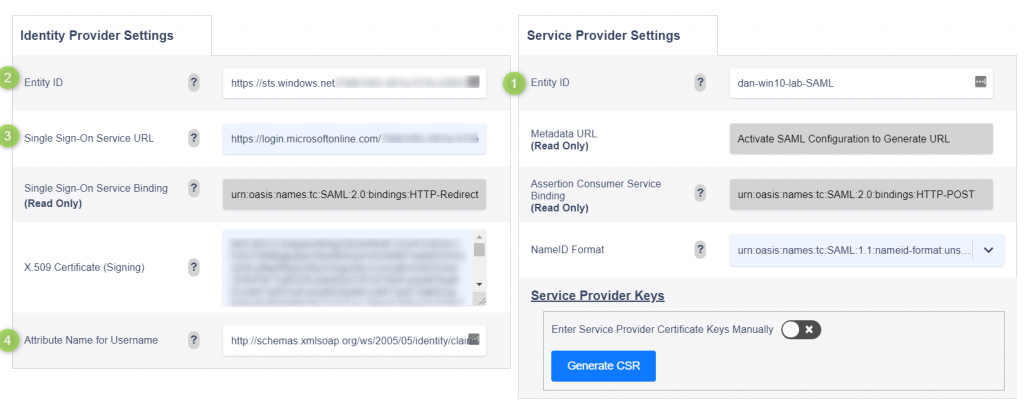
On the right side of the SAML config page within Variphy you will want to enter your settings.
- SP Entity ID — Place a unique Entity ID (name) value. This can be anything you would like, but typically FQDN of Variphy sever is used.
- IDP Entity ID – This will be a custom value provided by your instance of Azure. To save the config this field will temporarily need to be filled in. For now type: https://sts.windows.net
- Single Sign-On Service URL – This will be a custom value provided by your instance of Azure. To save the config this field will temporarily need to be filled in. For now type: https://login.microsoftonline.com
- Attribute Name for Username – Microsoft can publish user names as many different types of attributes. To keep users as email format we will suggest that user IDs be mapped to the name attribute: Please use: http://schemas.xmlsoap.org/ws/2005/05/identity/claims/name
- Scroll down and click Create. This will bring you back to the previous screen where you should see your SAML configuration listed.
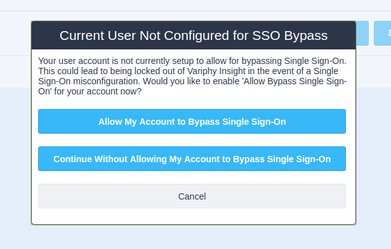
- Click Activate to enable this SAML configuration. It will present you with a screen to configure a local user as SAML Bypass. Click ‘Allow My Account to Bypass Single Sign-On‘.
- Gather Service Provider Metadata File — Once SAML entry is Activated, click the Edit button once more and Copy the Metadata URL (Read Only) link that is displayed: (https://servername:8443/insight/sso/saml/metadata). Open a new browser tab and browse to this URL. Download and Save the resulting metadata.xml file, this will contain all of the Variphy SAML Metadata that you will use inside of Entra ID.
Azure AD Enterprise Application Setup
Following this article, you will gain insight into where/how to set up your Variphy SAML Application to the Entra ID Identity Provider.
https://docs.microsoft.com/en-us/azure/active-directory/saas-apps/saml-toolkit-tutorial
- Log in to your organization’s Azure portal.
- In your Home Admin Console, search for Enterprise Applications.
- Click New Application.
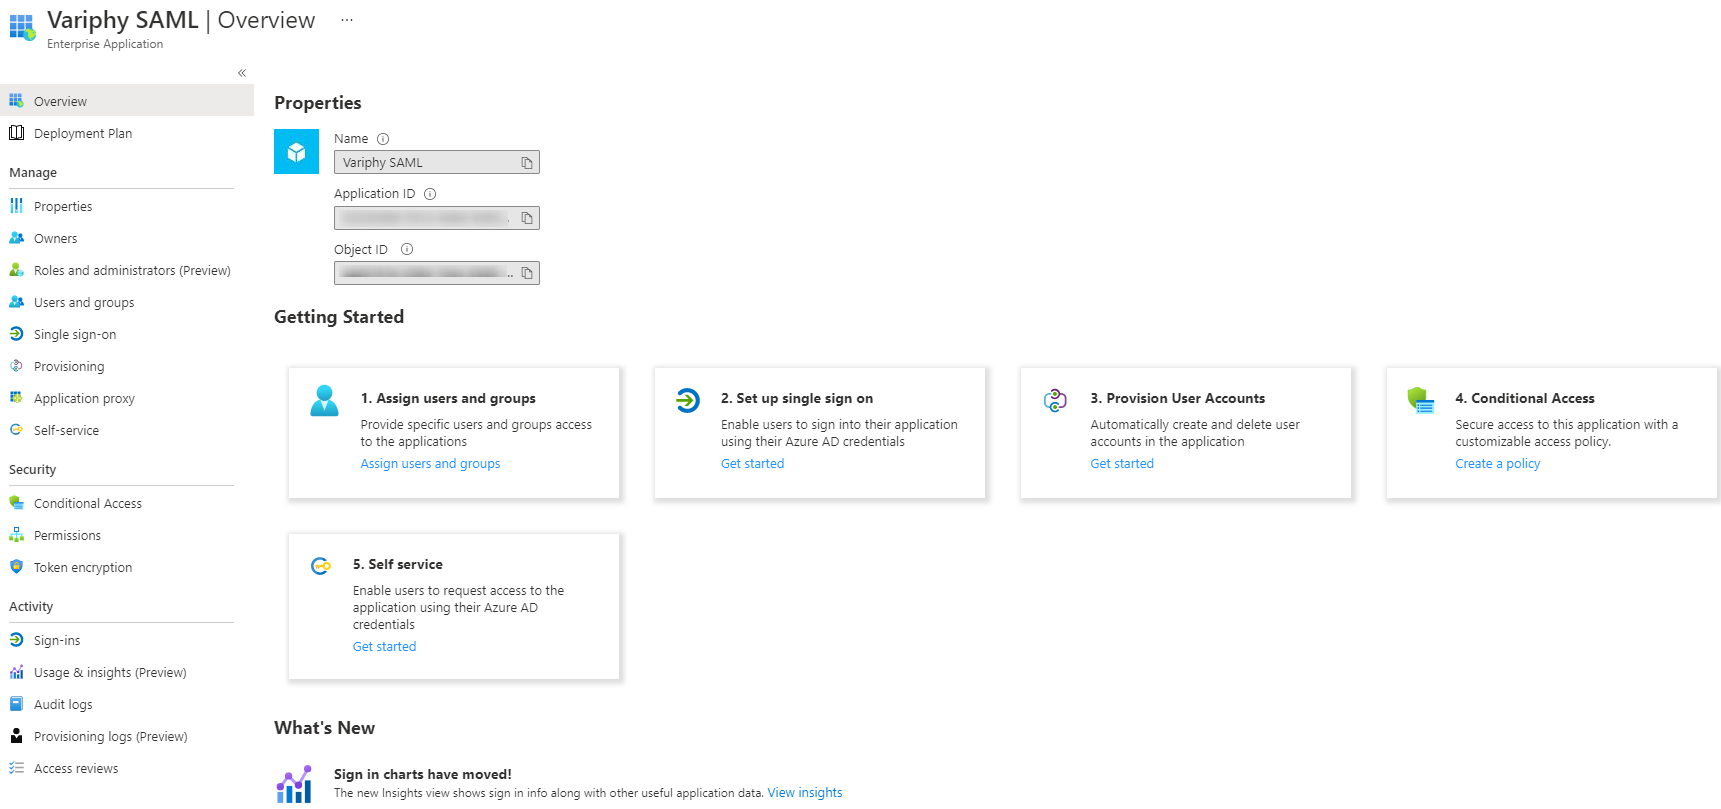
- Listed will be a slew of published applications. Click the Create your own application button.
- Give your application a new (ie: Variphy SAML) and select the Integrate any other application you don’t find in the gallery option.
- Click Create.
1. Assign Users and Groups
- Click Add User/Group.
- Though, you can certainly create a group and contain all your users within a created group, for this example we will add a few named users. Under Users, click None Selected.
- Search for users that should have access to this SAML App. Click the user entry to add them to the Selected items list. Once all users have been added hit the Select button.
- Give your application a new name (ie: Variphy SAML) and select the Integrate any other application you don’t find in the gallery option.
- Back on the Add Assignment window, Click Assign.
- Click Overview on the left to get back to the Enterprise Application setup

2. Set up Single Sign On
Next, let’s set up the single sign-on application configure it, and input all the required fields in order to communicate to the Variphy Server (Service Provider).
- Click Set up single sign-on.
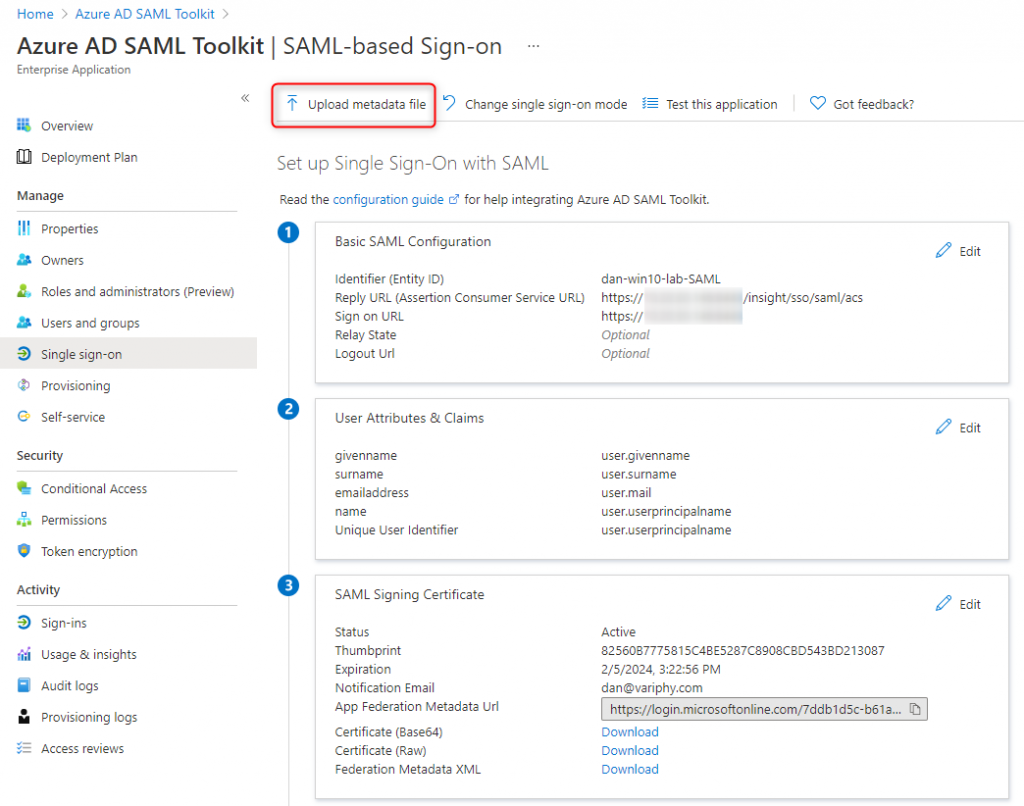
- In the upper left, click Upload metadata file. Click ‘Select a file‘ to upload the metadata.xml file previously downloaded from the Variphy server.
- Once uploaded the setup should populate with all the settings from the Variphy SAML config.

1. Basic SAML Configuration
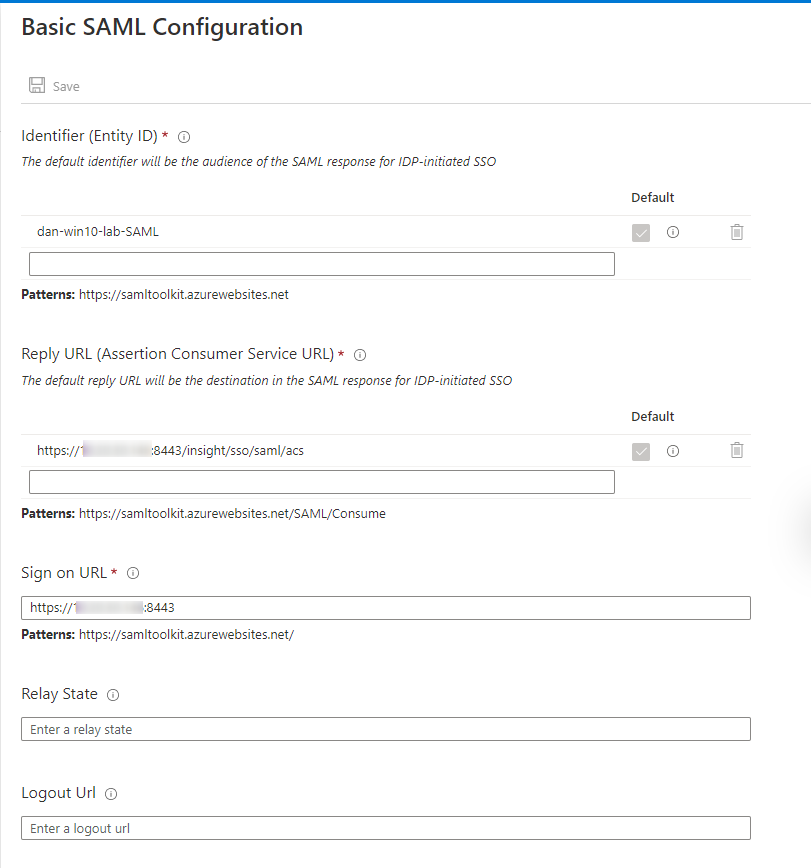
Identifier (Entity ID) — The Service Provider Entity ID provided within the Variphy Setup. Ensure that the ‘Default’ checkbox is selected on your Entity ID.
Reply URL (Assertion Consumer Service URL) — The location where the SAML assertion is sent with a POST operation. This URL is required and serves as the default ACS URL value for the Service Provider (SP). This URL is always used for IdP-initiated sign-on requests.
This should be in the format of –https://Variphy FQDN or IP:8443/insight/sso/saml/acs
Sign On URL — This URL contains the sign-in page for this application that will perform the service provider-initiated single sign-on.
This should be in the format of –https://Variphy FQDN or IP:8443/
2. User Attributes & Claims
Claim Name — The default claim name (format) is what we will use to provide formatted name info to the Service Provider.
Claim name = Unique User Identifier (Name ID)
Value = user.userpricipalname [nameid-format:EmailAddress]
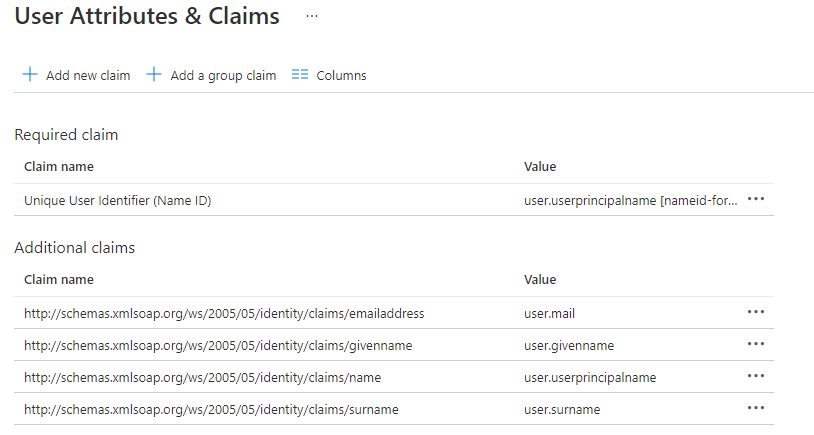
Note- If you would like to use another name attribute, simply copy the Claim Name URL into the Attribute Name for Username field within the Variphy IdP settings.
3. Basic SAML Configuration
- Download the Identity Provider Federation Metadata XML in Section 3.
- Open the .xml file in a text editor and scroll to the bottom. Copy the content from the IDPssoDescriptor between the <X509Certificate> tags.
- In the Variphy app SSO config paste the 509 Certificate string supplied by the last step into the Identity Provider Settings X.509 Certificate (Signing)


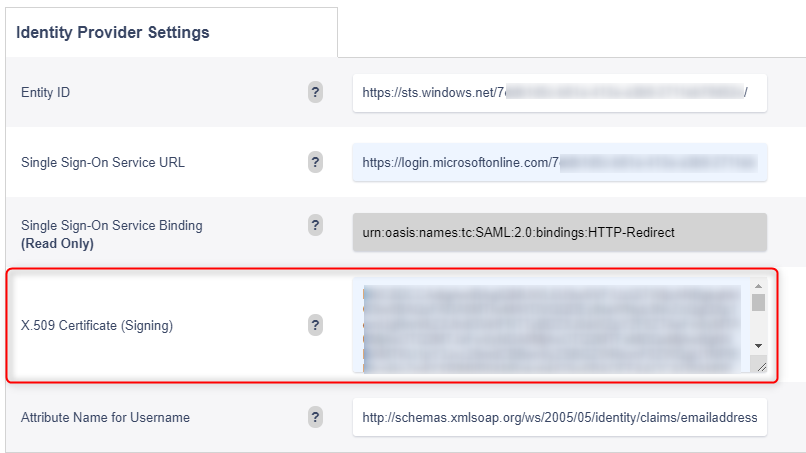
In the Variphy app SSO config paste the 509 Certificate string supplied by the last step into the Identity Provider Settings X.509 Certificate (Signing) and hit Save.
Ensure the SSO configuration entry is fully Activated. Close your current browser tab and attempt a connection to your Variphy interface. It should now redirect you to the Entra ID (Azure) login page where you can input your Microsoft user account details. If the user is associated with the Variphy application correctly it will relay you back to the Variphy application.
Troubleshooting Tip
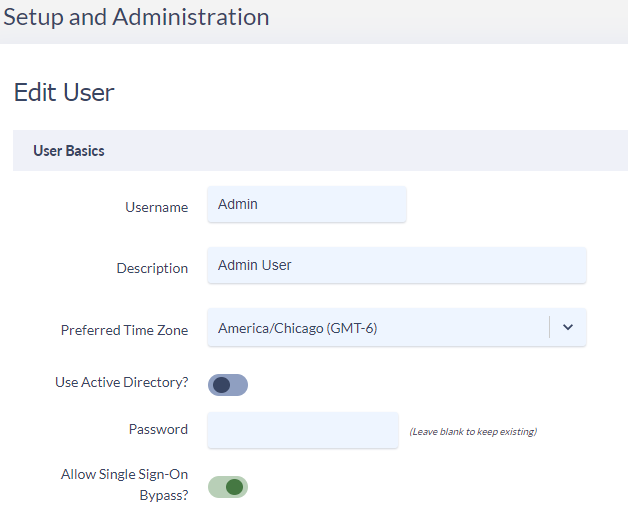
When activating your SAML Config within Variphy you will be given the option to include the local account you are using as an SSO bypass account.
This means that if SAML Authorization fails and you can’t get authenticated into Variphy, then you can browse to Variphy’s bypass URL and log in with your local Admin account:https://Variphy FQDN or IP:8443/insight/login.jsp
On the Variphy User or Variphy Group level in Variphy, you can define local users/groups that should be able to bypass SSO with the above-mentioned link and sign in locally by selecting the ‘Allow Single Sign-On Bypass‘ checkbox.