Report designed for Call Manager Administrators to help identify and track improper or abnormally terminating calls within their Cisco Call Manager Environment.
Commonly run on-demand, daily, weekly and/or monthly. This report will help identify the reason calls are terminating outside of standard reasons and provide detail on each call to assist in narrowing down the problematic call flow.
Optional Changes
This report does not require and additional editing to function. It is designed to look at all calls for the reporting period and report the top 10 reasons calls are terminating except the following 5 common causes.
- Normal Call Clearing
- No Error
- User Busy
- No Answer from user (User Alerted)
- Call split. A call is terminated during a feature operation indicating why the call leg was terminated. This occurs on transfers when the call leg was split off and terminated.
It may be necessary at times to report more that the top 10, add additional summary or detail values, exclusions or Cradle to Grave into the report.
Adding additional Exclusions.
- Edit the report.
- Navigate to the Grouping Statistics menu.
- Scroll down to the Termination Code Exclusions section.
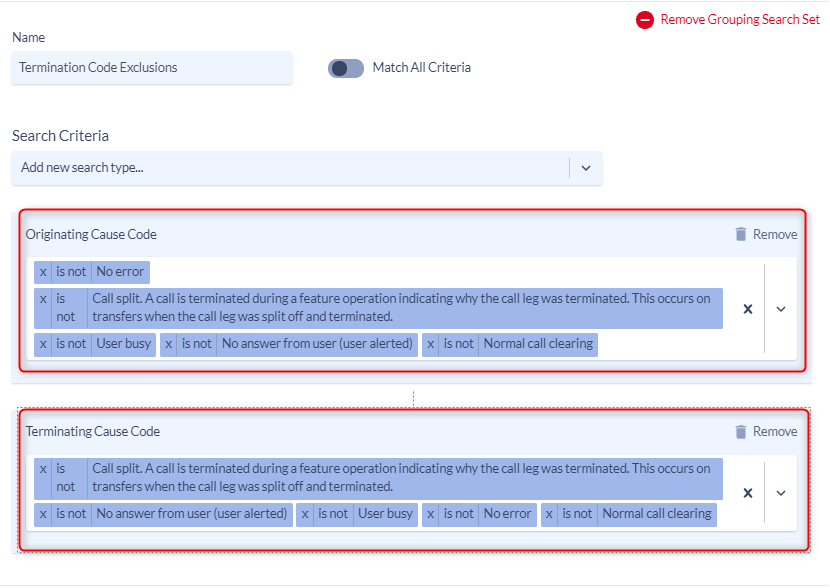
- Add the code(s) you wish to exclude in both the Originating Cause Code and Terminating Cause Code sections by clicking in the filters and selecting the cause from the picklist.
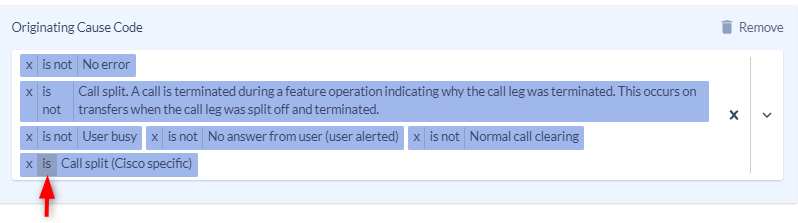
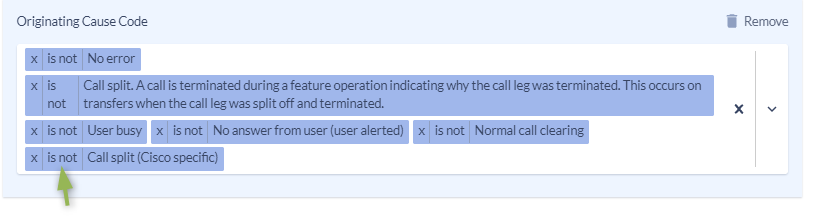
- Once the Cause code(s) you wish to exclude have been added to both originating and terminating cause codes click the “is” option to change it to is not.
Adjusting the number of results to report.
You may wish to see more or less than the top 10 causes for termination of calls. To adjust the number that report.
- Edit the report.
- Navigate to the Grouping Statistics menu.
- Edit the Primary Grouping Filtering section and adjust the “Maximum Primary Grouping Count (Top/Bottom N)” to the number of results you wish to see.

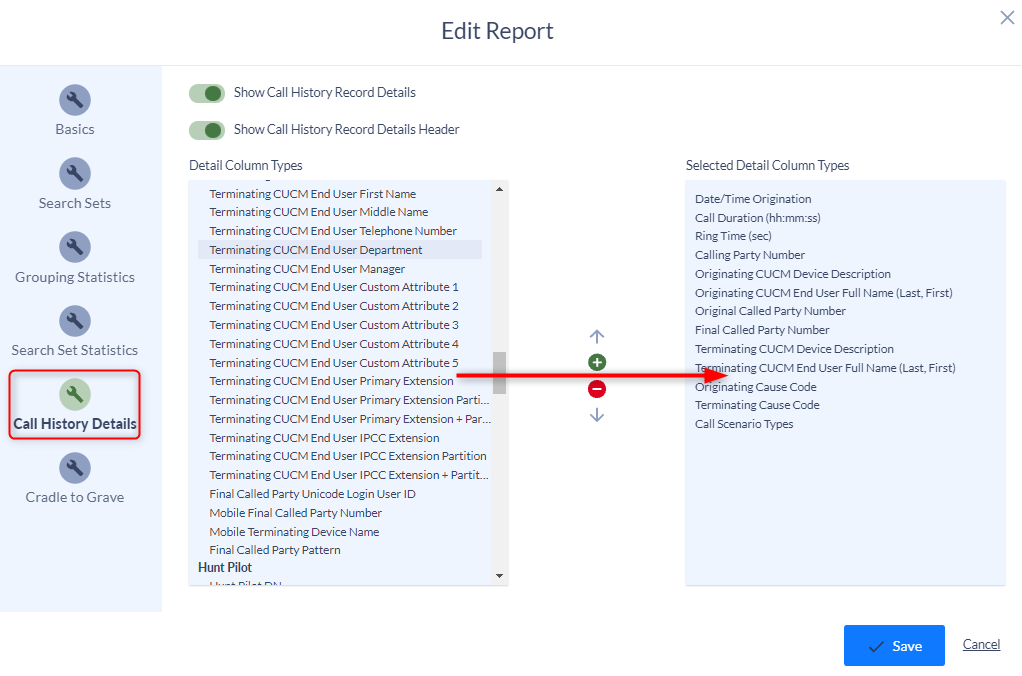
To Add Additional Detail Information
- Edit the report and navigate to the Call History Details page.
- In the Detail Columns Type field select the values you would like to see in the detail of each call and move them from left to right.
Enabling Cradle to Grave reporting.
A single call is often just 1 of many in a sequence of “related” calls, such as when a call is answered and then forwarded to another recipient. The chronological order of calls is commonly referred to as the “Cradle to Grave” sequence, which shows the complete order from 1st to last.
Cradle to grave can create a large report due to the row by row reporting of all hops a call takes from start to finish. If your report is already very large you may want to report a on smaller subset of data when enabling cradle to grave.
- Edit the report.
- Navigate to the Cradle to Grave Page
- Enable the first toggle to turn “Toggle All Cradle to Grave Options” on.