Applies to:
- Variphy users responsible for setting up automated report delivery.
- System administrators managing FTP/SFTP server configurations for Variphy.
Common Causes or Issues
- Need to schedule report deliveries via FTP or SFTP.
Steps:
How to Configure FTP Servers in Variphy for FTP Delivery
Variphy allows users to deliver ad hoc and scheduled reports through FTP (unsecured) or SFTP (FTP over SSH). Follow the steps below to configure an FTP server in Variphy.
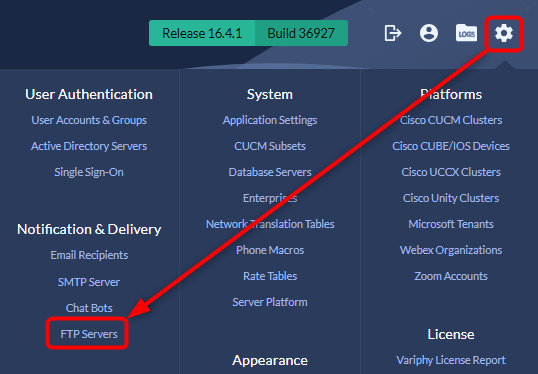
Step 1: Access the FTP Servers Configuration.
- Navigate to the Setup menu in Variphy.
- Under Notification & Delivery, select FTP Servers.
Step 2: Create a New FTP Server.
- Click Create FTP Server.

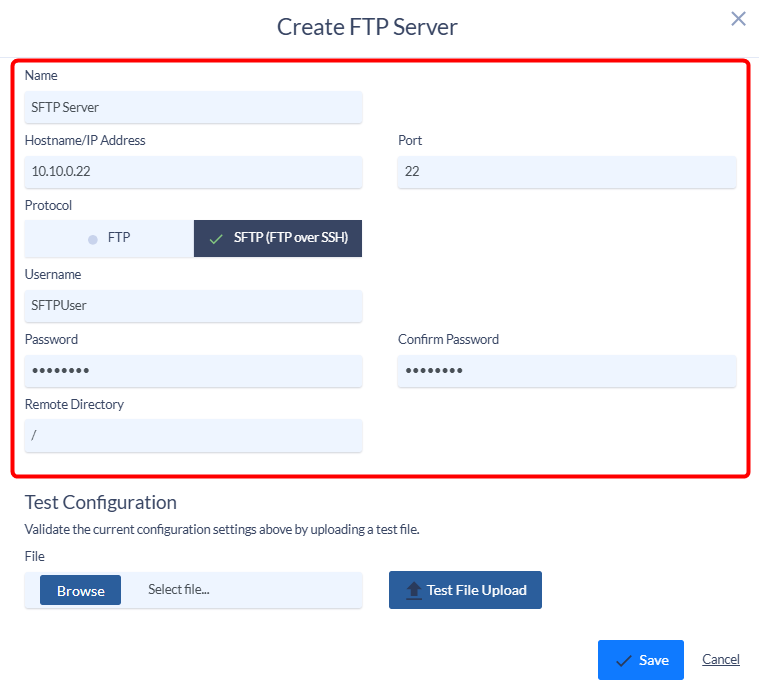
Step 3: Configure FTP Server Settings.
Complete the fields:
- Name: Used for identification within Variphy.
- Hostname/IP Address: The host or IP address Variphy will connect to. Ensure the Variphy server can access this host.
- Protocol: Choose either FTP or SFTP (FTP over SSH).
- Port: This adjusts automatically based on the protocol but can be changed if necessary.
- Username: Enter the username for authentication.
- Password: Enter the password for the username.
- Remote Directory: Specify the directory path on the FTP server for file uploads. Use / for the default “home” directory.
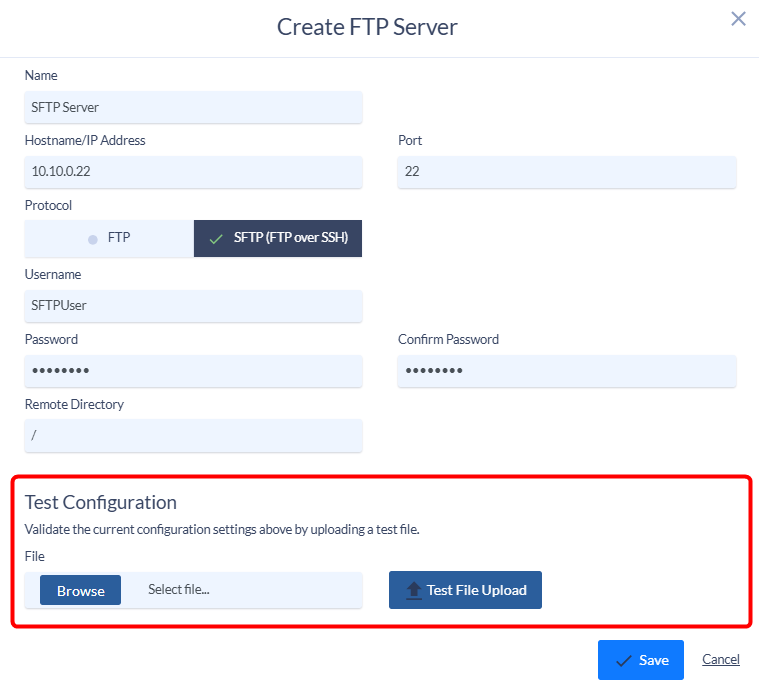
Step 4: Test the Configuration.
- Save your settings.
- Use the Upload Test File option to test the FTP server configuration.
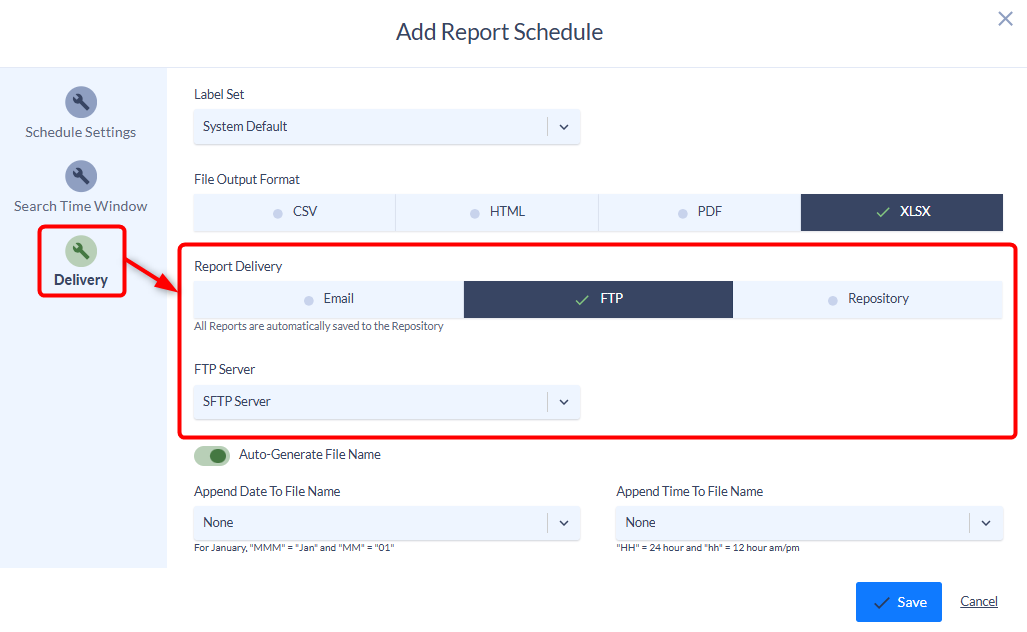
Step 5: Use the FTP Server for Report Delivery.
Once configured, the FTP server will appear as an option for ad hoc and scheduled report delivery in Variphy.
Still Need Help?
Email our support team at support@variphy.com or click the button below to access our ticket portal.
Provide details about your question or issue, including any applicable screenshots, reports, or Variphy application log files.