Variphy highly recommends deploying our pre-configured OVA, which has everything pre-installed and ready to go.
The article Variphy OVA Virtual Appliance Deployment details the steps to deploy the OVA to your VMWare host.
If you prefer to install Variphy to your preferred OS
Although we recommend our OVA, Variphy can be installed on your machine (whether physical or virtual) and your desired operating system.
Installing Variphy On Windows
Variphy can be installed on Windows 7 or later, including Windows 2016.
Step 1) Launch Variphy Installer
Right-Click on the Installer file and choose “Run as Administrator”

NOTE: You will need to use the “Run As Administrator” right-click function even if you are logged in as an administrator, otherwise the Windows UAC (User Account Control) security feature will interfere with the install, generating errors and possibly causing the install to fail.
Accept the Windows UAC warning that may pop up (depending on the level at which your UAC is set to.Click Next to begin the installation. After package finishes extracting, click “Next” to continue.
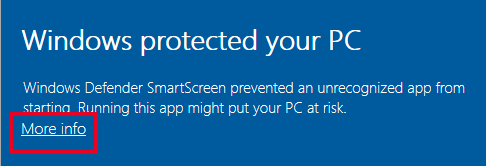
You may encounter this warning on your Windows installation. Click the More info option.
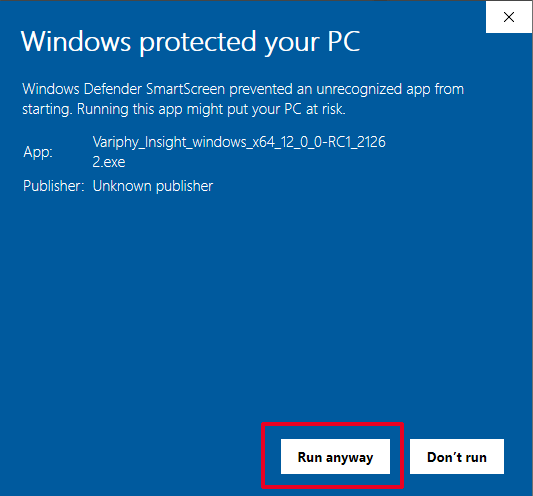
Then click the Run anyway button to continue.
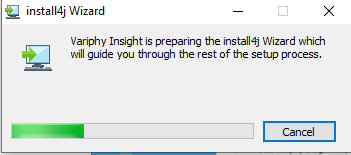
The installer should begin its preparation process, which should take a few moments.
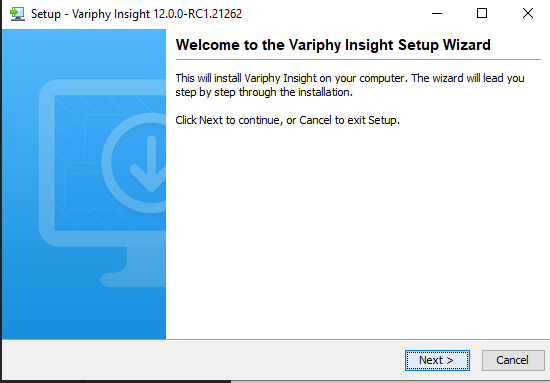
Click the Next button to begin the Variphy installation.
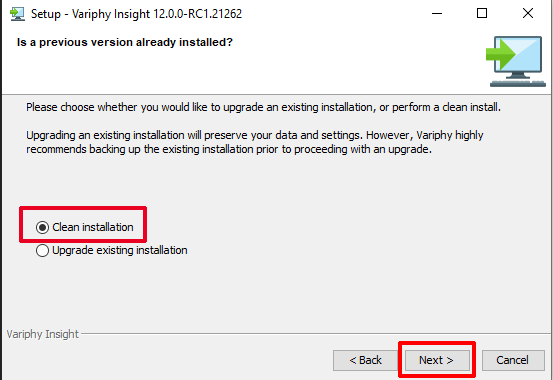
Step 2) Begin New Clean Installation
You can choose whether to perform a new (clean) installation or upgrade an existing version of Variphy.
If upgrading from a previous version of Variphy, please consult the Variphy Knowledge Base article How To Upgrade Variphy.
Select Clean installation and then click the Next button.
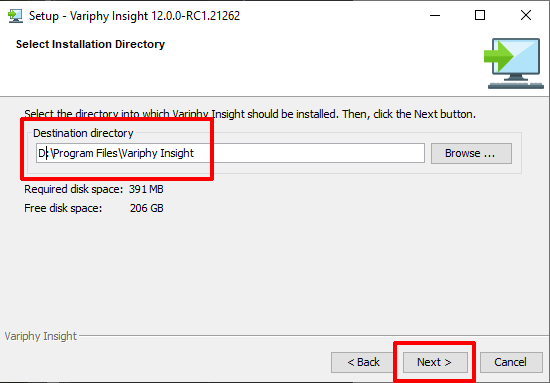
Step 3) Choose Installation Location
Specify where Variphy should be installed on the system.
NOTE: the install wizard will always default to C:\Program Files\Variphy Insight. You may change the path to an alternate location if desired.
Since this is a clean directory, ensure that this directory does not already exist, even if it empty. Allow the Variphy installer to create the installation folder (“Variphy Insight”) automatically for you.
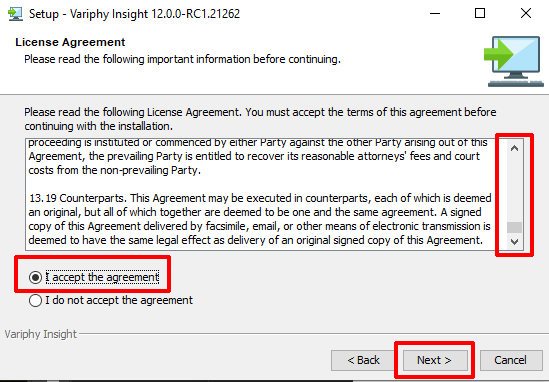
Step 4) Review and Accept the License Agreement
Review and agree to terms of the license agreement for Variphy.
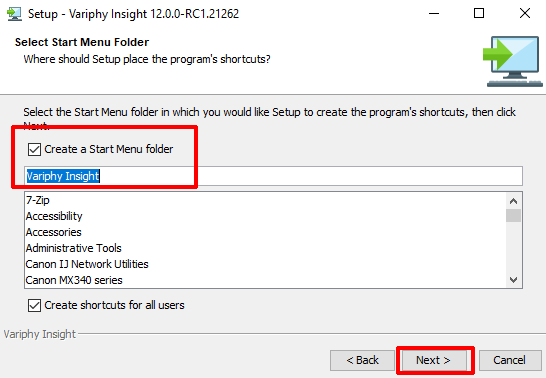
Step 5) Create Start Menu Entry Shortcuts
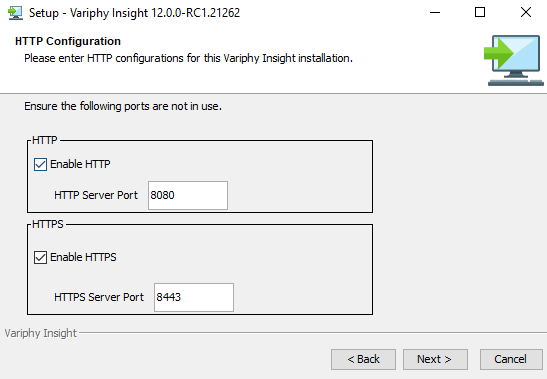
Step 6) Configure TCP Ports for Variphy
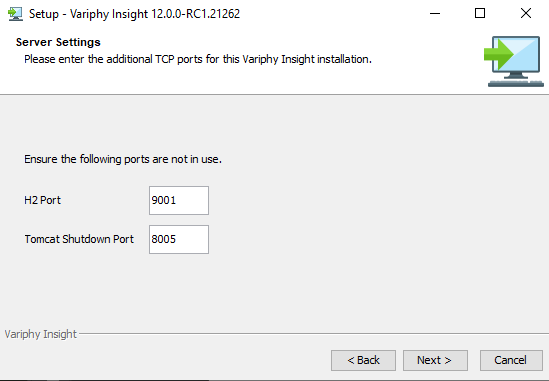
Variphy uses a various TCP ports for specific purposes, all of which are configurable to avoid any conflicts with other applications or processes which may be running on the system. The default ports are:
HTTP Port: HTTP (Non-SSL) Port for the Variphy web interface (default is 8080)
HTTPS Port: HTTPS (secure SSL) Port for the Variphy web interface (default is 8443)
H2 Port: Variphy’s internal database for configuration data (default is 9001)
Tomcat Shutdown Port: Apache Tomcat Shutdown Port (default is 8005)
Finish
The installation progress will be shown, followed by the completion message when the process has finished. Click the Finish button to exit the completed installation wizard.
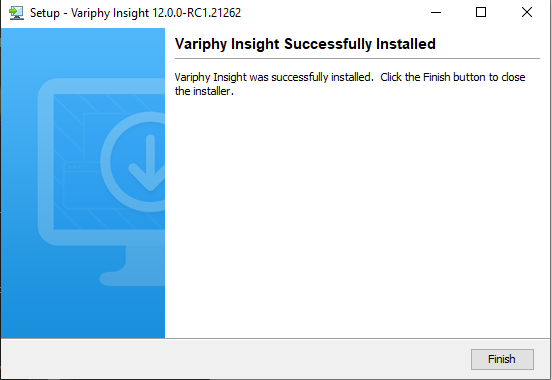
As part of the installation process, the installer will create a Windows Service named ‘Variphy Insight’ to start and stop the application, configured to startup automatically.
Following the installation process, the installer will start up the Variphy Insight service.
Now that Variphy has been installed, the Variphy Quick Start General Configuration Guide details how to login for the 1st time and configure Variphy with your Cisco UC/Collaboration environment.
Installing Variphy On Linux
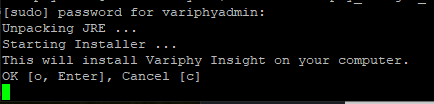
Step 1) Download the appropriate Variphy Linux installer to your Linux server and run the installer via sh.

Step 2) Begin Installation
You can choose whether to perform a new (clean) installation or upgrade an existing version of Variphy.
If upgrading from a previous version of Variphy, please consult the Variphy Knowledge Base article for how To Upgrade Variphy.
Press Enter to begin the installation.
Step 3) Choose New Installation and Location
Press Enter or n to indicate that this is a new installation.
Specify where Variphy should be installed on the system.
NOTE: the install wizard will always default to /opt/variphy/apps/insight. You may change the path to an alternate location if desired.

Step 4) Review and Accept the License Agreement
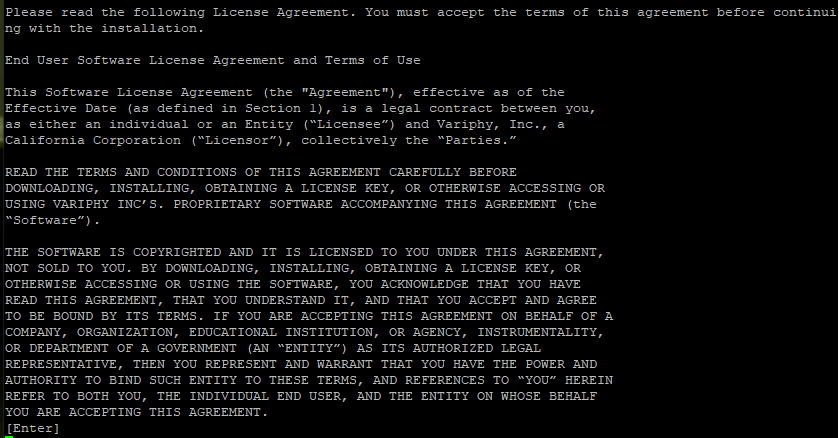
Enter 1 to accept the agreement and its terms.
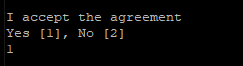
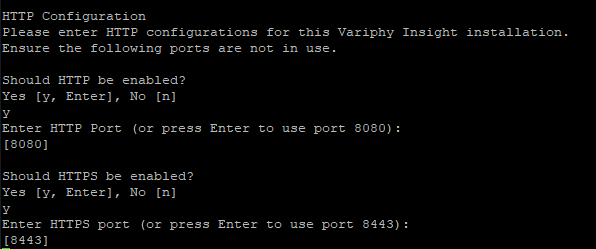
Step 5) Configure TCP Ports for Variphy
Variphy uses a various TCP ports for specific purposes, all of which are configurable to avoid any conflicts with other applications or processes which may be running on the system. The default ports are:
HTTP Port: HTTP (Non-SSL) Port for the Variphy web interface (default is 8080)
HTTPS Port: HTTPS (secure SSL) Port for the Variphy web interface (default is 8443)
H2 Port: Variphy’s internal database for configuration data (default is 9001)
Tomcat Shutdown Port: Apache Tomcat Shutdown Port (default is 8005)
Once configured, Variphy will be installed with the following message indicating that it has finished.
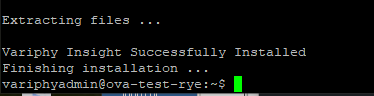
Now that Variphy has been installed, the Variphy Quick Start General Configuration Guide details how to login for the 1st time and configure Variphy with your Cisco UC/Collaboration environment.