INTRODUCTION
The Snapshot menu provides the ability to generate a historical view or “Snapshot” of a selected Cluster’s configuration data. Once a snapshot exists, it can be viewed in the same manner as the Inventory page, used as the source of data when executing Reports, and compared with other Snapshots or the current “Real-Time” Inventory for change detection and analysis via the Compare Tab.
Snapshots can be created manually, imported/exported via files, and scheduled for automatic creation. While similar to Log Analysis, they differ in that they are a proprietary function of Variphy Insight and do not require additional configuration in Cisco’s Real Time Management Tool (RTMT), or require log files to be downloaded from CUCM. The other key difference is that Snapshots do not contain traceability information (account name and IP address) of the person who made the recorded changes, but they will provide all other information related to the change itself.
USING SNAPSHOTS

In Variphy, select Change Management & As-Built Reporting from the main navigation and then select Snapshot menu.
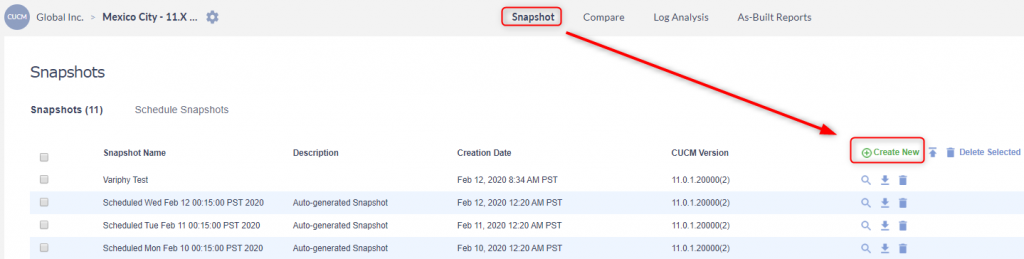
All existing snapshots for the cluster will be shown.
To Create a New Snapshot
Click on the Create New Snapshot button.
Provide a name and an optional description for the snapshot.
For CUCM Clusters
IP phone device and registration information can also be included in this snapshot but this procedure will significantly increase the time necessary to complete the snapshot process, and requires IP connectivity (TCP 80) to the IP phones. By default, it is recommended that this setting be left unchecked if the snapshot is time-sensitive.
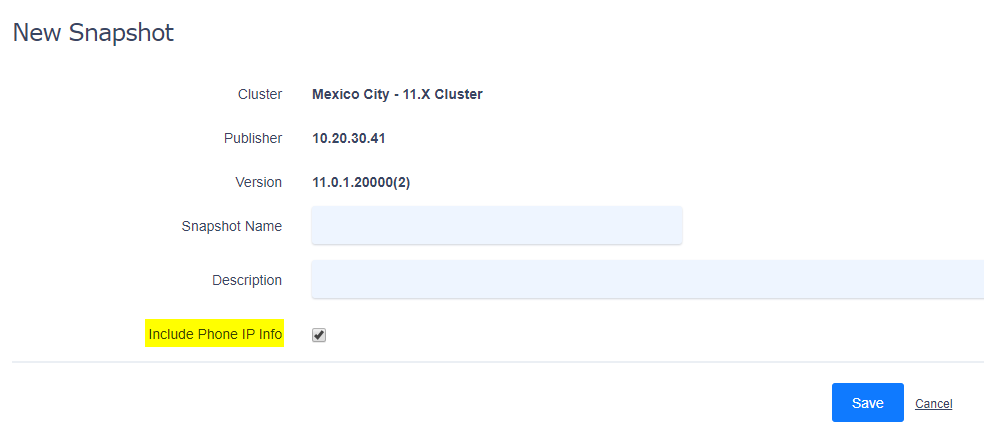
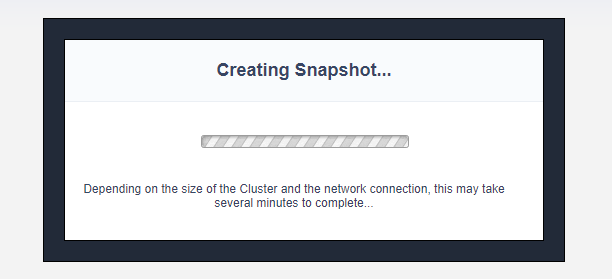
Click on Save to begin taking the snapshot. This may take several minutes, depending on the size of your CUCM environment.
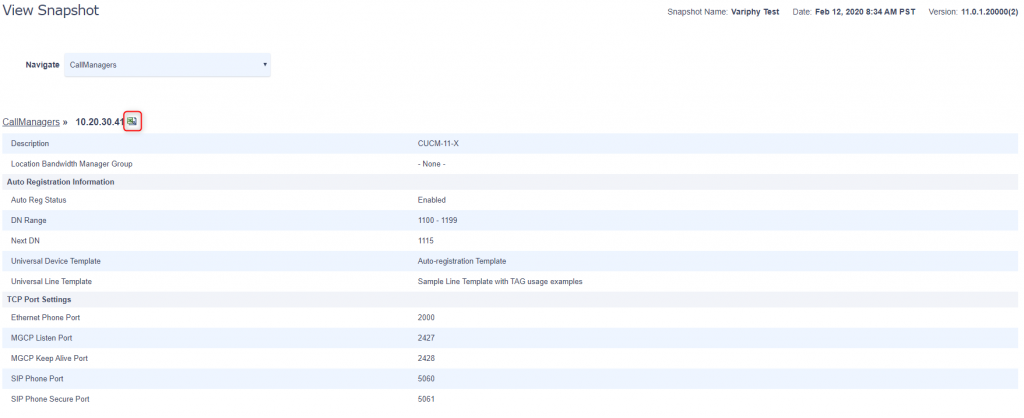
Once, the snapshot is created, check mark the Snapshot you are interested in viewing and click on View/Magnifying Glass icon to see the results. This will display a page that outlines all the contents of the Snapshot.

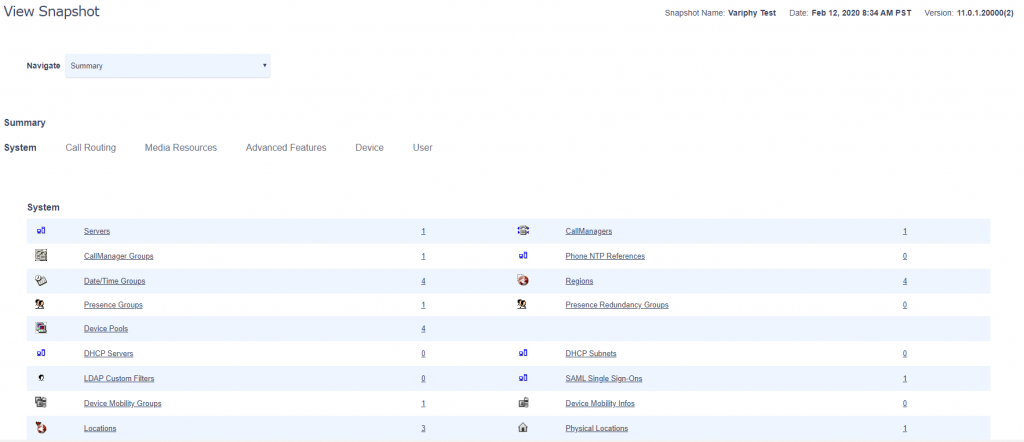
Browse to the specifc section of the Snapshot by selecting the category in the Navigate drop-down. Clicking on the number or category links will bring up a summary screen specific to that category (i.e. “CallManagers”). Further detail for specific items on the list can be viewed with the “details” link.

You can also export the details of these fields to a .CSV file using the MS Excel icon located next to the section’s title.
Delete, Export, and Import Snapshots
Deleting a Snapshot
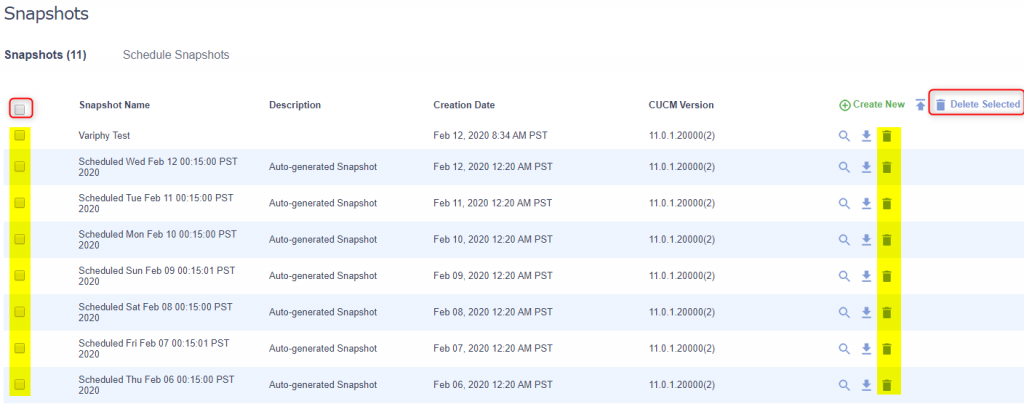
To delete a single Snapshot, click the Delete/Garbage Ban icon button for the appropriate Snapshot on the right hand side.
To delete multiple Snapshots at once, checkbox the desired Snapshots to delete, or the “select all” checkbox at the top left, then click the Delete Selected button in the upper right header.
Exporting a Snapshot
A Snapshot can be exported to a single file, which can be shared with other installations of Variphy Insight (via the Import). Click the Export icon for the desired Snapshot to export.

Importing a Snapshot
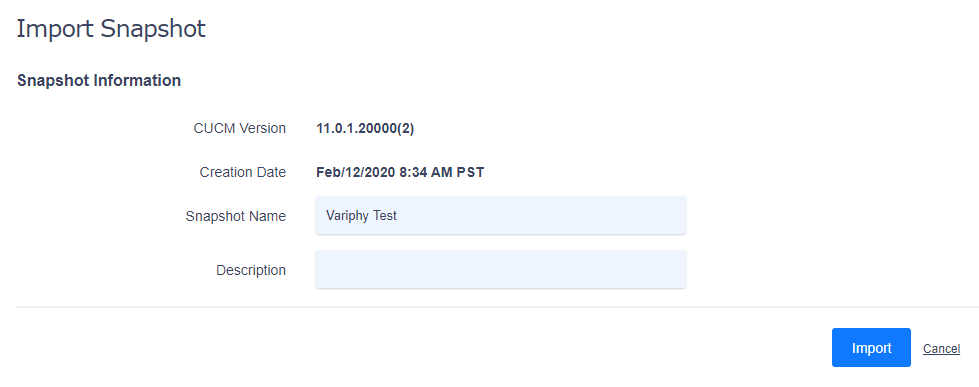
A Snapshot can be imported from a previously exported file by clicking the Import icon in the upper right header. Select Choose File to browse to and select the proper Snapshot import file. Import files will have a .var file extension type. Once selected, hit Import.


** NOTE: ENSURE THAT WHEN IMPORTING A SNAPSHOT YOU ARE IMPORTING A FILE FROM THE CORRECT CLUSTER TYPE. I.E.: A UNITY SNAPSHOT CANNOT BE IMPORTED FOR A UCM CLUSTER.
Next, enter and/or confirm a name and an optional description for the Snapshot to be imported and select the Import button. Once imported, it will be listed amongst any other snapshots.

Scheduling Snapshots
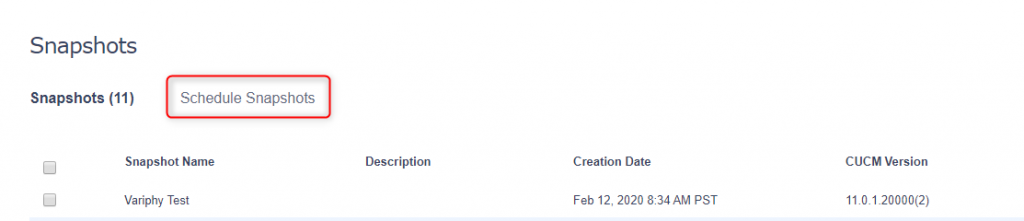
To schedule snapshots to run at regular intervals, or during non-production hours, use the Schedule Snapshots sub-menu.
1. Choose what type of Snapshot your like to schedule. Options include CUCM, Unity Con, or UCCX.
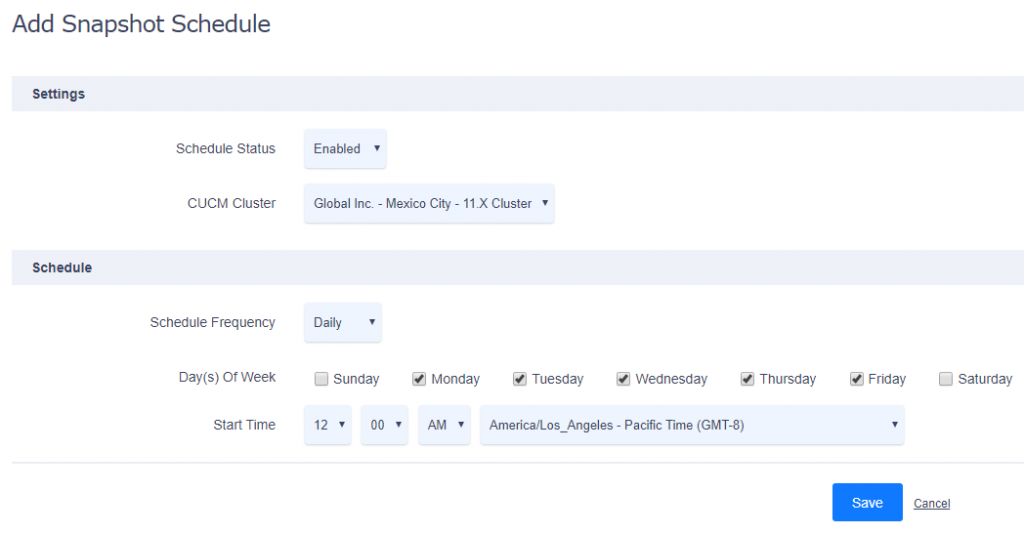
2. Click on the Add button to add a running schedule and then fill out the following fields to set up a schedule. Cluster – Select what Cluster you would like the scheduled snapshot to run for.
3. Type – Choose to run Snapshots on a daily, weekly, or monthly basis.
a. Daily – Select the days and start time you would like the snapshot to run.
b. Weekly – Select the day of the week and start time for the snapshot to run.
c. Monthly – Select the day of month (1st – 31st) and start time for the snapshot to run.
3. Select Save.

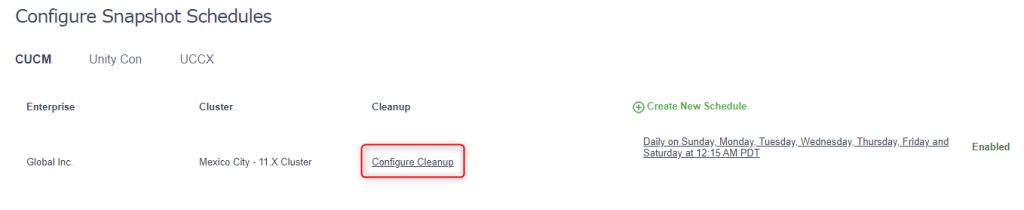
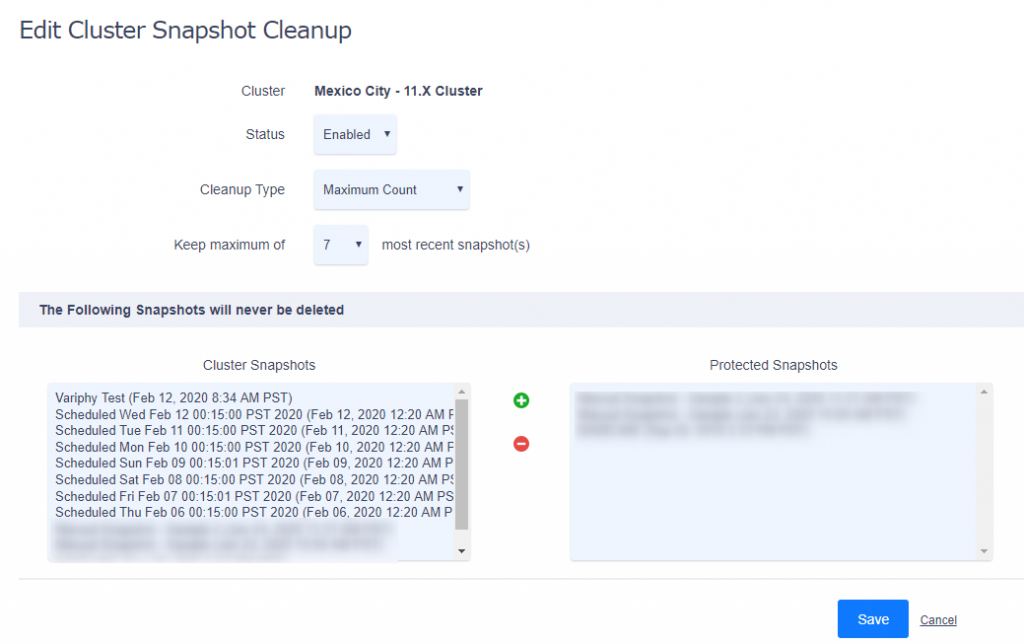
4. Configure a Cleanup Cycle by selecting Configure Cleanup.
** NOTE: SNAPSHOTS CAN BE SCHEDULED FOR CUCM, UCCX, AND UNITY CONNECTION CLUSTERS USING THE SAME PROCEDURE. REPORTS MUST BE CONFIGURED FOR THEIR SPECIFIC CLUSTER AND CANNOT BE USED UNDER OTHER TYPES OF CLUSTERS
USING THE COMPARE MENU
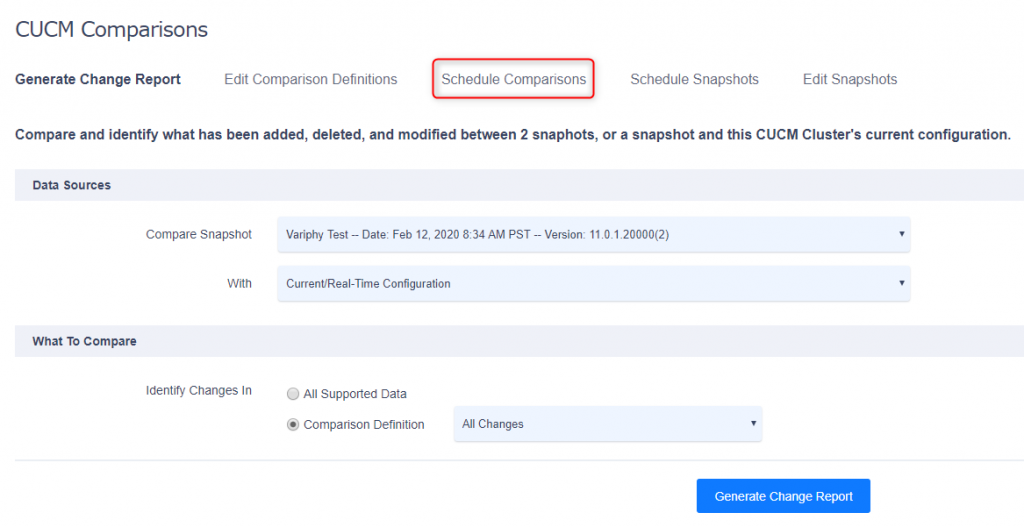
The Compare menu in Variphy Insight provides the ability to compare a Snapshot with another or with the selected Cluster in real-time. The comparison will result in a change report, which organizes and presents the changes found.
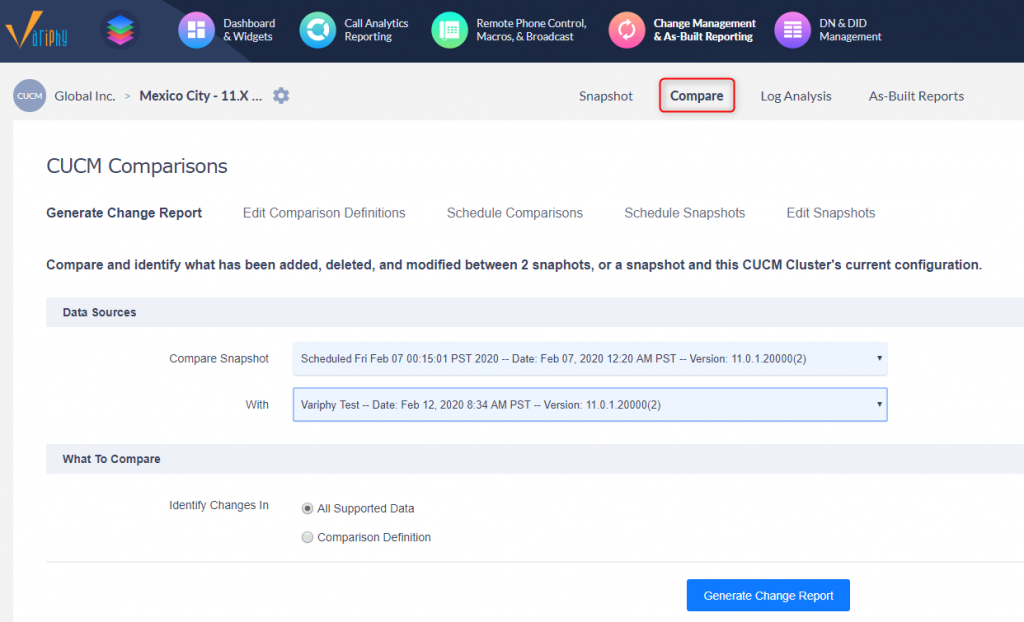
Data Sources
Once at least 1 snapshot exists, begin by selecting the baseline Snapshot and then select either the 2nd Snapshot or “Current/Real-Time Inventory” for the real-time Cluster configuration (connectivity required).
Snapshot to Snapshot Comparison:
Snapshot to Real-time Inventory Comparison:
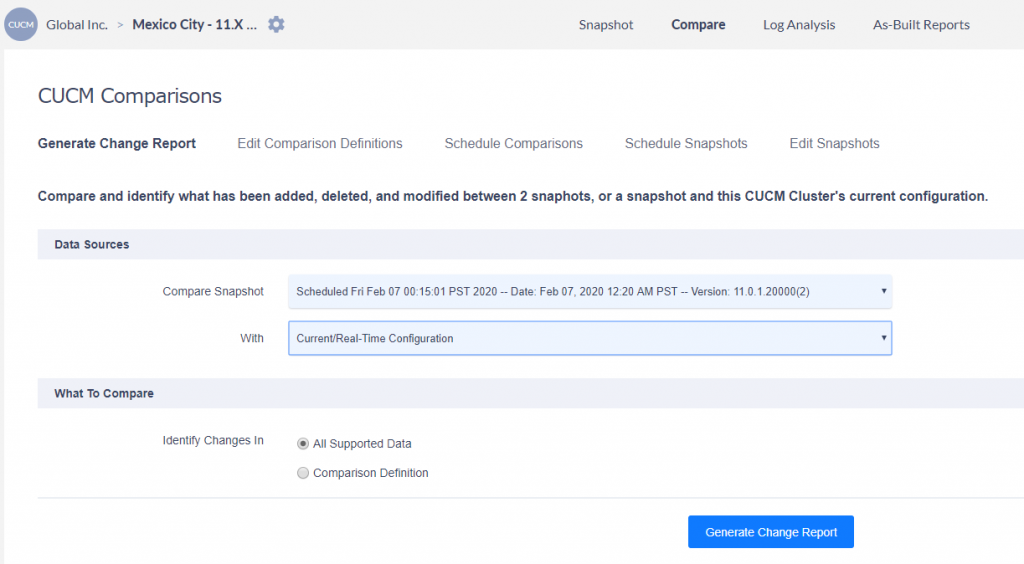
What To Compare:
To compare all possible/supported data, select All Supported Data (default). This will take more time to bring up results, but will provide a more thorough report.
To compare specific types of data, select the appropriate Comparison Definition, which defines the types of data to compare. The types of data to compare are as follows:
-Gateways
-Trunks
-Phones
-Route Plans
Click Run Comparison to begin. This will create an PDF file with the naming convention My_Enterprise_ Name_Cluster_Name_Change_Report.pdf.
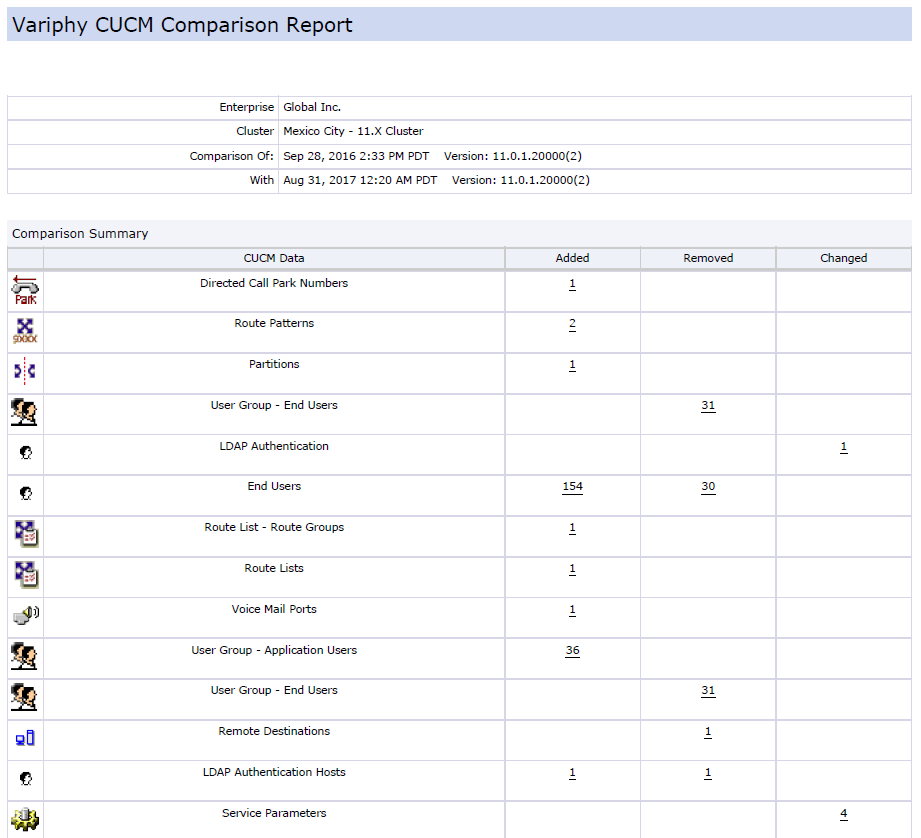
The report will give you a categorized Header page listing the types and numbers of changes. On any of the numbers indicated, you can Click to be redirected to that portion of the report to view more specifics. If the cells are blank, it indicates that no changes were made for that category in your system.
Adding or Editing Comparison Definitions
You can add new Comparison Definitions, or edit existing ones, with the Edit Comparison Definitions sub-menu within the Compare module. Comparison Definitions limit the type of data to be compared within a Compare report.

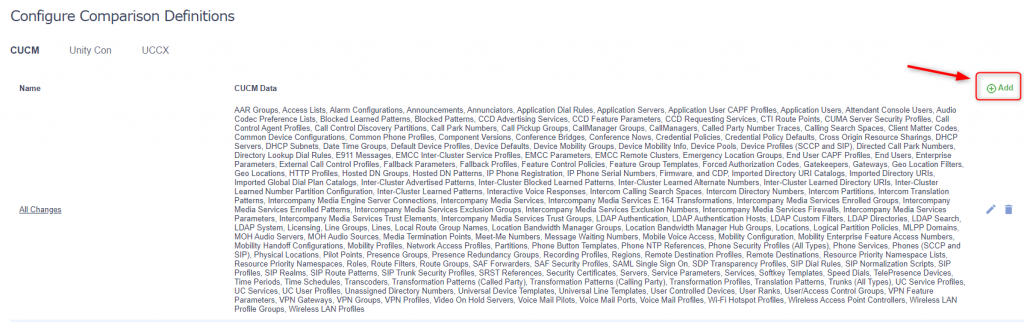
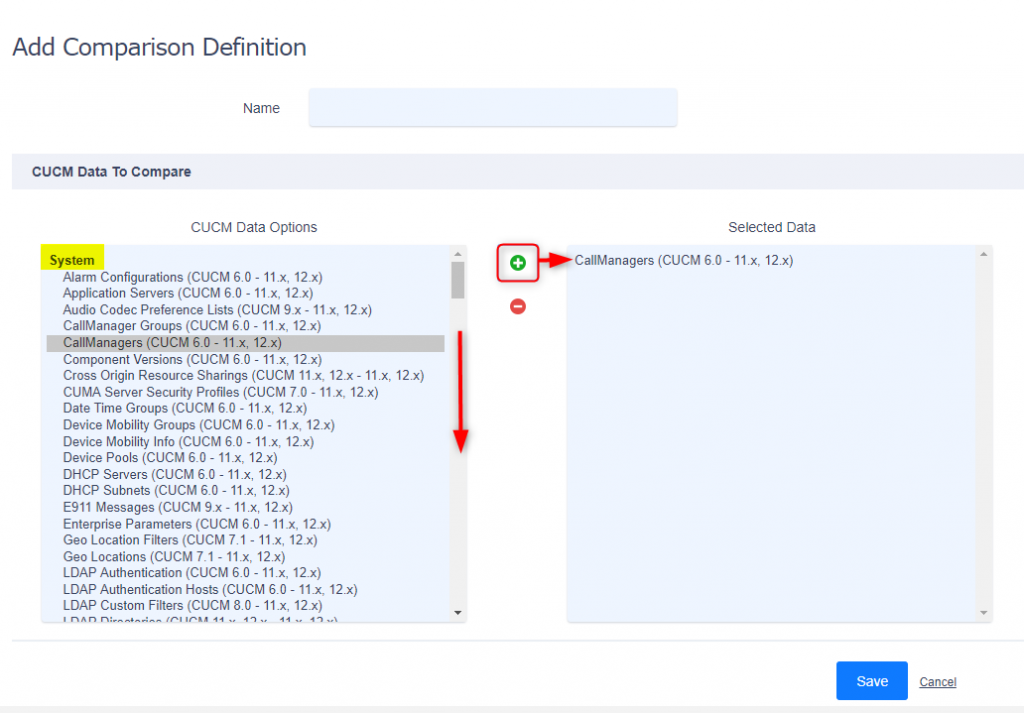
Click Add to create a new Definition, or Edit or Delete to modify an existing one. When Adding or Editing, simply check or uncheck the desired fields to add or remove and click Save at the bottom of the list.
Scheduling Comparisons
To schedule a comparison report, click on Schedule Comparisons tab within the Compare tab.
1. Choose what type of Snapshot your like to schedule. Options include CUCM, Unity Con, or UCCX.
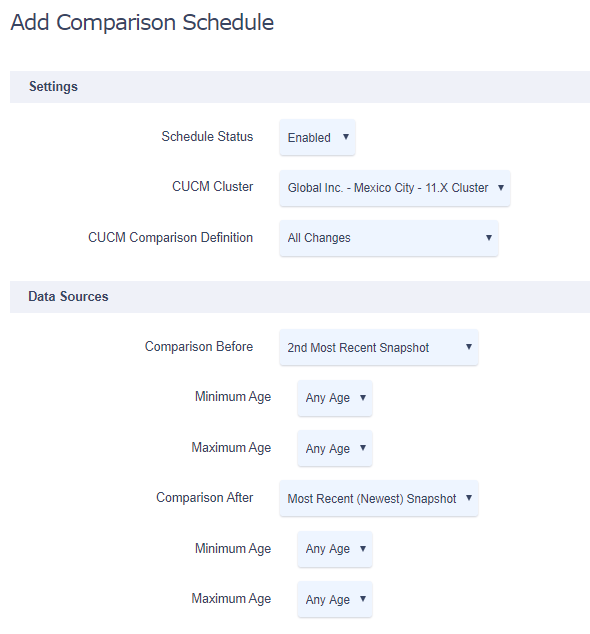
2. Select Add to add a new scheduled comparison or Edit to modify an existing Comparison Schedule.
3. In the Settings section, Choose the cluster and the Comparison Definition previously created.
4. In the Data Sources section, you can choose the following Comparison Before datasets:
-Least Recent Snapshot
-Second Most Recent Snapshot
-Most Recent snapshot
5. In the Data Sources section, you can choose the following Comparison After datasets:
-Most Recent Snapshot
-Real-Time System
6. Choose your scheduled interval (Daily, Weekly, or Monthly) that you’d like the comparison report to run.
7. In the Delivery section, you can configure the comparison report to be emailed to pre-specified contacts in your organization only if changes are found. Select the desired options if available, and then click “Save”

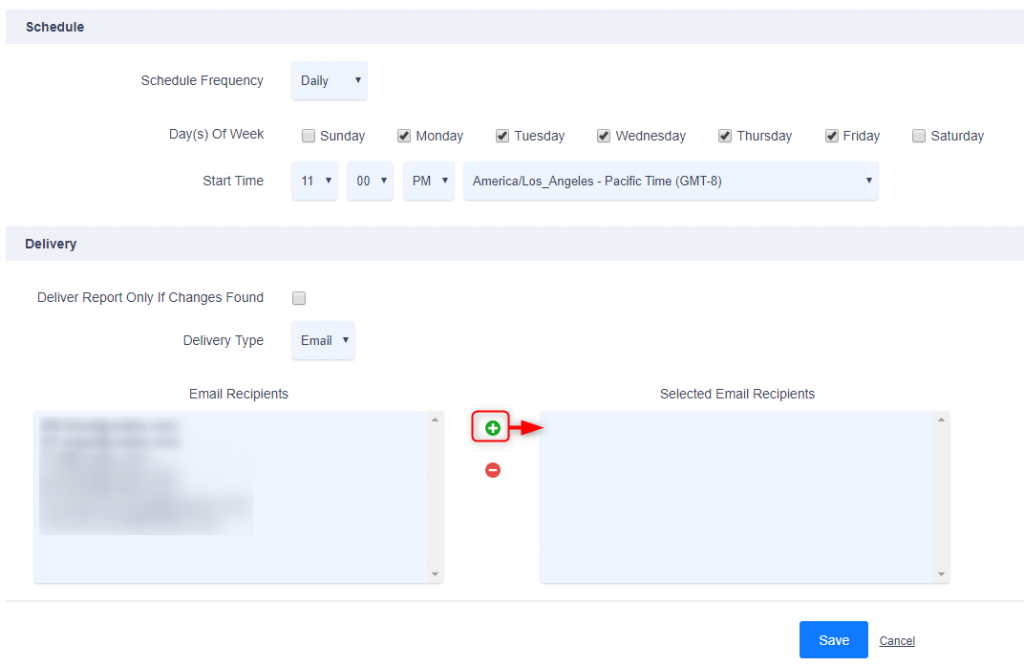
** NOTE: THE DELIVERY OPTION WILL REQUIRE SETTING UP AN SMTP SERVER AND LIST OF EMAIL RECIPIENTS UNDER THE SYSTEM SECTION WITHIN THE SETUP TAB
Once you have saved the scheduled comparison, ensure the new schedule is listed as “Enabled” in the Schedule menu. It can also be disabled, edited, and deleted from this section.
