One of Variphy’s phone-related features is the ability to send text messages to a phone, or group of phones, that will appear on the screen even if the user is on an active call, and remain on the screen until the user presses a softkey to acknowledge receipt of the message. This can be used primarily as a type of text-based paging system or an emergency alert notification system. However, it can also be used to create user polls with up to 4 options that users can select pre-determined answers from.
In order for Phone Control to function, the following configuration pre-requisites need to be met:
- Phones must be configured in advance for remote control in CUCM, in order for broadcast to function. The phone must be enabled for web access via authentication URL, and the Variphy application user account must have permissions to control phone via the controlled device list.
- Phones are added to distribution list in Variphy by device name, device description, directory number, etc. Non-supported phone models are automatically screened out (i.e. older phones with no display or incorrect display type, video phones with incompatible firmware, etc.)
- Phones will route back to Insight via HTTP with IP address and Port number. (xxx.xxx.xxx.xxx:80/ or 8080/). If this is on a remote network and there is no direct route back to the Variphy Insight Server, it’s address will need to be NATted on the phone’s network side so that it is routable to the Variphy server.
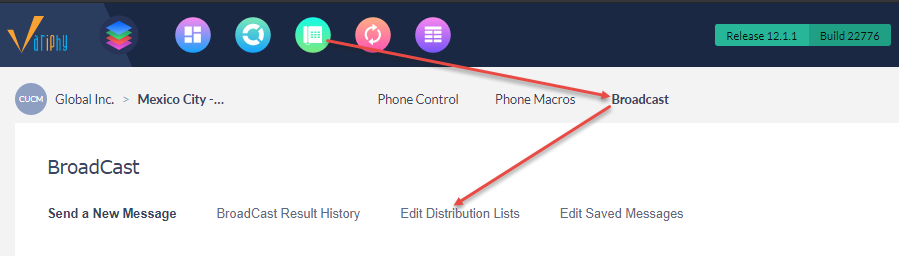
To access the Broadcast function, go to the “Remote Phone Control, Macros, and Broadcast” option, select Broadcast, and then Edit Distribution Lists. Configuring the DL is the first step in which the desired phones will be added to the list so that message broadcasts can be confined to the desired group of phones, rather than all phones in your organization. Multiple DL’s may be configured, allowing for either full company wide broadcast, or broadcasts to specific departments, sites, Route Groups, etc.
Create your distribution list by clicking the green “Add” button to the right, and giving it a name. Under “Route to Variphy Insight“, change the default localhost address to the actual Variphy Server IP address, rather than the default localhost IP of 127.0.0.1. This needs to be changed because the phones will not be able to route back to the Variphy server when responding to broadcasts, causing delivery to fail.
Also, use the default port HTTP of 80. A secure port, such as 8443, will not work if your Call Manager environment has not been configured to allow it.
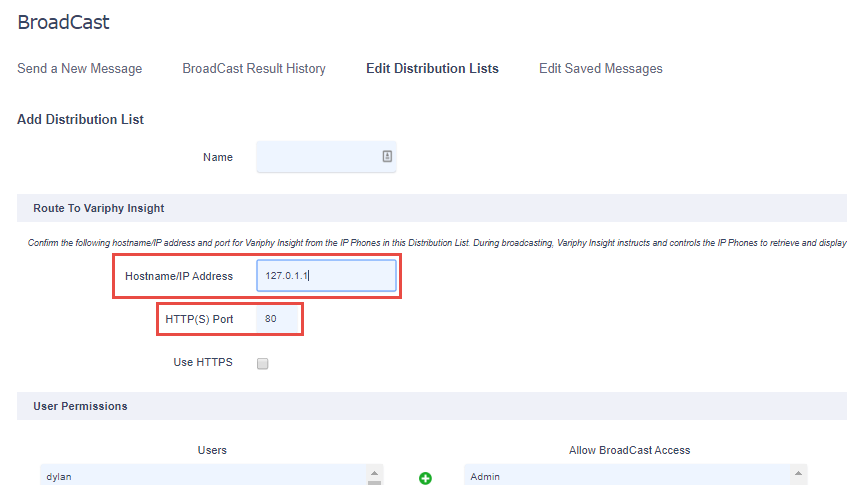
You can also select which Variphy user accounts you would like to give broadcast access to, by adding them to the right column. Save your changes and then go to the Broadcast > Send a New Message menu.
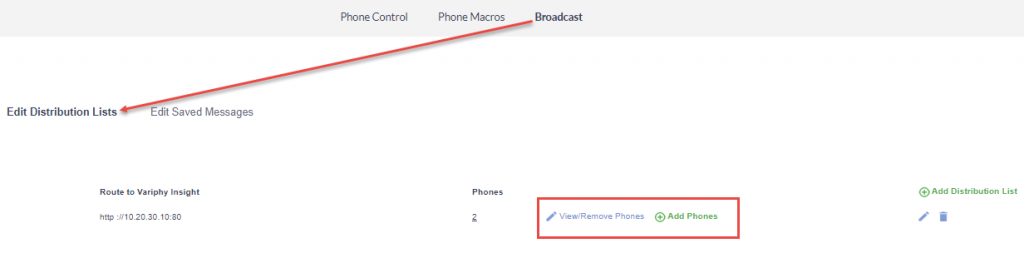
Next, you will need to add devices to the Distribution List. From the Broadcast tab, go to Edit Distribution Lists, then choose to add, view, or remove phones from the list.
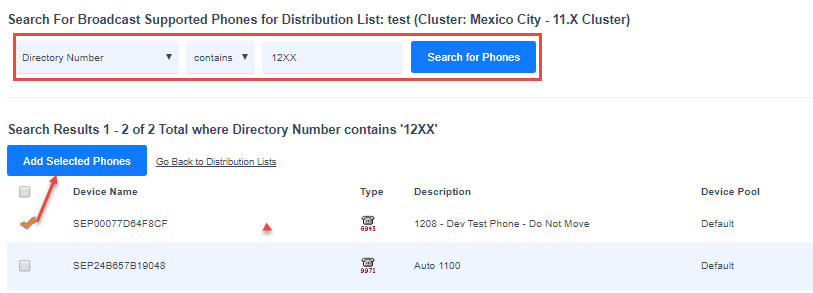
Choose the desire search parameter, (Directory number, Device Name, etc) and choose either equals or contains, then use the right hand field to search for phones. For example, to pull up a list of all physical phones, you could use “Device Name Contains SEP” and then select the specific phones you want included.
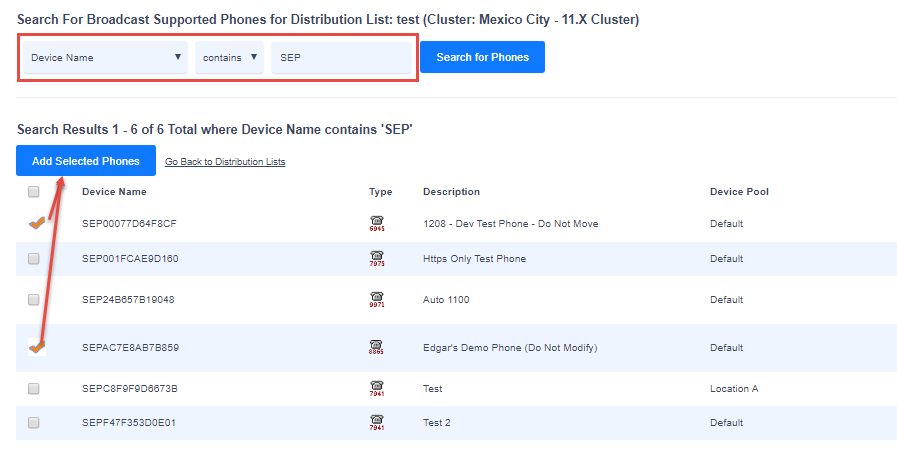
You can also search by Directory Number, using Cisco wildcards (capital X’s) to represent digits in a number range. For example, if you wanted to search for all of the 1200-1299 range extensions, you could search for “Directory Number contains 12XX“
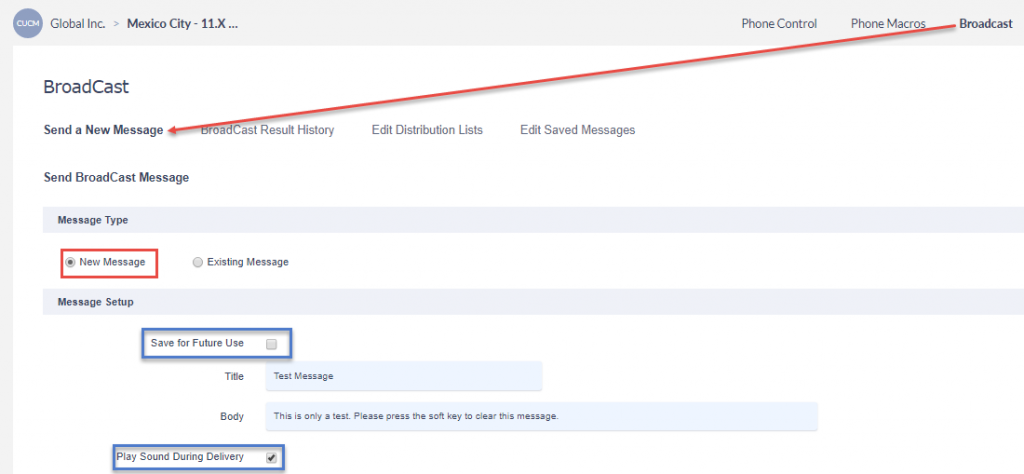
Once the phones have been added to your desired distribution list(s), You can Send a new message. Add a Title and Body, and select your distribution list. You can also Save for future use and Play Sound during Delivery. Please note that when the sound is made during delivery it will ring on all phones in the distribution list at once, making it a useful alternative to a paging or emergency notification system.
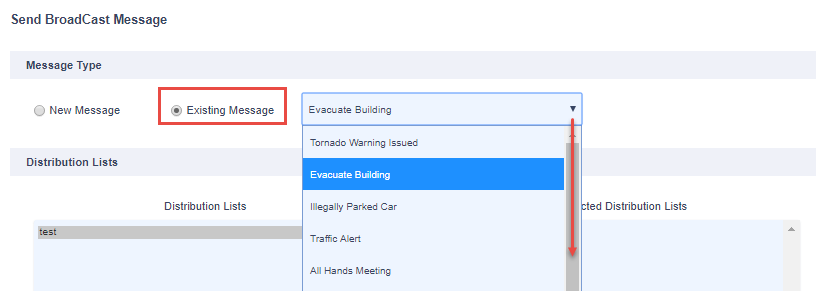
The saved messages can be re-used for future emergencies or general notifications.
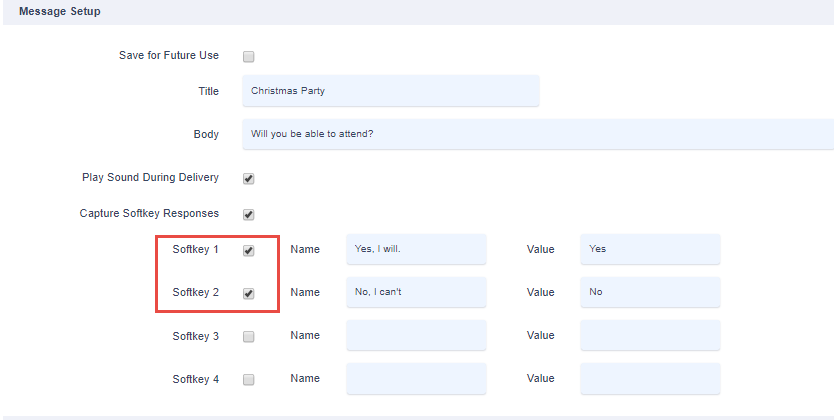
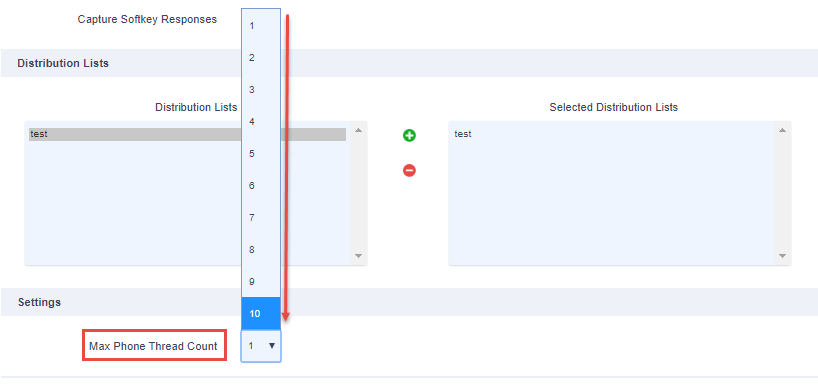
Another option available is capturing users responses from a softkey press. This allows you to poll users on a question with up to four possible answers. This can be used to gather a report of simple responses to a question. To use this feature, put a question to users in the Body field and enable a softkey for each response you want them to provide.
You can also adjust the Max Phone Thread Count with the drop down box below. The maximum number of broadcasts to phones allowed at a time are 10. This means that if you have 1000 phones in the distribution list, for example, it will execute the broadcast in 100 batches of 10 phones per batch. This is by design, to prevent a large broadcast group from sending to too many phones at a time and overwhelming either the network or the Call Manager server.
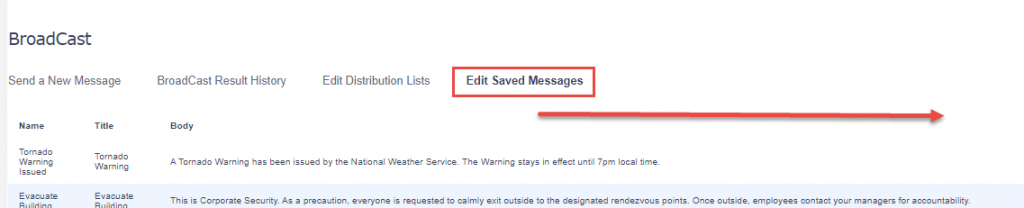
If you wish to create a list of pre-defined broadcast announcements without having to send a message live, go to the Edit Saved Messages tab and scroll to the right to add new messages. you can also edit or delete existing ones.

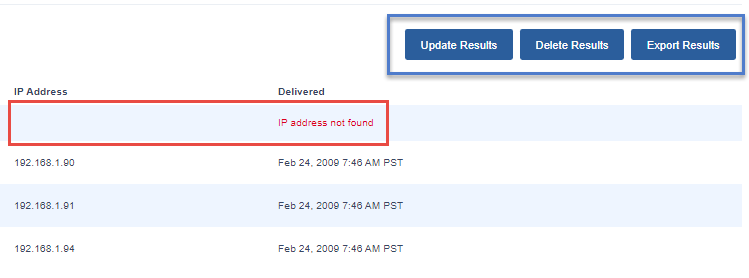
To view the results of a Broadcast, go to the Broadcast Result History tab, select the broadcast date from the drop down list and click . This will give you a list of phones the broadcast was sent to, and whether or not the message delivery was successful. Scroll further to the right to view the delivered status messages, and to Update Results (if the broadcast is still occurring in real-time), Delete the results, or Export them to an output file such as PDF or Excel.
Broadcasts must be manually sent from the Variphy web interface at this time. There is no way to schedule them in advance, or trigger them remotely via another method, such as a push text from a mobile device. However, these are features that we are planning to introduce in a future revision.
If you have additional questions or would like assistance with using the Broadcast feature, please submit a request to support@variphy.com. Please note that our normal support hours are Monday through Friday, 7:00 a.m. to 4:00 p.m. Pacific Time, excluding US holidays. After hours support may be arranged with advanced notice.