Applies to:
- System administrators managing Direct Inward Dialing (DID) assignments.
- IT personnel responsible for user provisioning and audit compliance.
Common Causes or Issues
- When a new user needs to be assigned a DID number.
- When an existing user’s DID must be reassigned to another user.
- When a DID needs to be unassigned for future use.
- When audit logs of DID assignments and changes are required.
Interactive Walkthrough
How to Assign a DID to a User
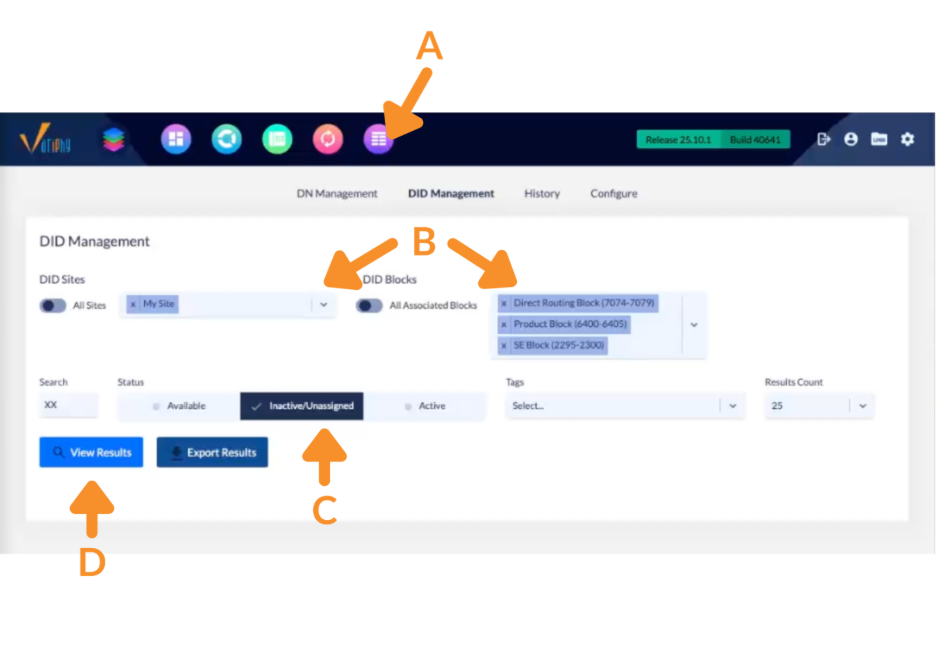
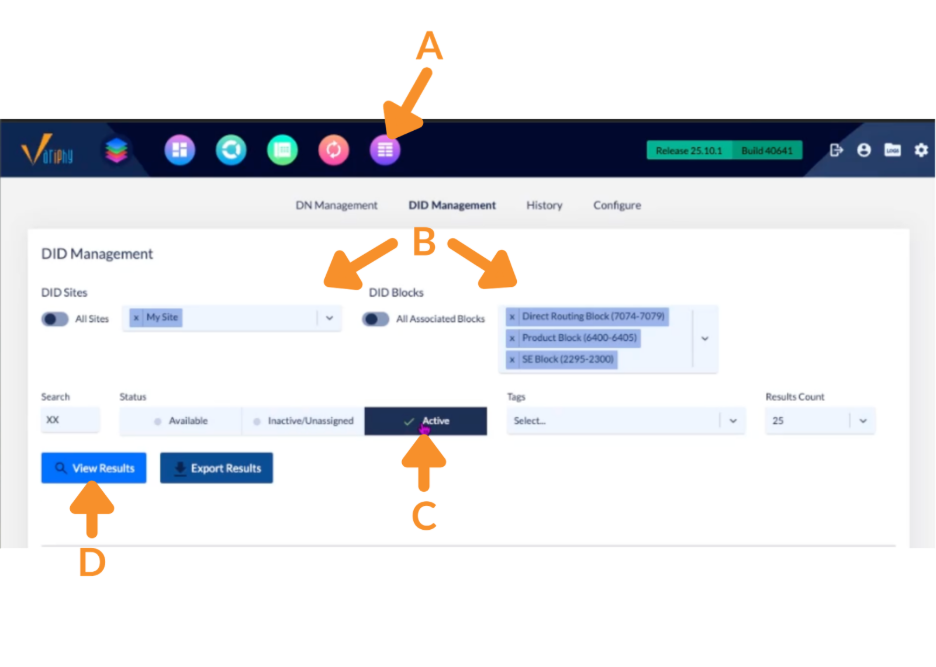
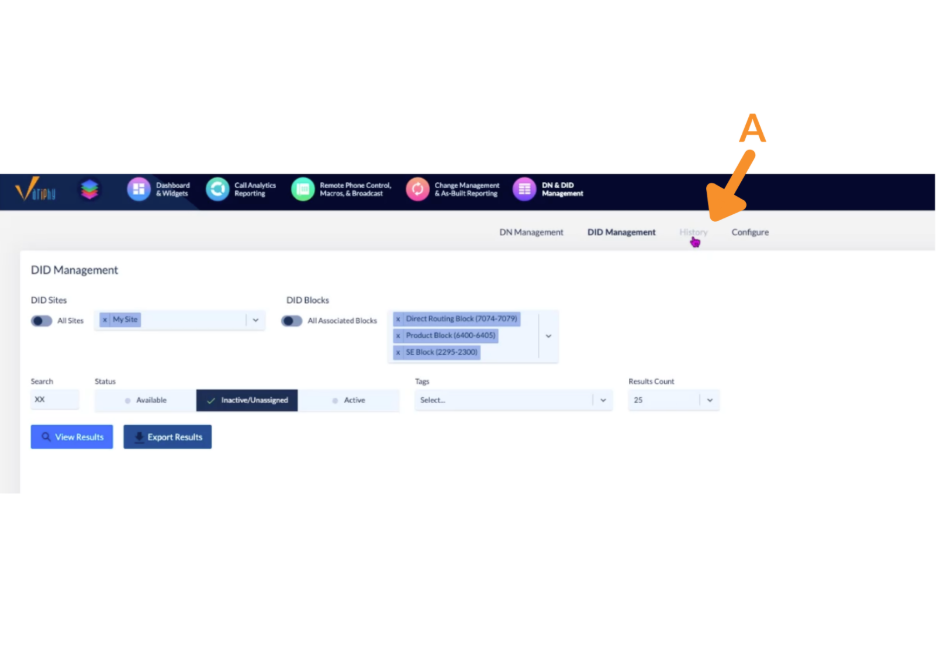
A. Navigate to the DID Management feature.
B. Under the DID Management tab, select the desired DID Sites and DID Blocks.
C. Click on Inactive/Unassigned under Status.
D. Click View Results.
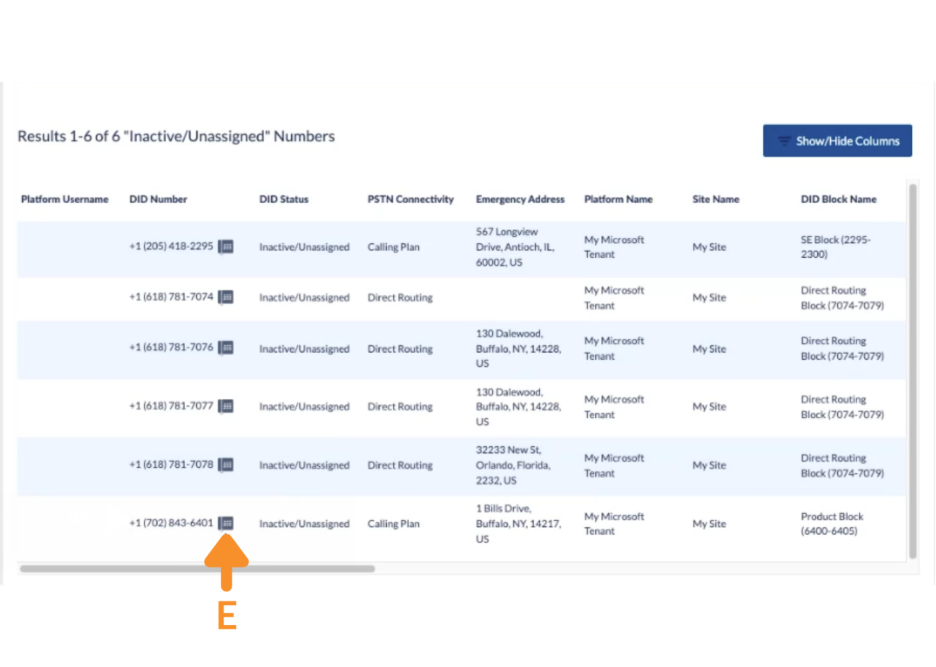
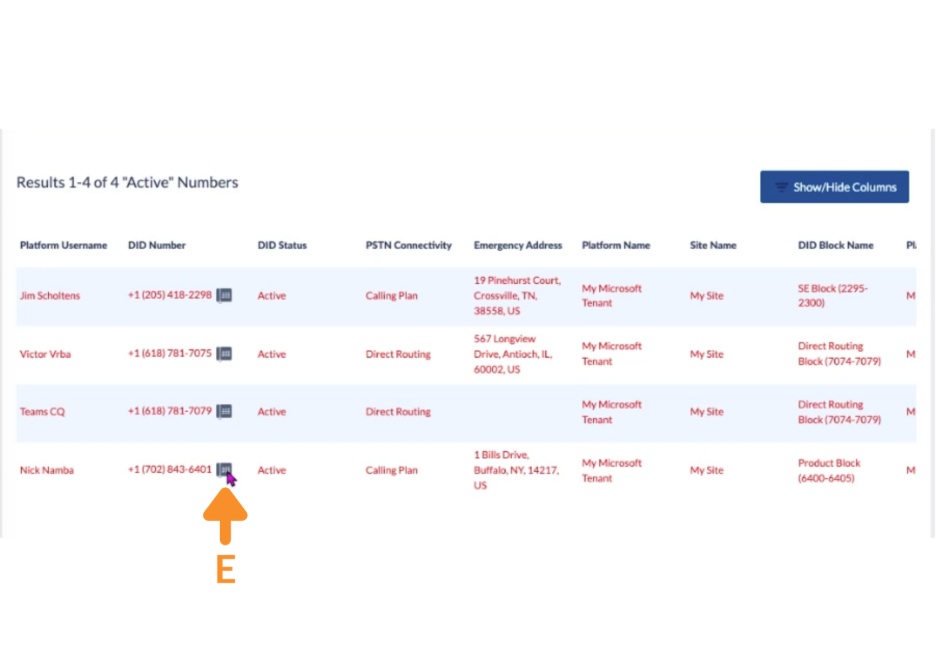
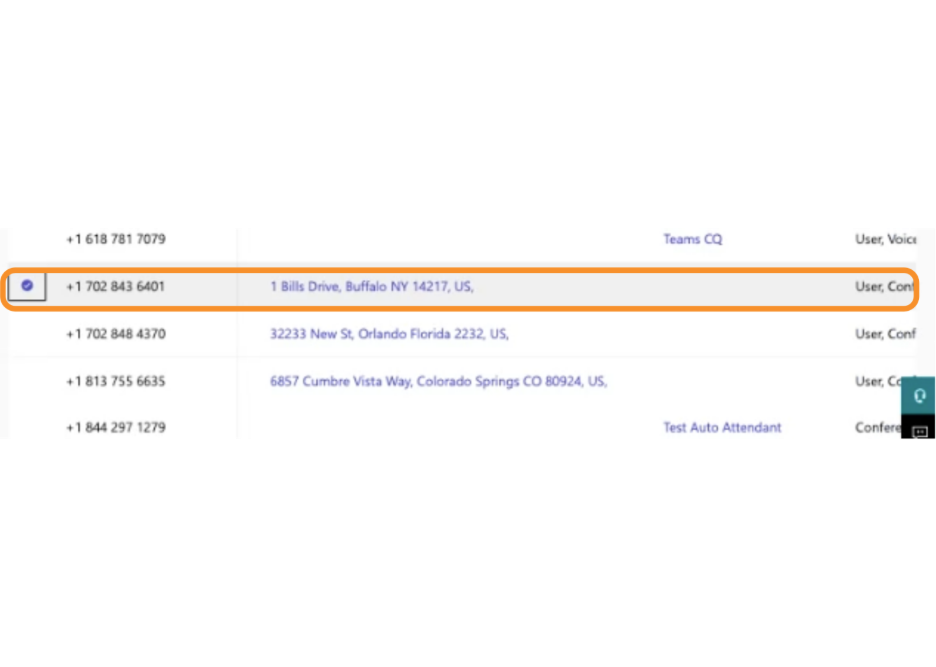
E. In the list of results, choose the DID you want to assign and click on the phone icon.
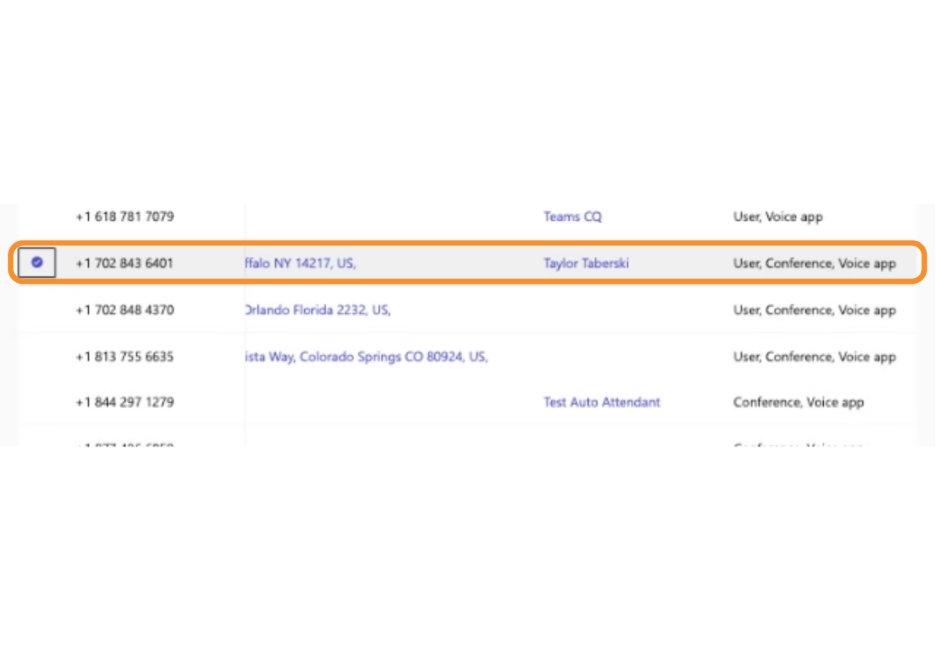
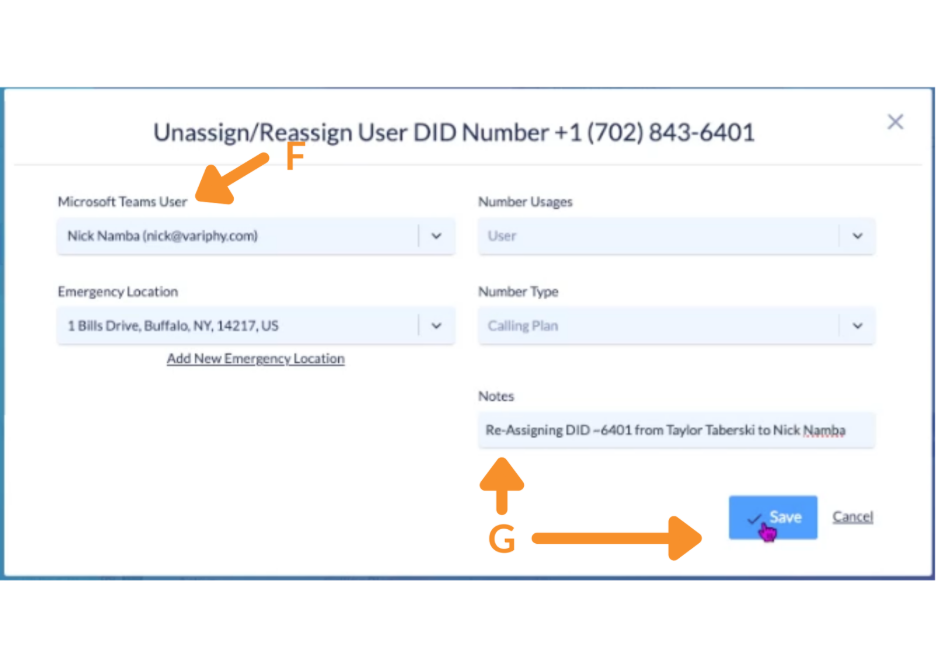
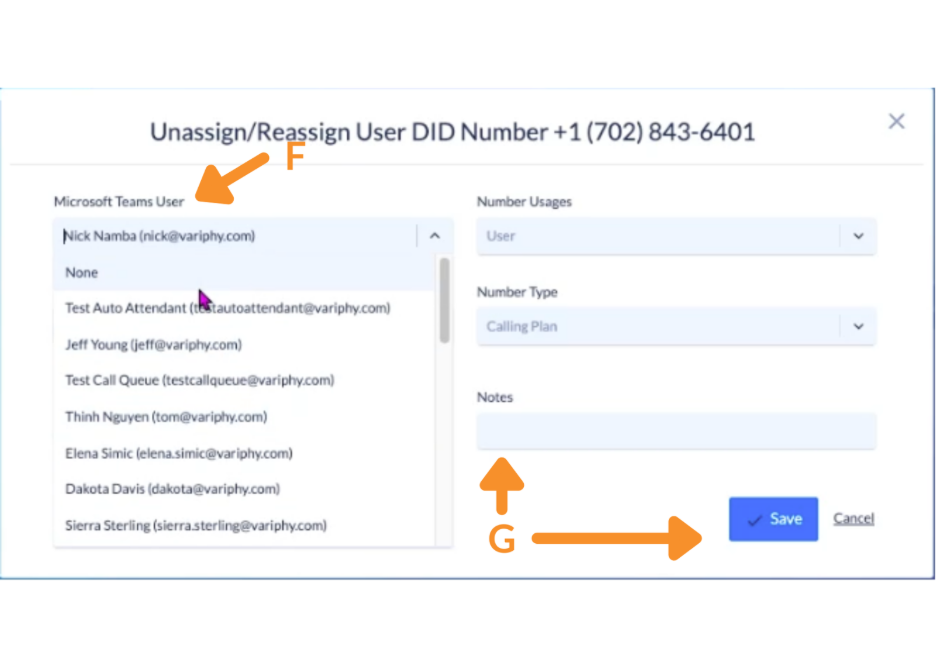
F. In the popup, use the Microsoft Teams User dropdown to search for and select the correct user.
G. Add a note for auditing purposes and click Save.

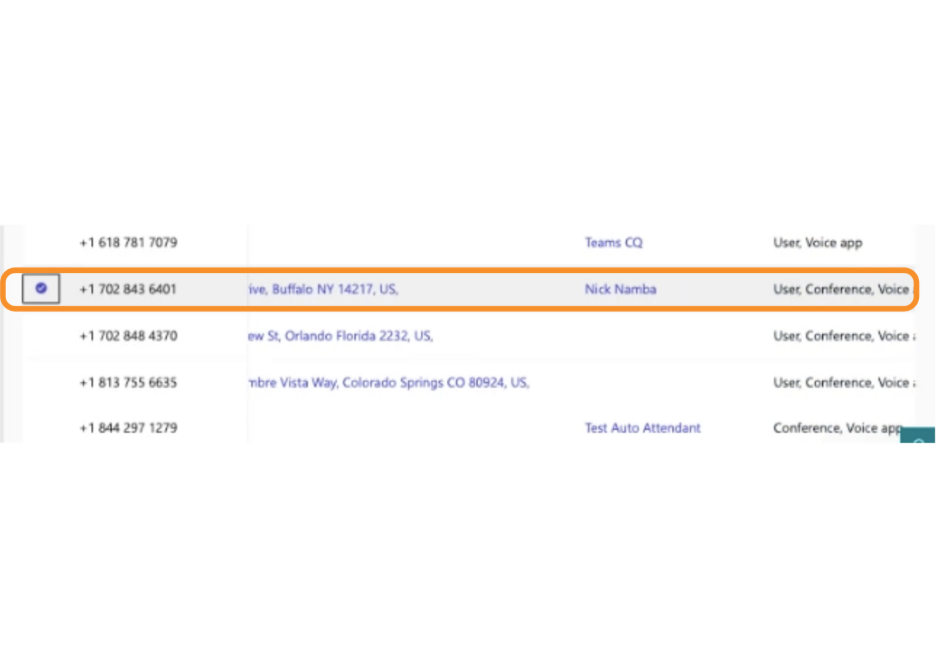
This change will be reflected in Microsoft Teams under the assigned user profile.
How to Reassign a DID to Another User
A. Navigate to the DID Management feature.
B. Select the desired DID Sites and DID Blocks.
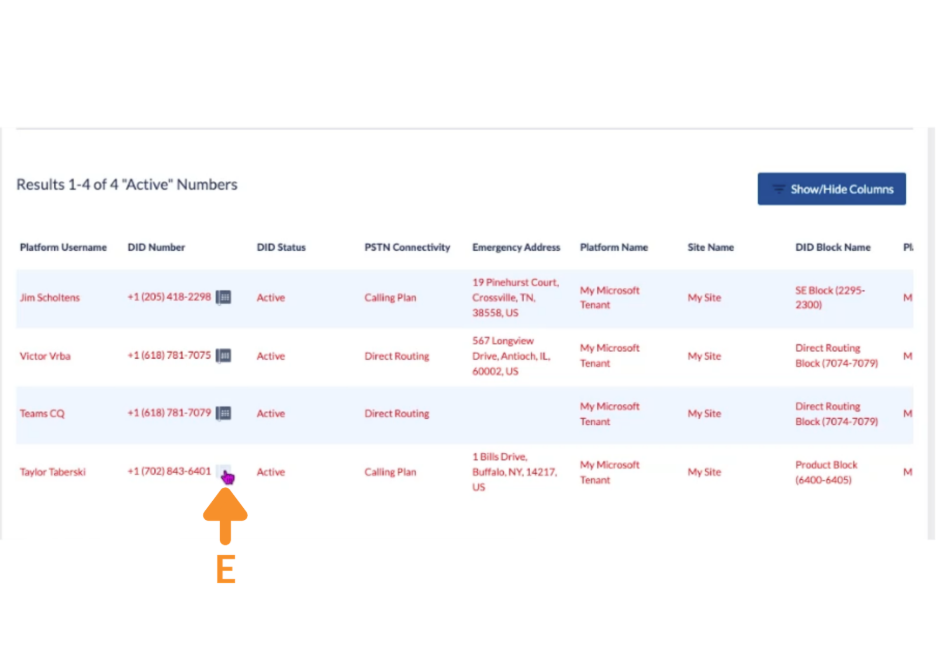
C. Click on Active under Status.
D. Click View Results.

E. In the list of results, find the DID number you’d like to reassign and click on the phone icon.
F. In the popup, search for the user you’d like to reassign the number to in the Microsoft Teams User dropdown.
G. Add a note for auditing and click Save.
This change will be reflected in Microsoft Teams under the assigned user profile.
How to Unassign a DID
A. Navigate to the DID Management feature.
B. Select the desired DID Sites and DID Blocks.
C. Click on Active under Status.
D. Click View Results.
E. In the list of results, find the DID number you’d like to unassign and click on the phone icon.
F. In the popup, search for and select None in the MIcrosoft Teams User dropdown.
G. Add a note for auditing and click Save.
This change will be reflected in Microsoft Teams under the assigned user profile.
View and Export DID Assignment History
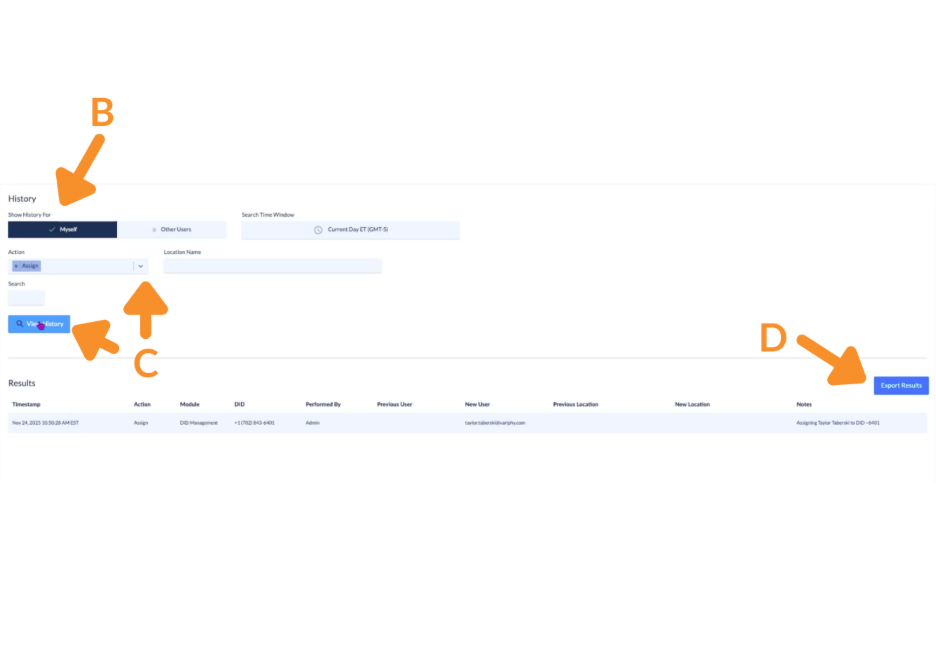
A. In DID Management, click on the History tab.
B. Under Show History for, select Myself or Other Users.
C. Under Action, filter by Assign, Reassign, or Unassign and click View History.
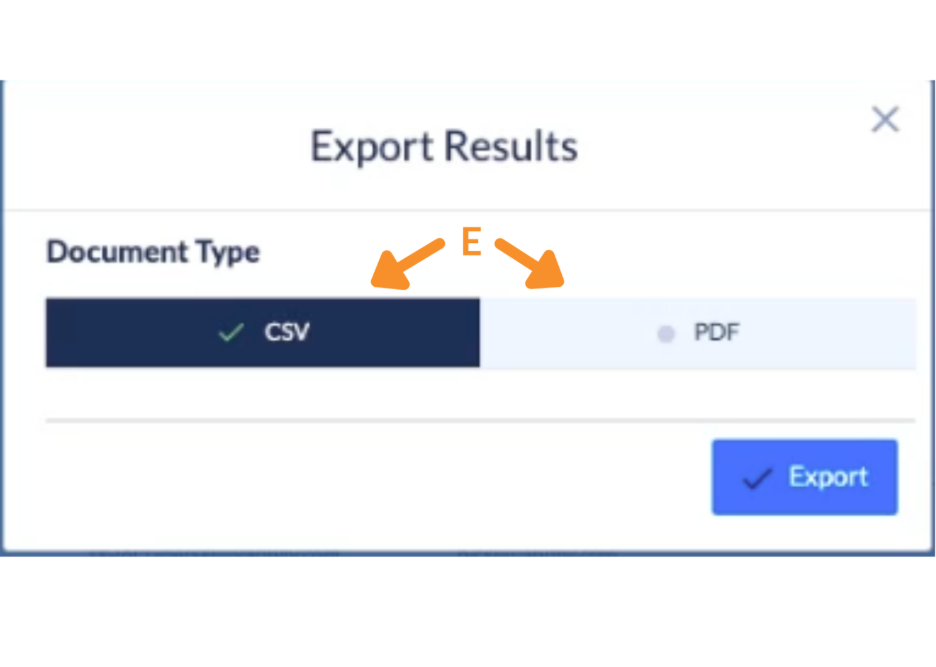
D. Select an event and choose the option to Export Results.
E. Choose to export as a CSV or PDF.
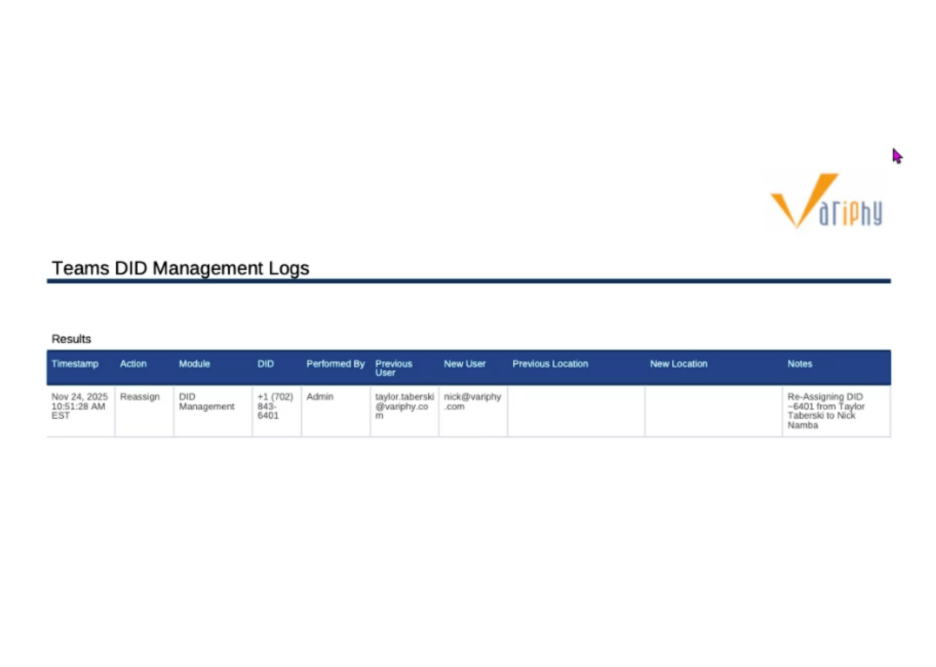
A clean, downloadable file will be generated in the selected format — ideal for documentation and compliance records.
Still Need Help?
Email our support team at support@variphy.com or click the button below to access our ticket portal.
Please provide details about your question or issue, including any applicable screenshots, reports, or Variphy application log files.