In addition to on-demand searches and call analytics reporting, Variphy can also generate alerts based on a more narrow set of search criteria. These alerts can be delivered to your inbox whenever a call meets that search criteria, and can be configured to notify you when a 911 call occurs, an international number is dialed, or a call fails due to certain conditions.
These alerts can typically be delivered within a few minutes of the call ending, but there will be a small window of delay in order for the CDR record to be generated, sent from CUCM to Variphy, and then processed to our database. In this regard, it can not offer “real time” 911 call tracking, such as the kind available with Cisco’s CER feature (Cisco Emergency Responder), but it is nevertheless a useful tool available to track specific call types, and is included in the Variphy Call Analytics feature at no additional cost.
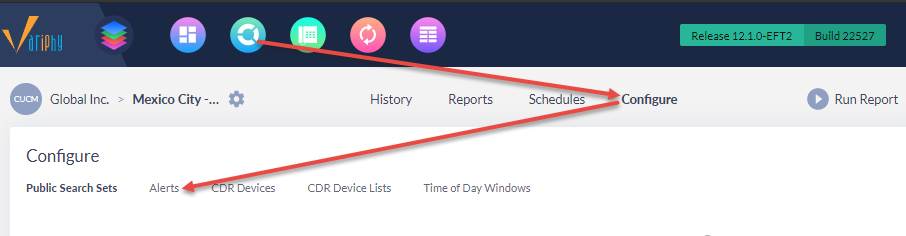
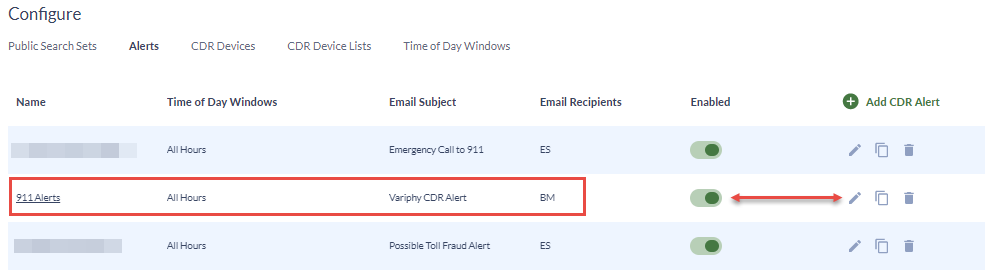
To Configure a CDR alert, go to the Call Analytics section, select Configure, and then choose Alerts. Add a new alert with the green plus icon on the right side.

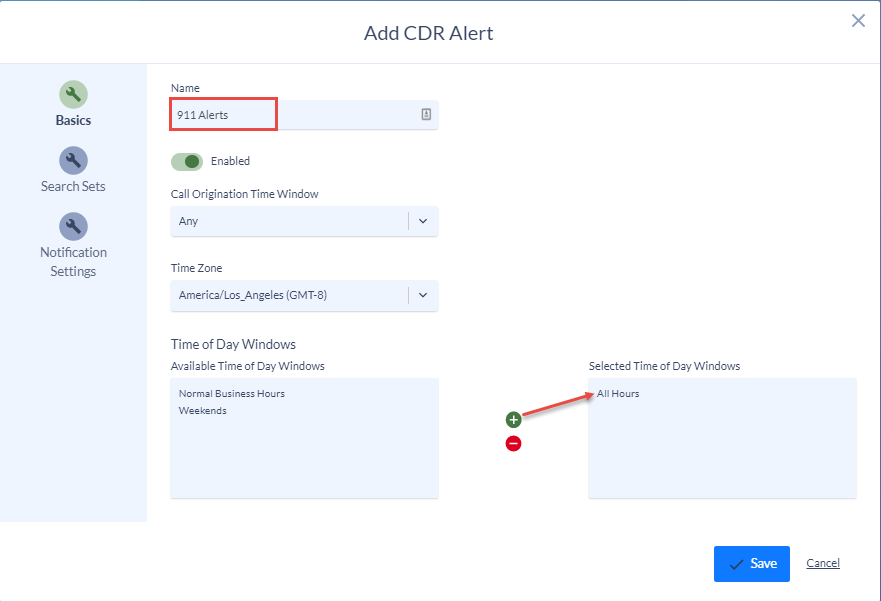
In the Add CDR Alert window, give the alert a name (e.g. 911 Alerts) and set the alert to “enabled” with the toggle, then select the Time of Day windows below. By default you have the options of All Hours, Normal Business Hours, or Weekend hours.
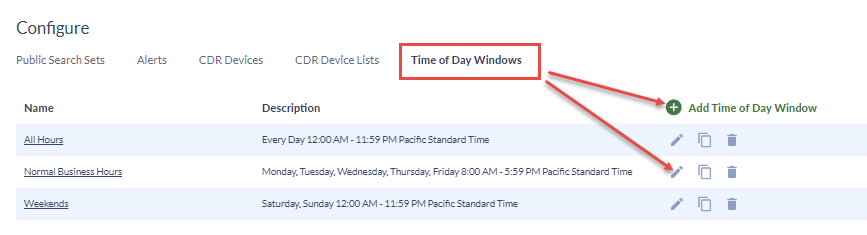
NOTE: If you need to add additional time windows or edit the existing ones, you may do so by going back to the Call Analytics > Configure menu and selecting “Time of Day Windows” to the far right of the “Alerts” option.
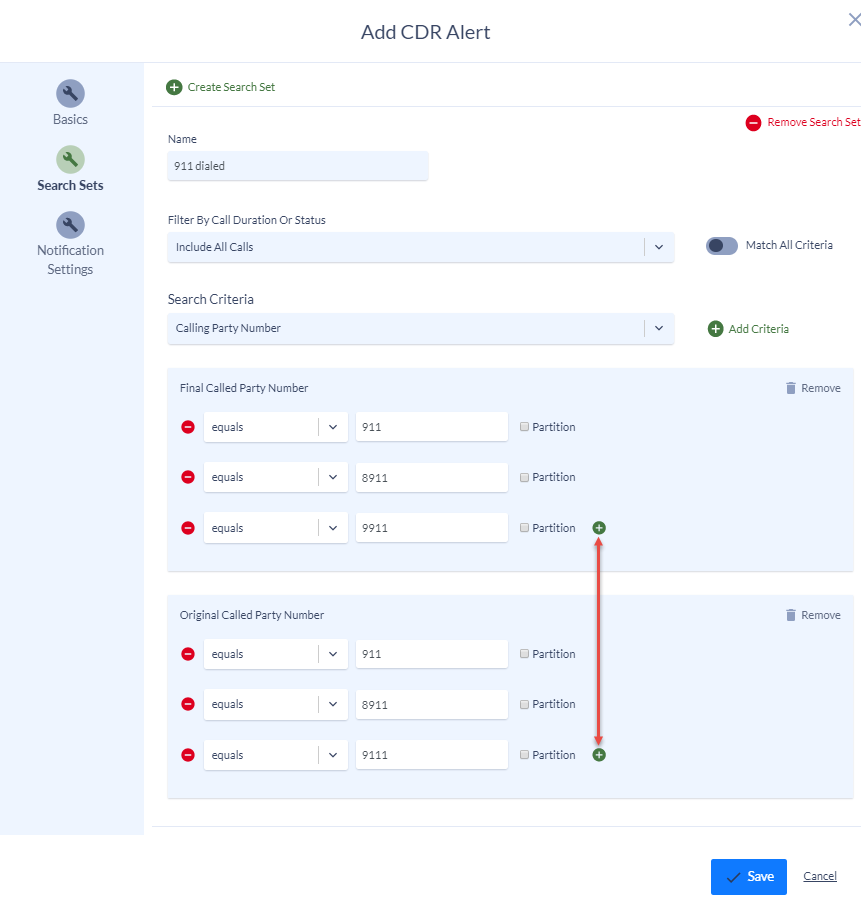
Back in the “Add CDR Data” window, proceed to the “Search Sets” section, where you will add your search criteria. In this example we will create an alert for any scenarios where 911 is dialed from within your organization, using Original called party number or Final called party number. This will capture any calls to 911 where either 911 is dialed directly, or forwarded to 911 via a transfer. Create a search set and provide a name, then add criteria. Select Original and Final called part number fields and add equals 911 to them.
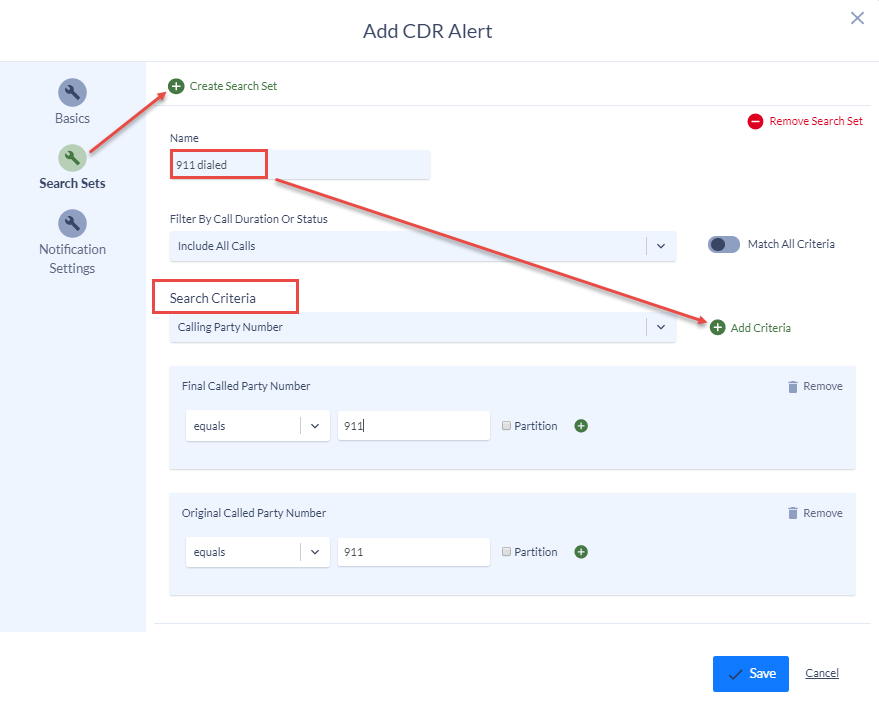
If you use any additional prefixes for dialing 911, such as 8911 or 9911, you can add those as well with the green plus icons next to each criteria. Leave the “Match All Criteria” toggled to the off position, as we will want to capture any calls meeting any of this criteria (if the 911 number is both the original and final called party number in the same call leg, it will only be displayed as one call. You would only need to toggle on the “Match All Criteria” setting if you are trying to capture specific call flows, e.g. “Calling Party number equals 5XXX” and “Original called party number equals 911”, which would only capture 911 calls specifically from the 5000 range of extensions.
Once the search sets have been configured, Go to the “Notification Settings” tab to finish setting up the alert. Here you will choose which email recipients you would like the alert to be delivered to. Once these recipients are selected, Save the alert and you will then see it listed under the alerts section. You can edit it, disable it, or remove it at any time.
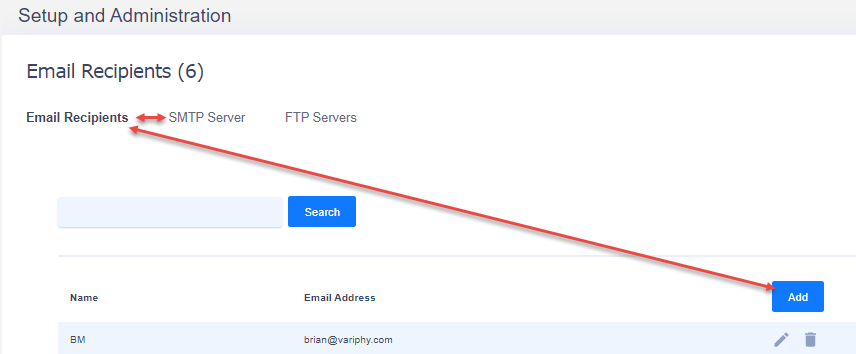
If you do not see any email recipients available when creating the alert, then you may need to configure an SMTP server and/or add email recipients to the list. You can check these by going to Settings > System > SMTP Server or Email Recipients, and toggle between the two tabs in the same window.
Available Search Criteria for CDR Alerts
The following search terms can be used for CDR alerting. While the full range of search criteria found in CDR Analytics reporting may not be available specifically for alerts, we have included the most commonly used criteria.
Calling Party Number = Extension that initiated the call.
Originating Device Name = Device that initiated the call, typically a phone or other device name beginning with SEP.
Originating Device IP address = Network address of calling device.
Calling party number partition = partition in which calling party resides.
Original Called Party Number = the first number dialed in the call sequence by the Calling Party.
Original Called Party Partition = Partition in which dialed party resides.
Final Called Party Number = This number may be the same as the original called (dialed) party number, or be a different number if the call was transferred or otherwise re-routed.
Terminating Device Name = Phone or other device that recieved the outbound call (this will be a gateway, SIP trunk or PRI if calling outside of your organization)
Terminating Device IP address = Network address of phone or other routing device that receives the call.
In addition, you can do combinations of calling, original, or final called party numbers (if you wish to track both inbound and outbound calls for an extension or range of extensions). These include:
Calling Party or Original Called Party Number Partition
Originating or Terminating Device Name
Originating or Terminating Device IP Address
Calling Party or Final Called Party Number Partition
Original or Final Called Party Number Partition
Calling Party, Original, or Final Called Party Number
Calling Party, Original, or Final Called Party Number Partition
In addition to tracking calls by device or extension, you can also track them by call signaling (cause codes), Call or Queue duration, Comment, or Hunt Pilot Number Partition.
Originating Cause Code = reason for call termination on the calling party side
Terminating Cause Code = reason for call termination on the final called party side.
Originating or Terminating cause code = reason for call termination for either side of the call.
The most common cause codes are “Normal call Clearing / No Error”, with the side that hangs up the call first showing “Normal Call Clearing” and the other side showing “No Error”. This is a normal call termination. You may also see a “Call split” cause code, indicating that the call was transferred to another party. However, there are a variety of other cause codes that can be used to determine if a call is dropped such as “No circuit/channel available”, “Out of bandwidth (Cisco specific), etc.
Call Duration (seconds) = time spent on a call (this includes both hold time and active talk time)
Queue Duration (seconds) = time spent in queue before connecting to agent (calculated by the time the call initiated to the time the call connected to an agent).
Comment = Cisco may put in certain comments into this field if, for example, a call is flagged by the agent as malicious, etc.
Hunt Pilot Number Partition = while we usually recommend tracking hunt pilot numbers with the field “original called party number”, this is useful for tracking related partition information.
Conclusion
If you have any further questions, or would like assistance with configuring Variphy, please contact us at support@variphy.com and a support ticket will automatically be added to our queue. One of or software engineers will reach out to schedule a support session with you as soon as possible. Please note that our normal support hours are M-F from 7:00-4:00 Pacific Time, excluding U.S. Holidays.