Often times you are required to store multiple years of call data resulting in millions of call rows in a single database. Housing multiple years of call data in a single database can be resource intensive when your day to day reporting requirements are usually only one, two or three months of call data.
Variphy 13.0 introduces the ability to support multiple databases within a single cluster. Multi-Database support allows customers who require longer data retention periods to manually create “Archive databases” that house less used call data, freeing up valuable resources for your day to day reporting, but leaves the archived data available for seamless reporting when needed.
1. Identify if you have any existing Archives
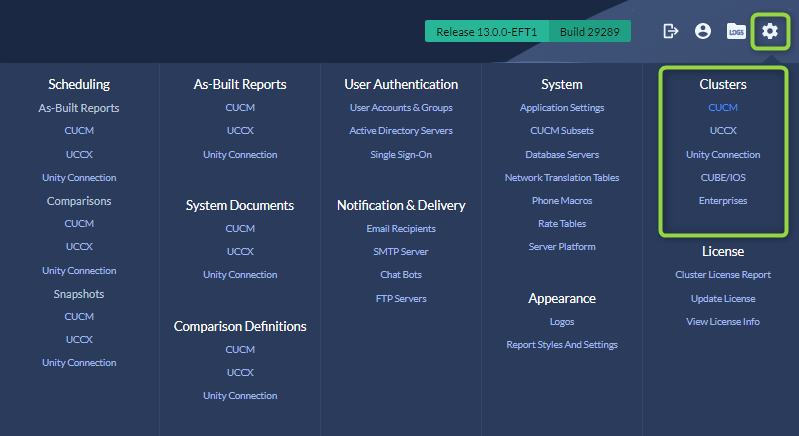
- Log into the Variphy web interface and navigate to the System Settings gear icon.
- Select the Cluster type that you will be archiving (CUCM, CUBE, etc…).
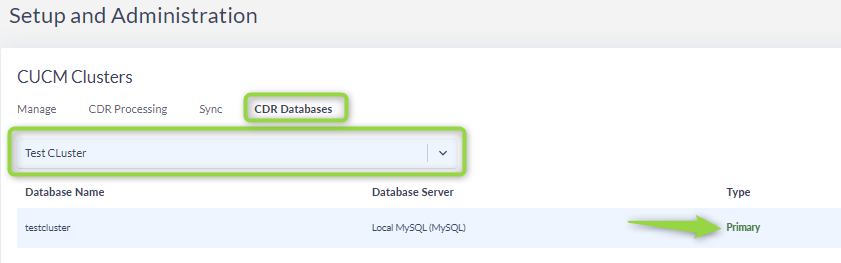
- Navigate to the CDR Databases tab and using the drop down select the cluster you are preparing to create an archive for.
- If you only have 1 database listed and the Type is Primary then you have not yet created any archives.
- If you have multiple databases listed you have already created Archives, take note of the Database Name naming convention as we will use this naming convention when creating a new Primary database.
2. Create a new Primary Database.
The Primary Database is the database new calls will be populating. As new data is provided from the phone system it will be stored in the Primary database.
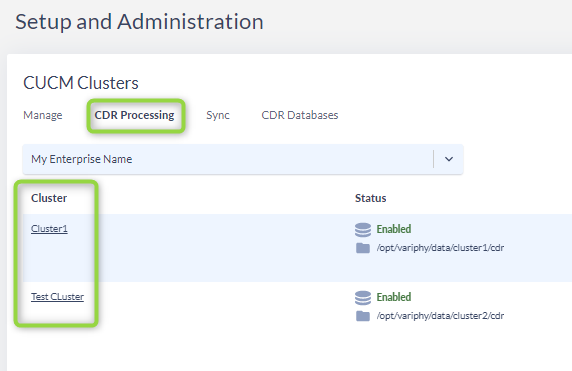
- Navigate to the CDR Processing tab and edit the cluster you will be creating an Archive for.
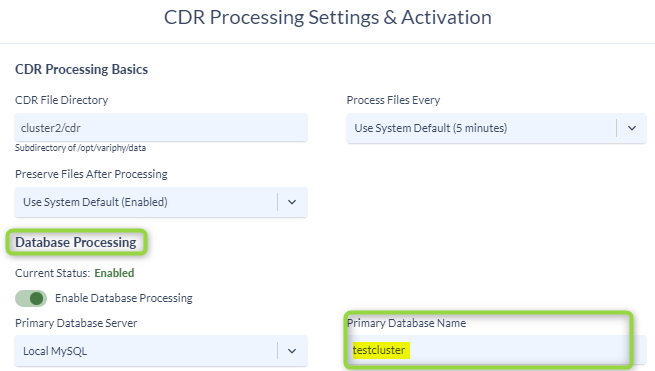
- In the CDR Processing Settings navigate to the Database Processing section and change the name of the Primary Database.
- Take note of the existing primary database name before changing it.
- If this is your first archive, as identified by the previous steps, It is strongly recommended to append _Archive2 to the existing Database name. (example: testcluster_Archive2)
- If you already have existing archives, as identified in the previous steps, you should append the appropriate increment to the existing database name. (Example: if you already have testcluster_archive2 and testcluster_Archive3 in your CDR databases you should use testcluster_Archive4 for the new database name.)
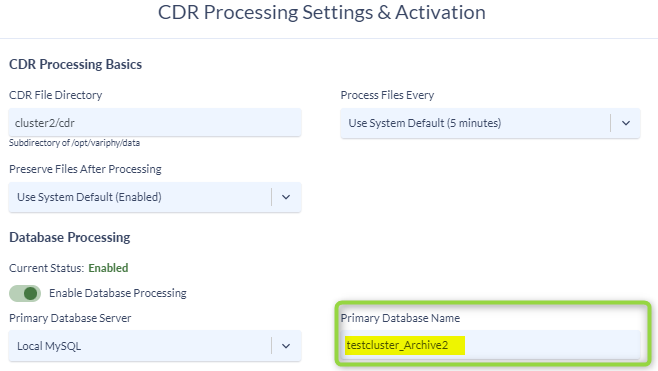
- Click Save and Continue.
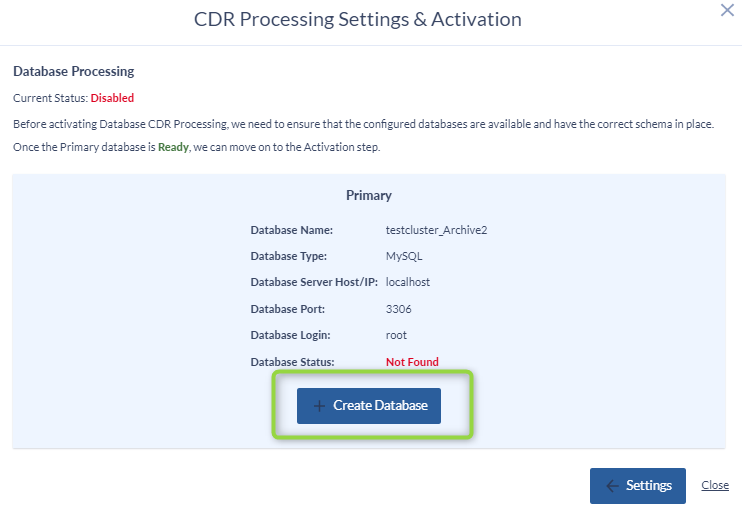
- On the next screen click Create Database
- On the next screen click Activate.
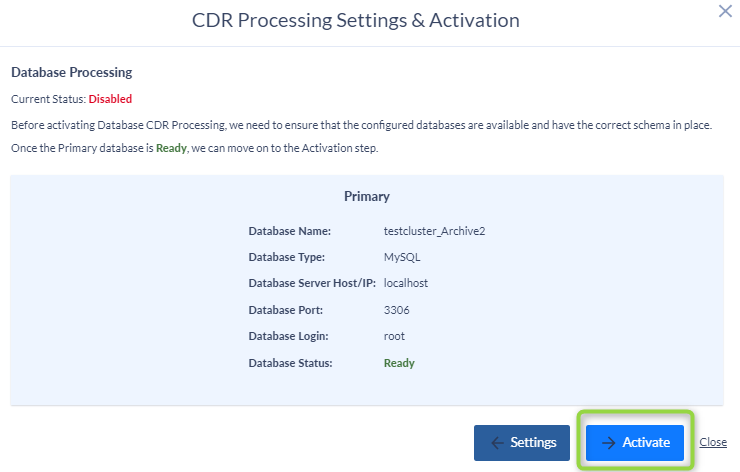
- Click Close once the Activation is complete.
You have now completed creating a new database to house new incoming call data.
3. Associate the old primary database to the cluster to allow reportability to the older data
- Navigate to the CDR Databases tab and using the drop down select the cluster you are creating the archive for.
- Click the Associate Existing Archive button on the right side of the screen.

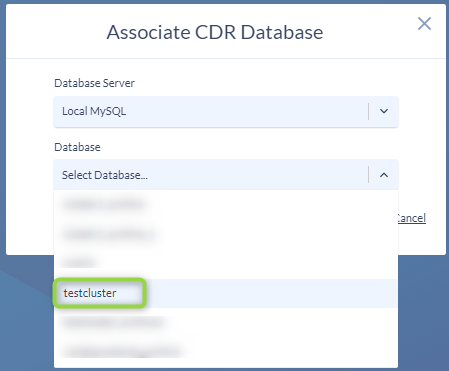
- Select the Database server from the drop down
- Select the Database that you are associating to the cluster.
- This will be the previous Primary Database you renamed in step 2.2
- Click Save.
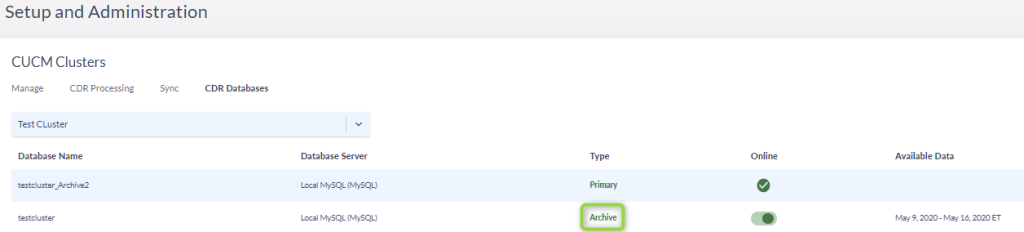
You will now see your previous primary database listed as the Archive database and your new database will be the primary.