Once you’ve created Call Analytics reports in Variphy, you can schedule them for delivery via email or FTP. Smaller “summary” reports are ideally delivered via email, while larger reports, or reports that you wish to store long term in a central location might be more suitable for FTP delivery. If you have not yet created any reports, you may wish to review our Variphy CUCM CDR Call Analytics Reporting Guide. If you are not sure where to run the report manually once you’ve created it, please check out How To Run Variphy CUCM CDR Call Analytics Reports
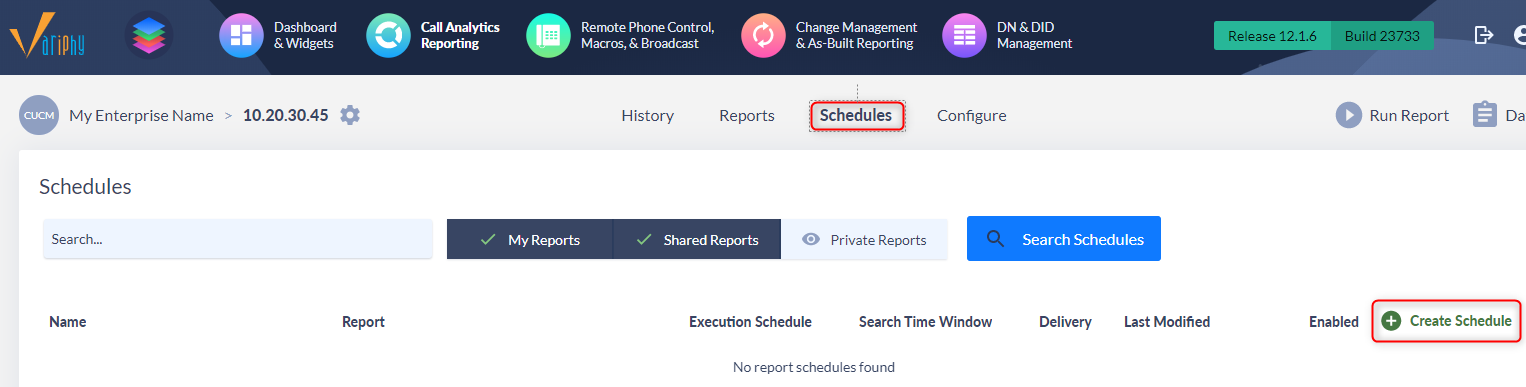
To create a schedule, Go to the Call Analytics Reporting Menu and select the Schedules Tab. On the right side under the “Search Schedules” you’ll see a green + icon to Create Schedule.
In the Add Report Schedule window, toggle the Scheduled Enabled setting and select your report name from the Report drop down field. We recommend naming the schedule the same as the report, or a variation of it if you plan on running the same report on different schedules.
For example you could run the same report called “Operations” using three different schedules called Operations Daily, Operations Weekly, and Operations Monthly. Under Execution Schedule, choose Hourly, Daily, or Monthly. If you wish to choose a weekly report, simply choose Daily and then select the day of the week you want it to run on below.
You can also set the start time when you want the report schedule to run. If running multiple reports, we recommend staggering the start times slightly so that they aren’t all trying to run at the same time, as this can create heavy resource usage on the SQL server if the reports are large.

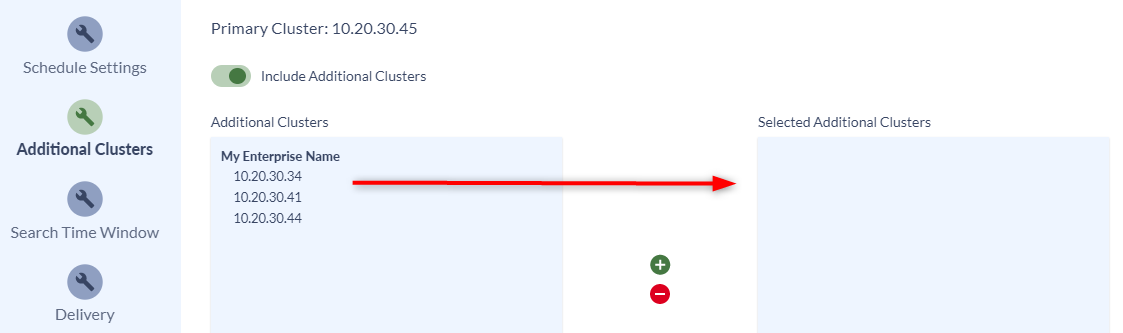
If you want to run the report for more than one cluster in your environment that have a common search criteria (e.g. Department name or a common extension range), enable the Include Additional Clusters option and select the desired clusters from the list . Otherwise, by default the report will only be run in the cluster which it was created, and this setting can be ignored.
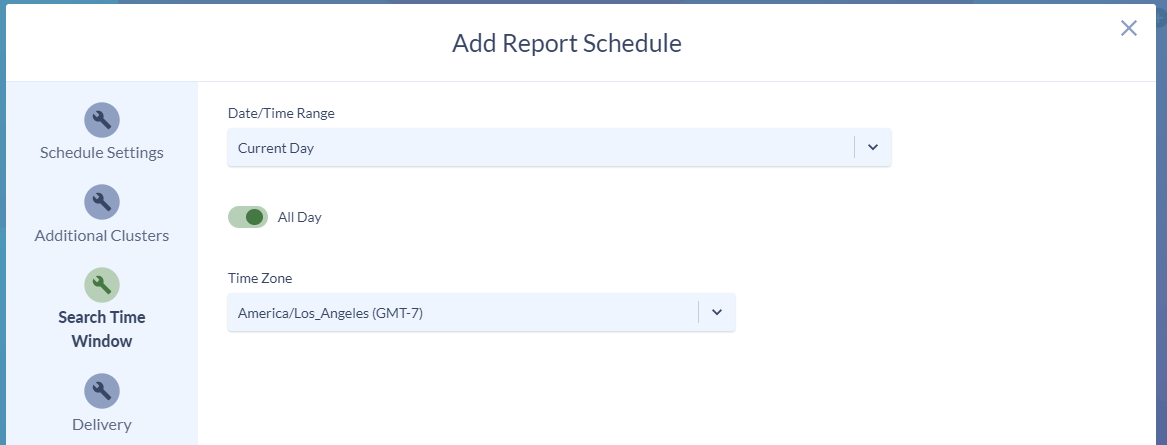
Select the Search Time Window from the available Date/Time Range. There are several intervals to choose from, from previous hour to previous 3 months. By default it will pull call data from All Day (midnight to 11:59 p.m.), but you can de-select the toggle to create a custom time search window based in the include or exclude options. You can also set the time zone that you want the schedule to run on, as it will otherwise default to the local Variphy server default time zone.
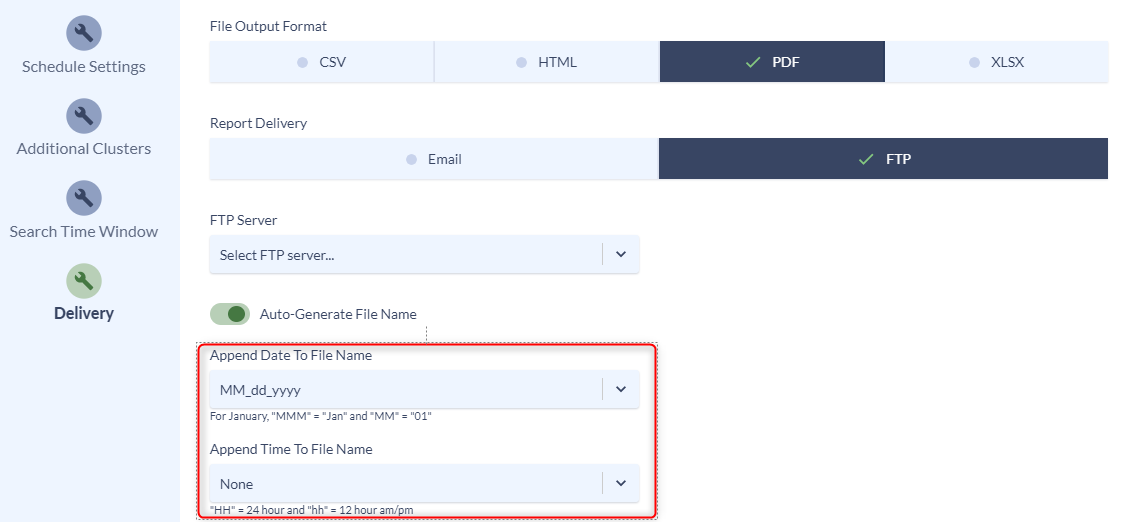
The final step is to choose your delivery option. This will usually be an email unless an FTP server is preferred. The report can be created in CSV, HTML, PDF, or XLSX formats. While PDF is the default, please not that due to page width limitations, a PDF can only show about 10 columns of data if you are running a report with call data selected, instead of just a totals summary. If you have more columns than that, they will simply be truncated from the report. If you want to show a wider range of columns, please use one of the other formats.
If you select Email, you can select the recipients from the Email Recipients drop-down box. You can also create a custom email subject by de-selecting the Auto Generate Email Recipients toggle. This will allow you to create a custom header for email delivery.

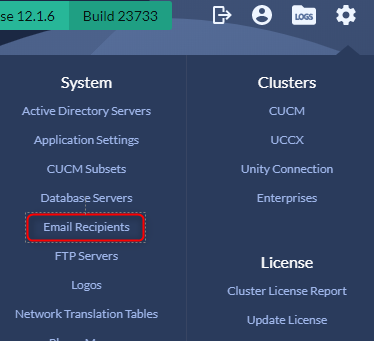
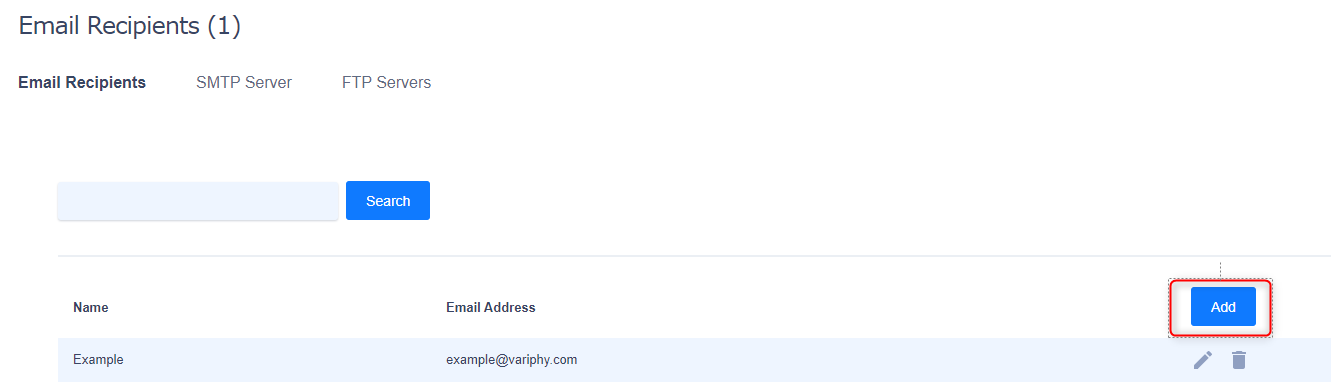
In order to select an email recipient, they will need to be added to Variphy in advance. if you do not see the desired recipient you can add them by going to the Settings menu (gear icon) and selecting Email Recipients under the System category. Click on the Add button inside the menu and put in the user’s name and email address. they will then be added to the list and be available for any scheduled reports.
If you prefer to send the report to an FTP server, choose the FTP option. Select the name of the FTP server from the drop down box. You can also add a custom File name, or simply append a date and/or time to the automatically generated file name. If you want to keep a history of stored reports, we highly recommend appending a date stamp to the file name. Otherwise it will re-use the same file name every time the report is run, and will overwrite the previous file of the same name.
If you do not have an FTP server configured yet in Variphy, please follow the instructions in Knowledge Base article How To Configure FTP Servers in Variphy for FTP Delivery.
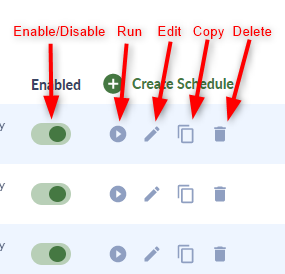
Once the schedule is created it will appear in the schedule list, which will show the schedule’s name, format, execution schedule, search time window, delivery method, when it was last modified and by who, and whether it is enabled. If you want to turn off a schedule without deleting it, simply edit it and turn off the “enabled” toggle. Schedules can be searched by name with the Search Schedules option above.
To the right of each schedule is series of 4 buttons. These will execute the schedule immediately and run the report (it will then return to its normal schedule afterward), edit the schedule, make a copy of the schedule (if you want to modify for different search time windows) or delete it.
If you have any further questions, or would like assistance with configuring Variphy, please contact us at support@variphy.com and a support ticket will automatically be added to our queue. One of or software engineers will reach out to schedule a support session with you as soon as possible. Please note that our normal support hours are M-F from 7:00-4:00 Pacific Time, excluding U.S. Holidays.