- Overview
- Note about Multi-line Commands
- Variphy Insight OVA HTTPS Certificate Signing and Configuration Steps
- Connect to your Variphy Insight OVA deployment via SSH
- Archive the current keystore file
- Create a new public/private key pair and store them in a new keystore
- List entries in newly-created keystore
- Create a Certificate Signing Request (CSR)
- List the Certificate Signing Request Contents
- Retrieve the Certificate Signing Request File from the Variphy Insight OVA Server
- Submit the Certificate Signing Request to your Certificate Authority
- Import the signed public key certificate and chain into the keystore
- List the keystore entries to verify the import
- Check Variphy Insight HTTPS Configuration
- Restart the Variphy Insight service and check the HTTPS endpoint
- Optional: Active Directory Root Certificate
Overview
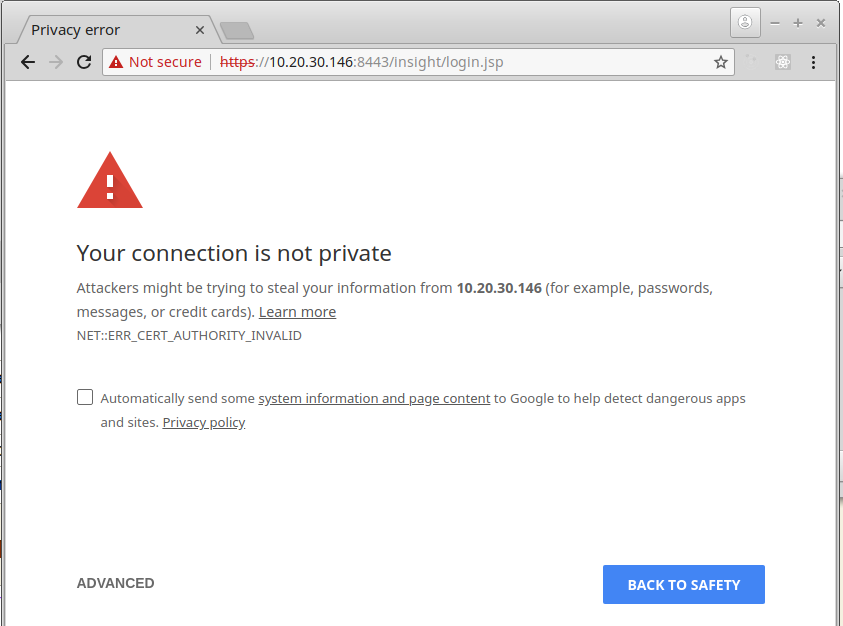
This tutorial will walk you through requesting, signing, and installing an Active-Directory-Certificate-Services-signed TLS certificate for the Variphy Insight OVA. Using a certificate signed by your organization’s Active Directory server should allow you to use the Variphy Insight web interface over HTTPS (“HTTP Secure”), without the pesky browser warning messages:
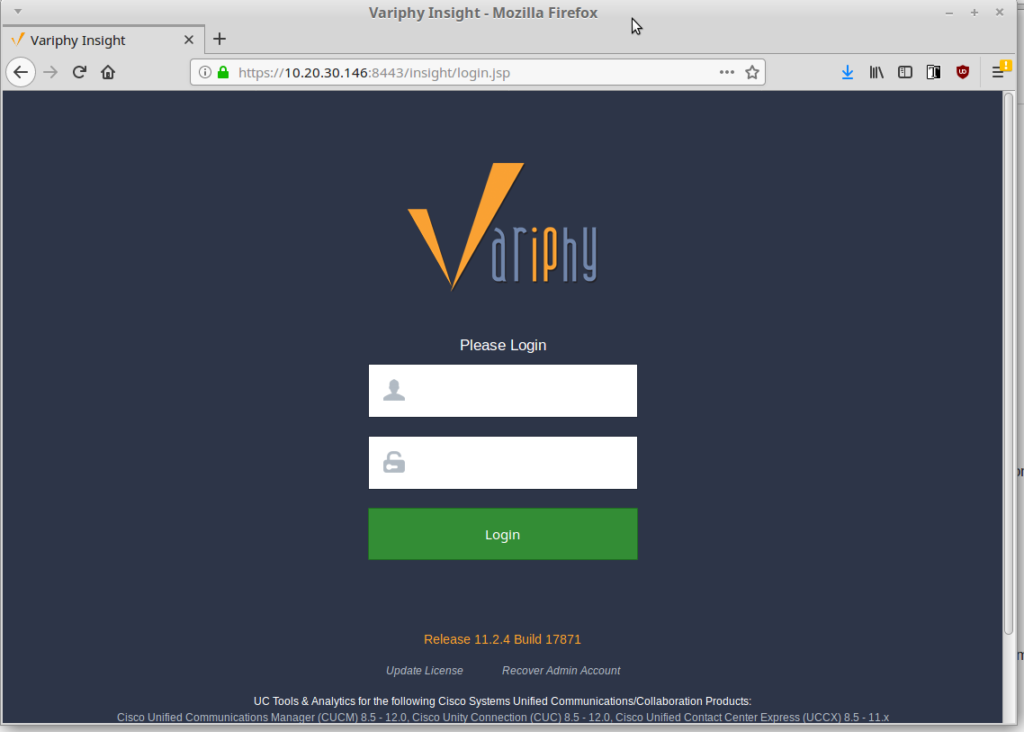
If your organization uses Active Directory Certificate Services (or a similar Public Key Infrastructure system), you can create a certificate that is signed by your organization’s root certificate. Since this root certificate can then be added (or already has been added) to your organization’s workstations by your system administrators, the above browser message should instead look like this:

Note about Multi-line Commands
Please note that this tutorial uses multi-line commands that you can copy and paste directly into your SSH prompt. A multi-line command is like a single one-line command spread across multiple lines using a backslash (\). Commands were written in this tutorial this way to make it more clear what each part of the command is doing.
In certain steps below, a multi-line command will be listed before the equivalent one-line command. You should be able to paste either into your SSH prompt.
Variphy Insight OVA HTTPS Certificate Signing and Configuration Steps
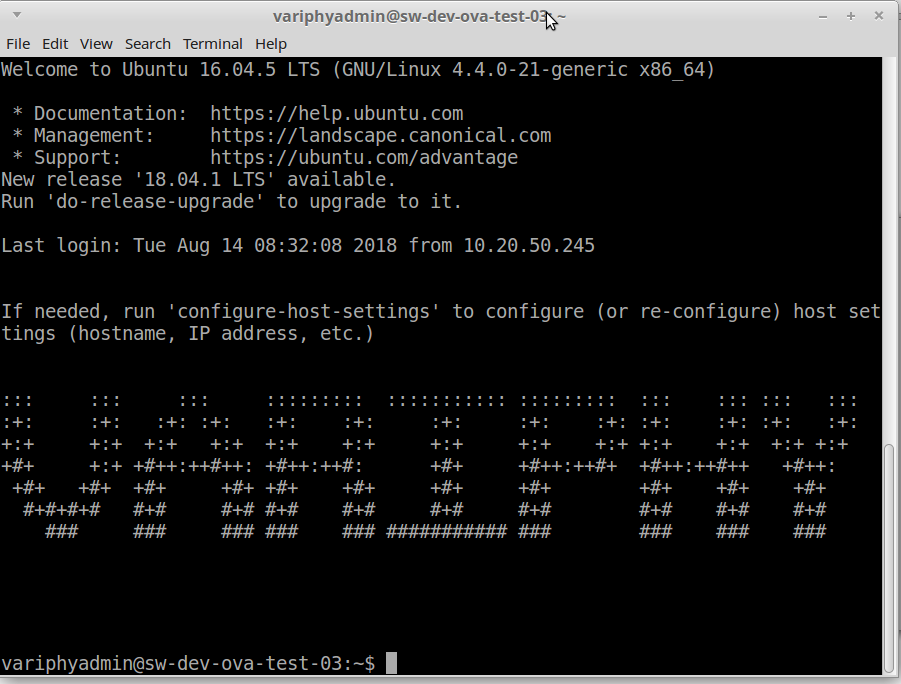
Connect to your Variphy Insight OVA deployment via SSH
- The default credentials are
- username:
variphyadmin - password:
V@riphy!!
- username:
- Example screenshot:
Archive the current keystore file
- Multi-line – Archive original keystore.pfx –to–> keystore.pfx.somenumber.original
sudo mv \
  -v \
  /opt/variphy/apps/insight/app/tomcat/keystore.pfx \
/opt/variphy/apps/insight/app/tomcat/keystore.pfx.$(date +%N).original- Line 1 – Run the
mv(move) command withsudo - Line 2 –
-vproduces verbose output - Line 3 – This is the ‘source’ of the move command, the current Variphy Insight keystore file
- Line 4 – This is the ‘destination’ of the move command. Here we’re renaming (archiving) keystore.pfx into keystore.pfx.somenumber.original. The part that says
$(date +%N)will produce a nanosecond string to make the archived keystore filename somewhat random (this prevents accidental overwrites)
sudo mv -v /opt/variphy/apps/insight/app/tomcat/keystore.pfx /opt/variphy/apps/insight/app/tomcat/keystore.pfx.$(date +%N).originalExample screenshot:

Create a new public/private key pair and store them in a new keystore
- Multi-line – Create a new keystore – Change the dname to the full qualified domain name.
sudo /opt/variphy/apps/insight/jre/bin/keytool \
  -genkeypair \
  -dname "CN=sw-dev-ova-test-03" \
  -alias tomcat \
  -storetype pkcs12 \
  -keyalg RSA \
  -keysize 2048 \
  -sigalg SHA256withRSA \
  -validity 3650 \
  -storepass changeit \
-keystore /opt/variphy/apps/insight/app/tomcat/keystore.pfx- Line 1 – Run the bundled keytool application using sudo
- Line 2 – The
-genkeypairargument tellskeytoolto create a new key pair - Line 3 – The
-dnameargument tellskeytoolthe distinguished name to use for the new key pair. You should change this value (afterCN=) to the fully qualified domain name of your server. - Line 4 – The
-aliasargument specifies the name of the alias under which the public/private key will be stored in the keystore. - Line 5 – The
-storetypeargument specifies the type of keystore we will use. We’re specifying PKCS#12 here. - Line 6 – The
-keyalgargument specifies the name of the algorithm to use for the key. We’re specifying RSA here. - Line 7 – The
-keysizeargument specifies the size of the key. We’re specifying a key size of 2048 bits. - Line 8 – The
-sigalgargument specifies which algorithm to use for the certificate signature. We’re specifying SHA-256 here. - Line 9 – The
-validityargument specifies the number of days that the key pair will be valid. We’re specifying 10 years here. - Line 10 – The
-storepassargument specifies the password to use to restrict access to the keystore. We will usechangeitfor this tutorial. Optional – Change this to something else - Line 11 – The
-keystoreargument specifies where we will put our new keystore. We’re going to create a newkeystore.pfxfile where Insight will expect it.
One-line – Create a new keystore –
Change the dname to the full qualified domain name.
sudo /opt/variphy/apps/insight/jre/bin/keytool -genkeypair -dname "CN=sw-dev-ova-test-03" -alias tomcat -storetype pkcs12 -keyalg RSA -keysize 2048 -sigalg SHA256withRSA -validity 3650 -storepass changeit -keystore /opt/variphy/apps/insight/app/tomcat/keystore.pfxExample screenshot:

List entries in newly-created keystore
- Multi-line – List keystore entries –
If you specified a value other thanchangeitfor the password in Step 3, use the same password here as well.
/opt/variphy/apps/insight/jre/bin/keytool \
  -list \
  -v \
  -storepass changeit \
  -storetype PKCS12 \
-keystore /opt/variphy/apps/insight/app/tomcat/keystore.pfx- Line 1 – Run the keytool application
- Line 2 – The
-listargument tells keytool we want to list the entries - Line 3 – The
-vargument tells keytool to give verbose output - Line 4 – The
-storepassspecifies the keystore password. If you specified a value other thanchangeitfor the password in Step 3, use the same password here as well. - Line 5 – The
-storetypeargument tells keystore that this is a PKCS#12 keystore - Line 6 – The
-keystoreargument specifies the keystore we are looking to read.
One-line – List keystore entries –
If you specified a value other thanchangeitfor the password in Step 3, use the same password here as well.
/opt/variphy/apps/insight/jre/bin/keytool -list -v -storepass changeit -storetype PKCS12 -keystore /opt/variphy/apps/insight/app/tomcat/keystore.pfx
Example screenshot:

Create a Certificate Signing Request (CSR)
- Multi-line – Create a CSR – Make sure to change options in this line to your current system – dname “CN=sw-dev-ova-test-03, OU=Information Technology, O=Variphy Inc., L=San Francisco, ST=California, C=US” \
sudo /opt/variphy/apps/insight/jre/bin/keytool \
  -certreq \
  -dname "CN=sw-dev-ova-test-03, OU=Information Technology, O=Variphy Inc., L=San Francisco, ST=California, C=US" \
  -ext "SAN=dns:sw-dev-ova-test-03,IP:10.20.30.146" \
  -keyalg RSA \
  -alias tomcat \
  -file /tmp/csr.pem \
  -storepass changeit \
-keystore /opt/variphy/apps/insight/app/tomcat/keystore.pfx- Line 1 – Run the keytool application with sudo
- Line 2 – The
-certreqargument tells keytool that we are looking to create a certificate signing request - Line 3 – The
-dnameargument tells keytool which distinguished name we want to use. You should change these values to match your environment.- CN = Common Name – this should be the fully qualified domain name of the server
- OU = Organizational Unit – specifies the division within an organization
- O = Organization – corporation, limited partnership, university, or government agency registered with some authority at the national, state, or city level
- L = City or Locality – usually denotes the city in which the organization is located
- ST = State – U.S. or Canadian State or Province name
- C = Country – the 2-character ISO format country code
- Line 4 – The
-extargument tells keytool we would like to add an extension to our CSR. This is due to needing to specify a Subject Alternative Name (SAN) for this CSR. In this tutorial, we are going to specify the fully qualified domain name of the server, as well as the server’s IP address. The certificate you receive back from your CA should be valid for both the domain name and the IP address of the server. Change these values to match your environment.- After
dns:you should put your server’s fully qualified domain name - After
IP:you should put your server’s IP address
- After
- Line 5 – The
-keyalgargument specifies the name of the algorithm to use for the key. We’re specifying RSA here. - Line 6 – The
-aliasargument specifies the name of the alias under which the public/private key can be found in the keystore. - Line 7 – The
-fileargument tells keytool where to write the resulting CSR file. This tutorial uses/tmp/csr.pem - Line 8 – The
-storepassargument specifies the password to use for accessing the keystore. If you specified a value other thanchangeitfor the password in Step 3, use the same password here as well. - Line 9 – The
-keystoreargument specifies the keystore we want to use to create this CSR.
One-line – Create a CSR –
Make sure to change options in this line to your current system – dname “CN=sw-dev-ova-test-03, OU=Information Technology, O=Variphy Inc., L=San Francisco, ST=California, C=US” \
sudo /opt/variphy/apps/insight/jre/bin/keytool -certreq -dname "CN=sw-dev-ova-test-03, OU=Information Technology, O=Variphy Inc., L=San Francisco, ST=California, C=US" -ext "SAN=dns:sw-dev-ova-test-03,IP:10.20.30.146" -keyalg RSA -alias tomcat -file /tmp/csr.pem -storepass changeit -keystore /opt/variphy/apps/insight/app/tomcat/keystore.pfx
Example screenshot:

List the Certificate Signing Request Contents
- Multi-line – List CSR Contents
/opt/variphy/apps/insight/jre/bin/keytool \
  -printcertreq \
  -v \
-file /tmp/csr.pem- Line 1 – Run the keytool application
- Line 2 – The -printcertreq argument tells keytool that we want to print the certificate request contents
- Line 3 – The -v argument specifies verbose output
- Line 4 – The -file argument specifies where to find our CSR file
One-line – List CSR Contents
/opt/variphy/apps/insight/jre/bin/keytool -printcertreq -v -file /tmp/csr.pem
Example screenshot:

Retrieve the Certificate Signing Request File from the Variphy Insight OVA Server
- You can copy the CSR from your SSH session. Print the CSR with the command:
cat /tmp/csr.pem - Then select the lines marked in red below and copy to your workstation’s clipboard

Alternatively, you can connect to the Variphy Insight OVA with an SFTP client, retrieve the file from
/tmp/csr.pem and open the file locally on your workstation. NOTE: Before you submit the certificate, it is recommended to confirm the contents in a free CSR viewer, such as https://www.entrust.net/ssl-technical/csr-viewer.cfm
Submit the Certificate Signing Request to your Certificate Authority
- At this point in the process, your organization’s Certificate Authority needs to review your CSR and respond with a signed public key certificate. Your organization may have a person or group that handles this process for you. You will just need to get the CSR to them.
- Alternatively, if you can access your organization’s Active Directory Certificate Services site directly, navigate to it in a web browser. The URL is usually of the form
http://active-directory-server/certsrv/- Click on the “Request a certificate” link

From the next screen, click on ‘submit an advanced certificate request’ link

Paste the CSR contents into the ‘Base-64-encoded certificate request’ text field on this screen. Then, change ‘Certificate Template’ to ‘Web Server’. Finally, click the ‘Submit >’ button.

From the “Certificate Issued” screen, select ‘Base 64 encoded’ and click the ‘Download certificate chain’ link. Your browser should download a ‘certnew.p7b’ file.

Upload this file to your OVA server, placing the file in the
/tmp directory: /tmp/certnew.p7b Import the signed public key certificate and chain into the keystore
- Instructions
- If you haven’t already, upload your signed public key certificate file to the
/tmpdirectory on the Variphy Insight OVA. We’ll use ‘certnew.p7b‘ for our certificate filename in the commands below. - Run either the multi-line or one-line command listed below.
- After executing the import command, you may see a prompt saying “
... is not trusted. Install reply anyway? [no]:“ - If you see this, type
yesand press enter to continue.
- After executing the import command, you may see a prompt saying “
- If you haven’t already, upload your signed public key certificate file to the
- Multi-line – Import Public Key Certificate and Chain into Variphy Insight Keystore –
If you specified a value other thanchangeitfor the password in Step 3, use the same password here as well.
sudo /opt/variphy/apps/insight/jre/bin/keytool \
  -import \
  -alias tomcat \
  -keystore /opt/variphy/apps/insight/app/tomcat/keystore.pfx \
  -storepass changeit \
-file /tmp/certnew.p7b- Line 1 – Call the keytool application with sudo
- Line 2 –
-importtells keytool that we’re importing a certificate chain - Line 3 –
-aliastells keytool into which keystore entry (i.e. private key) to import the signed public key certificate and chain - Line 4 –
-keystorespecifies the path to Variphy Insight’s keystore file - Line 5 –
-storepassspecifies the keystore password. If you specified a value other thanchangeitfor the password in Step 3, use the same password here as well. - Line 6 –
-filespecifies the certificate and chain file
One-line – Import Public Key Certificate and Chain into Variphy Insight Keystore – Lines highlighted below may need to be changed to match your system
sudo /opt/variphy/apps/insight/jre/bin/keytool -import -alias tomcat -keystore /opt/variphy/apps/insight/app/tomcat/keystore.pfx -storepass changeit -file /tmp/certnew.p7b
Example screenshots:


List the keystore entries to verify the import
- Multi-line – List Keystore Entries –
If you specified a value other thanchangeitfor the password in Step 3, use the same password here as well.
/opt/variphy/apps/insight/jre/bin/keytool \
  -list \
  -v \
  -storepass changeit \
  -storetype PKCS12 \
-keystore /opt/variphy/apps/insight/app/tomcat/keystore.pfx- Line 1 – Run the keytool application
- Line 2 – The
-listargument tells keytool we want to list the entries - Line 3 – The
-vargument tells keytool to give verbose output - Line 4 – The
-storepassspecifies the keystore password. If you specified a value other thanchangeitfor the password in Step 3, use the same password here as well. - Line 5 – The
-storetypeargument tells keystore that this is a PKCS#12 keystore - Line 6 – The
-keystoreargument specifies the keystore we are looking to read.
One-line – List Keystore Entries – Text highlighted below needs to be changed to match your system
/opt/variphy/apps/insight/jre/bin/keytool -list -v -storepass changeit -storetype PKCS12 -keystore /opt/variphy/apps/insight/app/tomcat/keystore.pfx
Example Screenshot:

Check Variphy Insight HTTPS Configuration
- Before we restart Variphy Insight, let’s check the
/opt/variphy/apps/insight/config/https_customizations.xmlfile. If you have never changed this file and usedchangeitas the keystore password (as was done in this tutorial), things should work just fine. But just in case, let’s take a look. - Make the file editable by the
variphyadminuser:
sudo chown variphyadmin:variphyadmin /opt/variphy/apps/insight/config/https_customizations.xml
- In an SFTP client, download the file located at
/opt/variphy/apps/insight/config/https_customizations.xml - Edit this file on your workstation to view its contents:

- Note that
keystoreFile(underlined in red) should bekeystore.pfx(which represents/opt/variphy/apps/insight/app/tomcat/keystore.pfxas we’ve used in this tutorial) - Note that
keystorePass(underlined in red) ischangeit(as we’ve used in this tutorial). If you used a different keystore password in Step 3, then you will need to change the text afterkeystorePass="here. - If you need to make any edits to this file, do so now. Then, upload the updated file to
/opt/variphy/apps/insight/config, making sure that the uploaded file is namedhttps_customizations.xml.
Restart the Variphy Insight service and check the HTTPS endpoint
- Restart the Variphy Insight service:
sudo service variphy restart - In a browser, navigate to
https://your-variphy-server:8443

Optional: Active Directory Root Certificate
- If your browser is now showing Variphy Insight as trusted (such as in the screenshot in Step 12), then you are done with these steps. But if for some reason your browser is still showing a “This site cannot be trusted” message, then your workstation may not know about your Active Directory server’s root certificate. Your IT Administration team should know whether your workstation should already have access to the Active Directory server’s root certificate. The following steps will walk you through manually adding the Active Directory root certificate to the Firefox browser. Please note that this process will need to be repeated on each workstation and browser that does not have the Active Directory root certificate, and it is therefore strongly recommended that your IT Administration team handle adding the Active Directory root certificate to your organization’s workstations.
- Download the Active Directory Root Certificate
- Navigate to your organization’s Active Directory server and click the ‘Download a CA certificate, certificate chain, or CRL’ link
- Download the Active Directory Root Certificate

- On the ‘Download a CA Certificate, Certificate Chain, or CRL’ screen, select ‘Base 64’ for the ‘Encoding method’, and then click the ‘Download CA certificate chain’ link. This should download a
certnew.p7bfile to your workstation.

Add Active Directory Root Certificate to Firefox
- In Firefox, go to the menu in the upper right corner and click ‘Preferences’ (alternatively, open a new tab and enter ‘about:preferences’ into the URL bar)
- Next, click the ‘Privacy & Security’ tab.
- Scroll down to the bottom of the page and you should see a ‘Certificates’ section with a button that says ‘View Certificates’. Click the ‘View Certificates’ button.
- From Firefox’s ‘Certificate Manager’ dialog, click the ‘Import…’ button

- Select the
newcert.p7bActive Directory CA chain file you downloaded from Active Directory a few steps earlier, and then click the ‘Open’ button. - From the ‘Downloading Certificate’ dialog, select ‘Trust this CA to identify websites’ and click the ‘OK’ button.

- At this point, your Active Directory root certificate should now be trusted by Firefox.