Applies to:
- Webex Contact Center users managing or customizing reporting dashboards and data labels.
- IT admins, report designers, or anyone tailoring reporting terminology to match internal business language.
Common Causes or Issues
- You want to customize default Webex naming conventions (like “Queue Name”) to match internal terminology.
- You want to abbreviate long labels for space-saving in widgets.
- You need reports and dashboards to be easier to interpret for end users.
Interactive Walkthrough
- How to Add or Edit a Label Set
- How to Apply Custom Labels to Detail Column Type
- How to Apply Custom Labels to Search Criteria Types
- How to Apply Custom Labels to Grouping Types
- How to Apply Custom Labels to Call Statistic and Scenario Types
- How to Set User Default Label Set
- How to Apply a Custom Label Set to a Widget
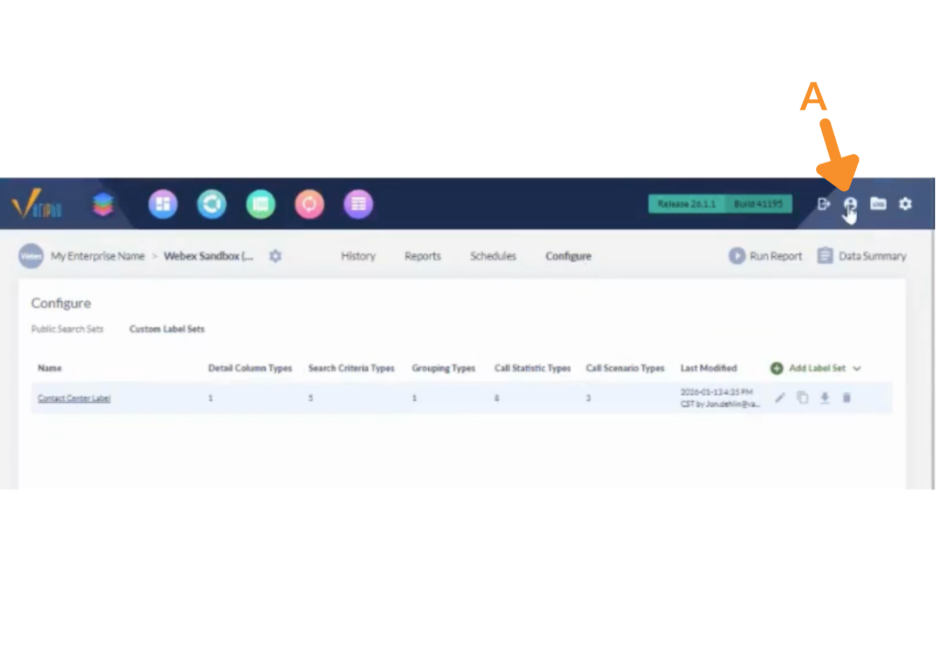
How to Add or Edit a Label Set
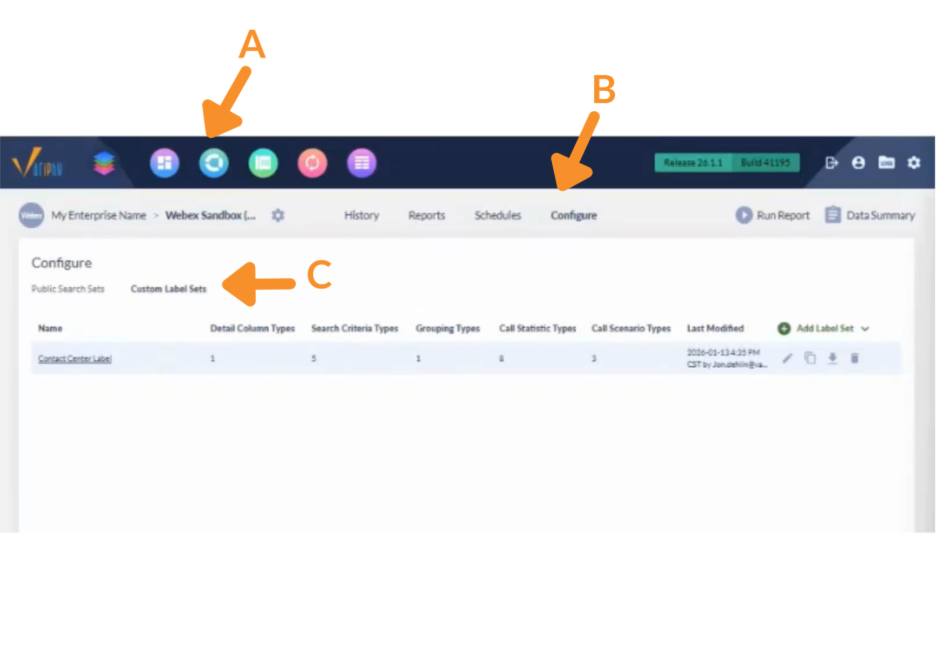
1. Access Custom Label Sets.
A. In the Webex Contact Center feature, go to Reporting.
B. Select Configure.
C. Navigate to Custom Label Sets.
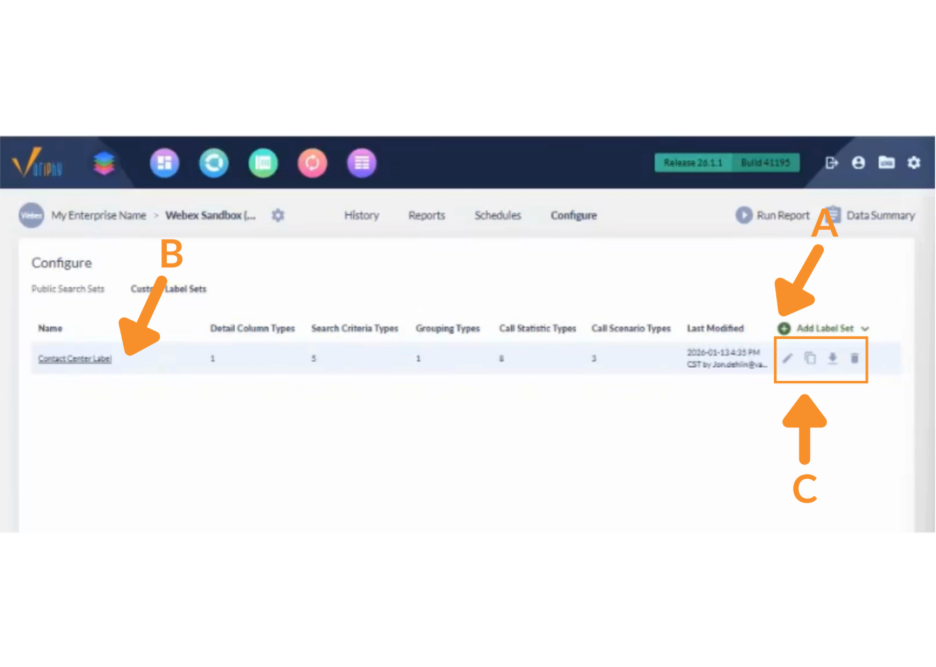
2. Add or Edit a Label Set
A. To add a new label set:
- Click Add Label Set.
- Enter a name for the label set (for example, Contact Center Labels).
B. To modify an existing label set, select the label set name from the list.
C. For an existing label set, you can also choose to:
- Edit: Update any existing label mappings.
- Copy: Duplicate the label set to use as a starting point for a new one.
- Download: Export the label set for documentation or review.
- Delete: Remove label sets that are no longer needed.
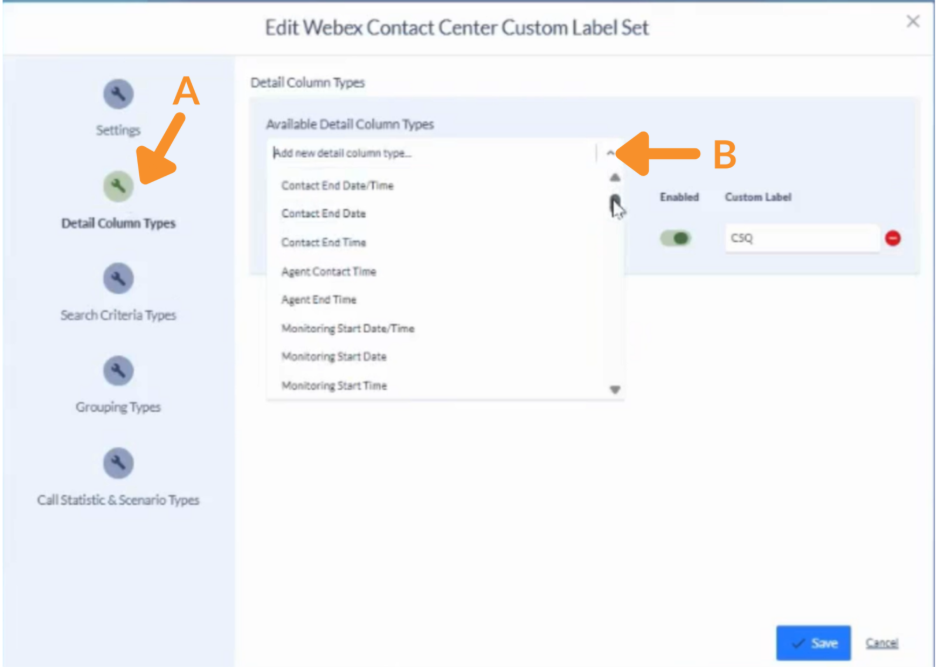
How to Apply Custom Labels to Detail Column Type
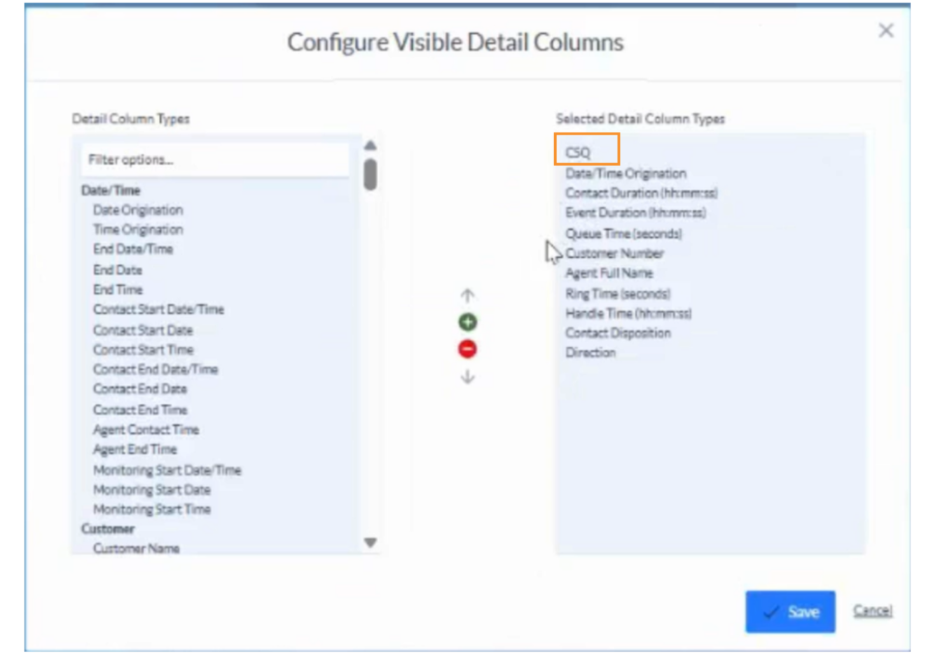
A. Select Detail Column Types.
B. From the Available Detail Column Types dropdown, choose the columns you want to customize (for example: Queue Name, Agent Name, or Monitoring Start Date).
C. Click the green + Add Detail Column Type.
D. Toggle the Enabled column to On.
E. Enter your preferred custom label (e.g., rename “Queue Name” to “CSQ”) and click Save.
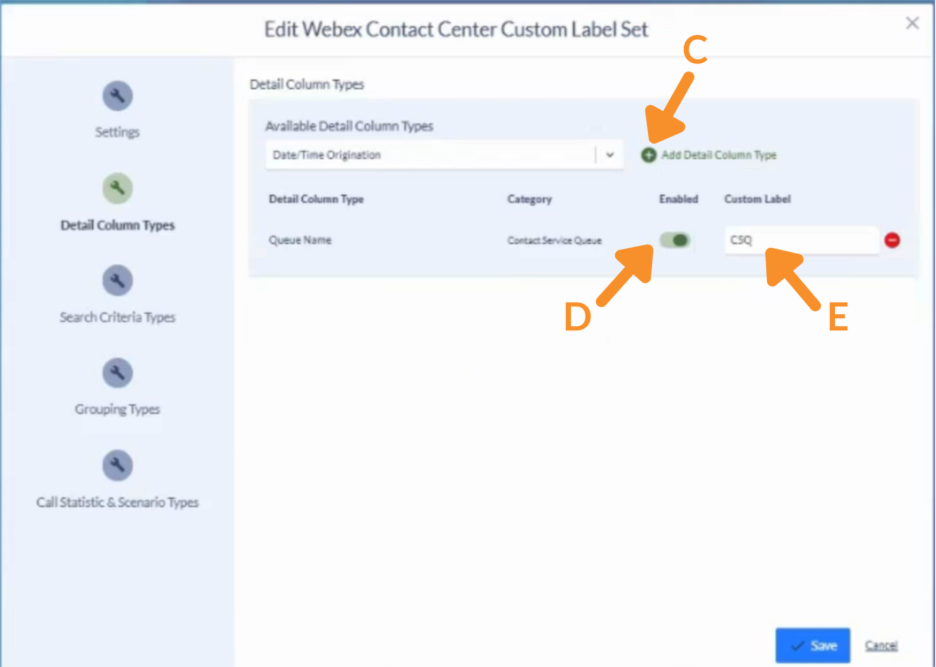
Custom labels appear across reports, history lookups, and widgets. Hovering over a label reveals the original name for clarity. In this example, Queue Name is now displayed as CSQ.

How to Apply Custom Labels to Search Criteria Types
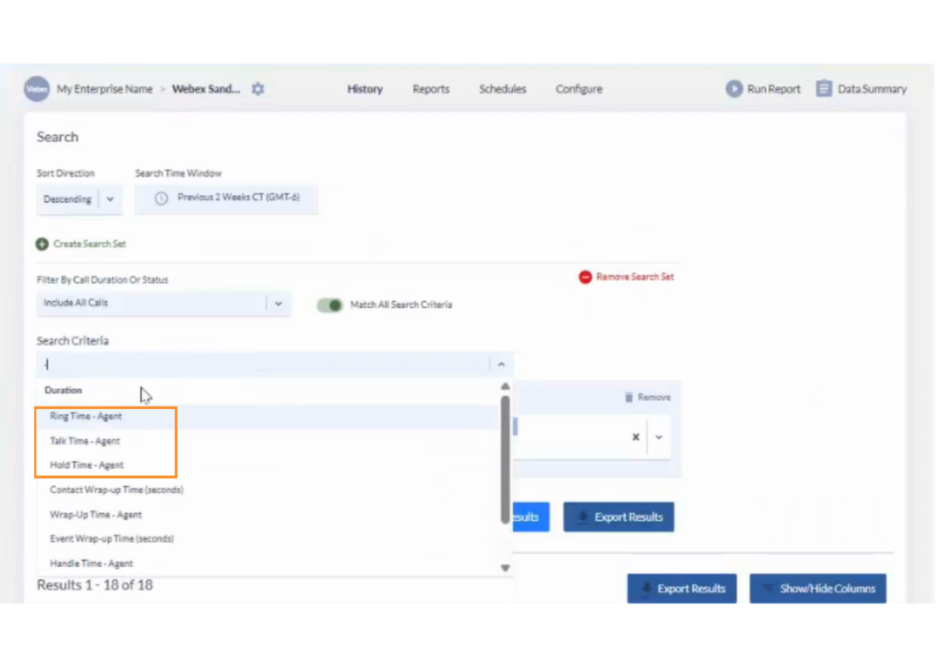
A. Select Search Criteria Types.
B. From the Available Search Criteria Types dropdown, choose one or more criteria (for example: Agent Handle Time, Agent Ring Time, or Agent Talk Time) and click the green + Add Detail Column Type.
C. Toggle the Enabled column to On.
D. Enter the new custom label (e.g., “Agent Handle Time” → “Handle Time – Agent”) and click Save.

Renamed search criteria appear in filters, dropdowns, and search bars throughout the application.
How to Apply Custom Labels to Grouping Types
A. Navigate to Grouping Types.
B. From the Available Grouping Types dropdown, select the grouping type you want to customize and click the green + Add Detail Column Type.
C. Toggle the Enabled column to On.
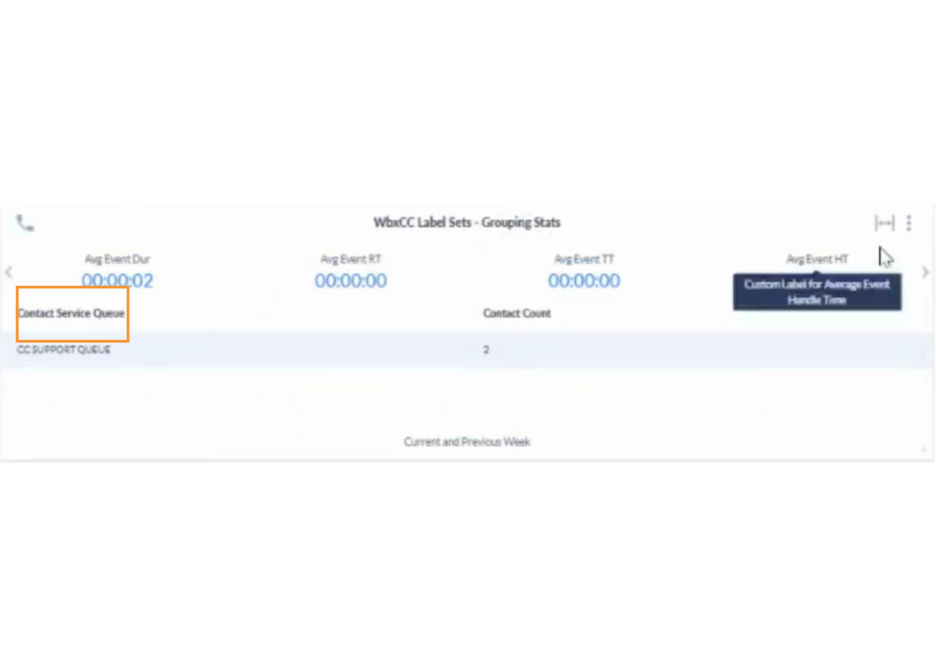
D. Enter a new label (e.g., “CSQ Name” → “Contact Service Queue”) and click Save.
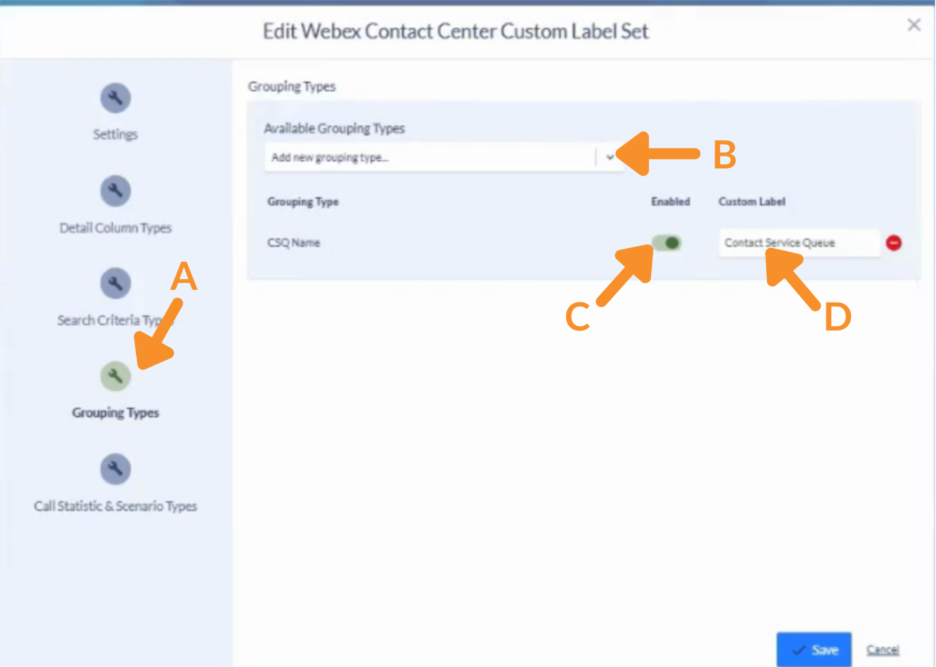
Custom grouping labels are reflected immediately on dashboards and in widgets once the label set is active.
How to Apply Custom Labels to Call Statistic and Scenario Types
A. Navigate to Call Statistic & Scenario Types.
B. To customize:
- Call Statistic Type: In the Available Call Statistic Type dropdown, choose a call statistic type.
- Scenario Type: Scroll to the Call Scenario Types section and select an option from that dropdown.
C. Toggle the Enabled column to On.
D. Enter the preferred custom label and click Save.
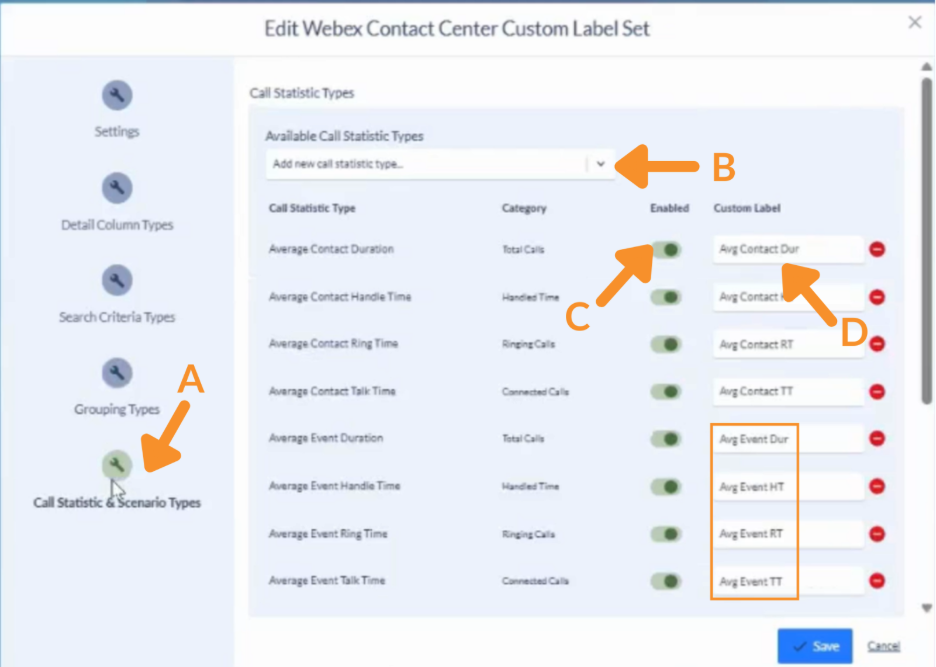
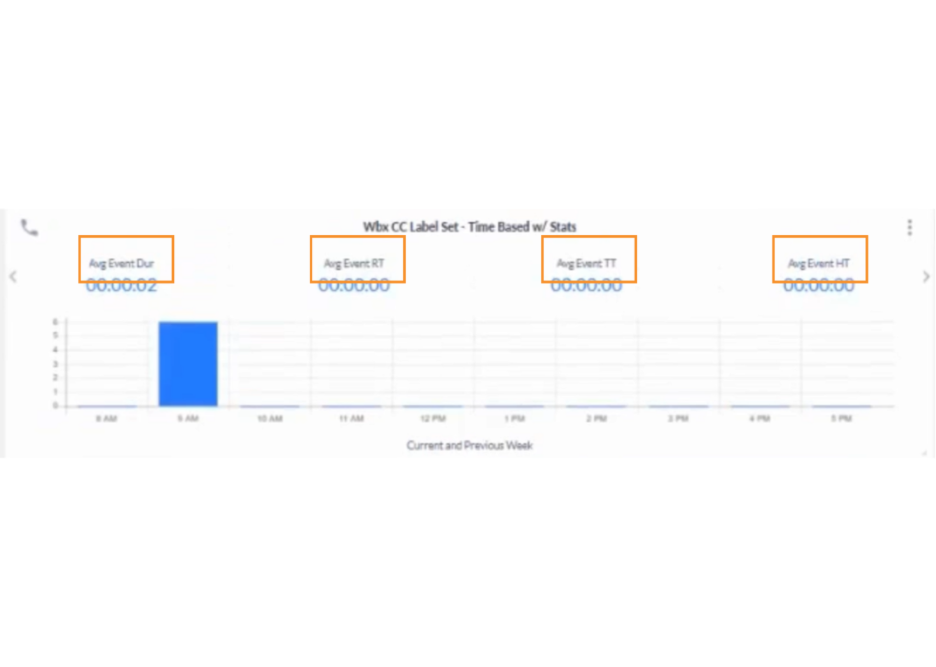
Custom labels help conserve space in widgets.
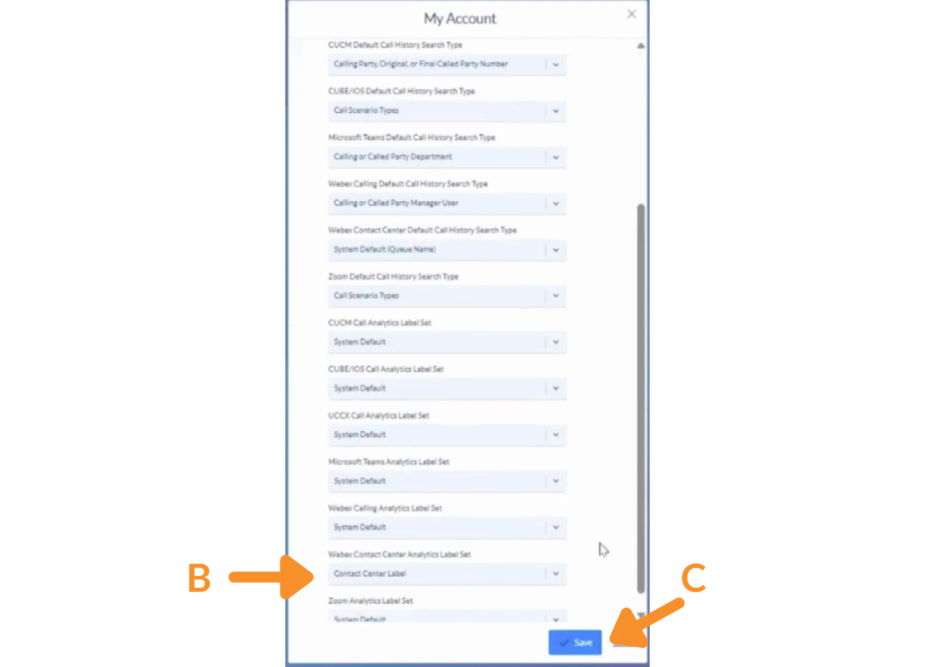
How to Set User Default Label Set
A. Click the Profile icon in the top-right corner of the application.
B. In the My Account window, locate the dropdown for Webex Contact Center Analytics Label Set and choose your desired label set.
C. Click Save.
How to Apply a Custom Label Set to a Widget
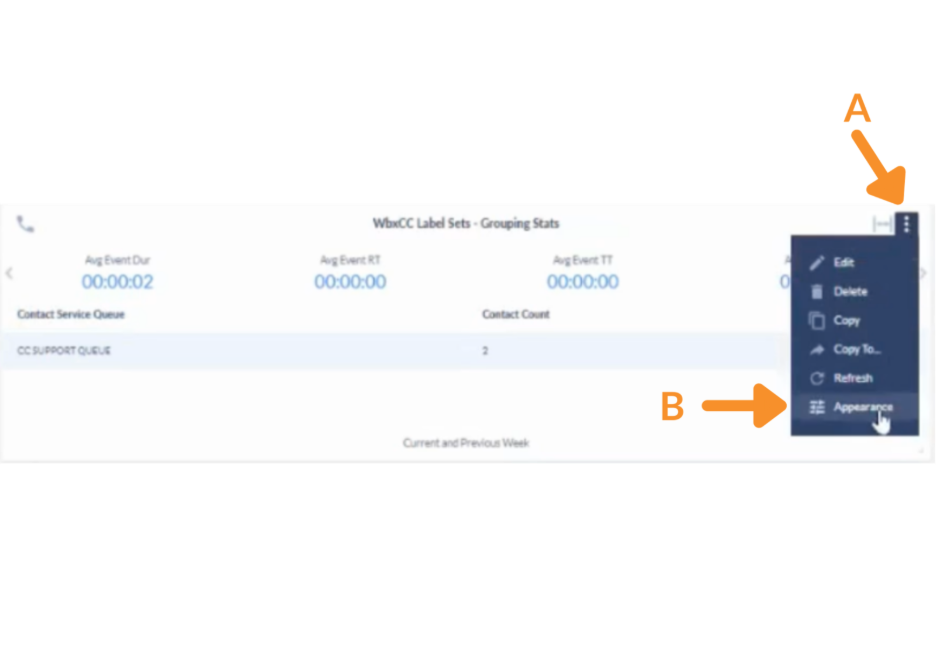
A. On the widget, click the three-dot menu in the top-right corner.
B. Select Appearances.
C. In the Widget section, locate the Webex Contact Center Label Set dropdown and select System Default or a specific custom label set.
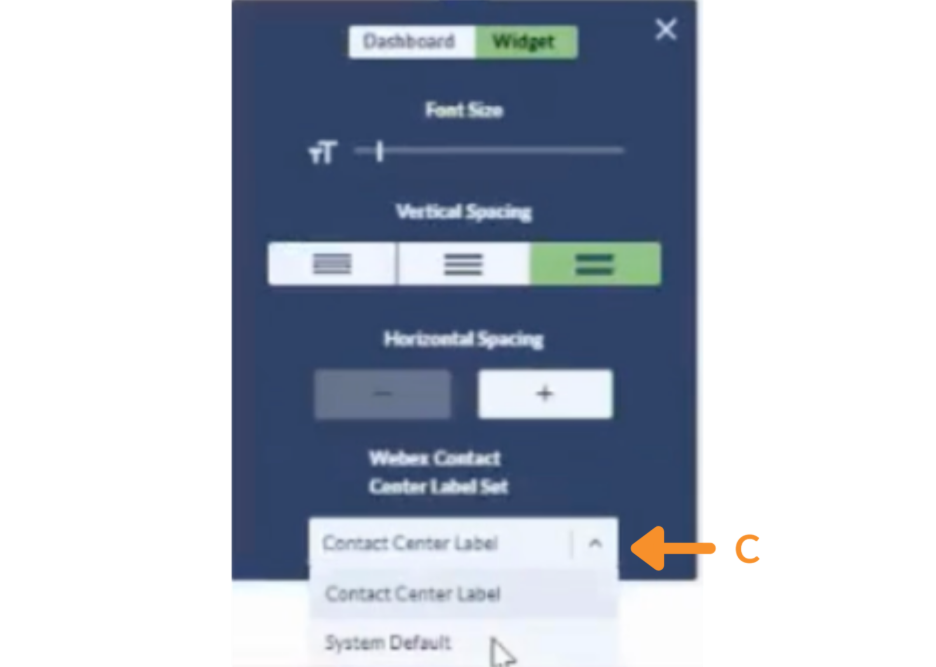
Each widget can display a different label set, allowing side-by-side comparisons or audience-specific labeling within the same dashboard.
Still Need Help?
Email our support team at support@variphy.com or click the button below to access our ticket portal.
Please provide details about your question or issue, including any applicable screenshots, reports, or Variphy application log files.