Applies to:
- System administrators managing Webex and Variphy integration.
- IT professionals configuring service accounts for API access.
- Organizations using Variphy for Webex Calling or Webex Contact Center analytics.
Common Causes/Issues:
- You are setting up a Webex user account to allow Variphy to access call data.
- Webex Contact Center analytics are not available due to missing licenses or roles.
- You are configuring or troubleshooting CDR data sync in Variphy.
How to Set Up Webex Integration in Variphy
1. Configure the Webex User Account in Control Hub.
Variphy requires a Webex user to connect to the Webex API. You can use an existing user, although Cisco recommends creating a new user to act as a service account.
- In Control Hub, go to the Management section and click Users.
- Select the user you want to configure.
- Under the Summary tab, click Administrator Roles.
- Assign the following roles:
- Read-only admin (Full admin role is also acceptable).
- Webex Calling Detailed Call History API access.
Note: You cannot assign roles to the user you are logged in as, even if you’re a full admin.
Note: To establish the Contact Center webhook connection and enable real-time widgets, customers must first authorize with a full admin account and create at least one real-time widget (either Real-Time Agent or Real-Time CSQ). This step is required to initiate the webhook subscription. Once the webhook is successfully created, customers can reauthorize with a read-only account for ongoing access.
2. Configure the Webex Contact Center Account (If Applicable).
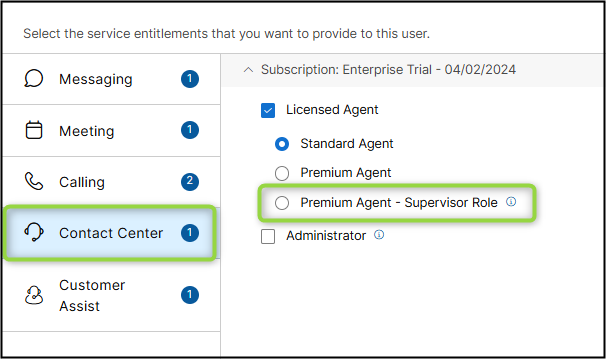
If utilizing Variphy’s Webex Contact Center Analytics, your Webex Calling user must also have a Webex Contact Center license to communicate with the Contact Center APIs.
In addition to the Webex User for API access, Webex Contact Center also requires that same user to have a Webex Contact Center agent license of Premium Agent – Supervisor Role.
If you’re using Webex Contact Center Analytics in Variphy:
- In the Summary tab under Licenses, click Edit License.
- Under the Contact Center section, assign the following:
Note: You cannot assign roles to the user you are logged in as, even if you’re a full admin.
3. Add Your Webex Account to Variphy.
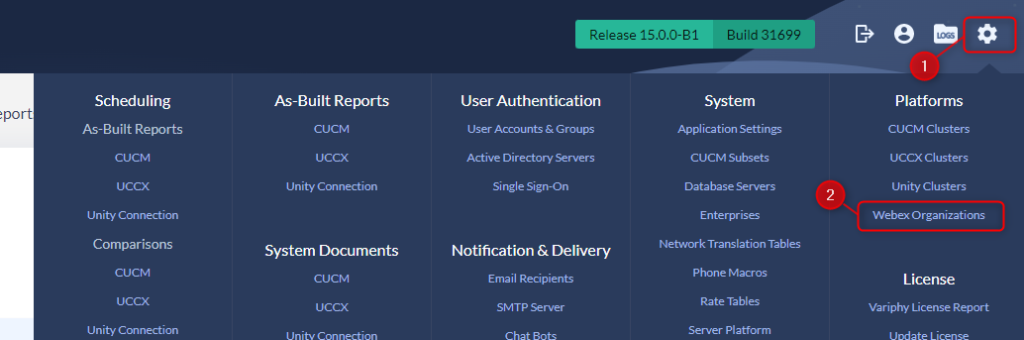
1. Log in to Variphy.
2. Hover over the Setup icon in the top right and click Webex Organizations.
- Only available to system administrators with Webex Calling licensed.
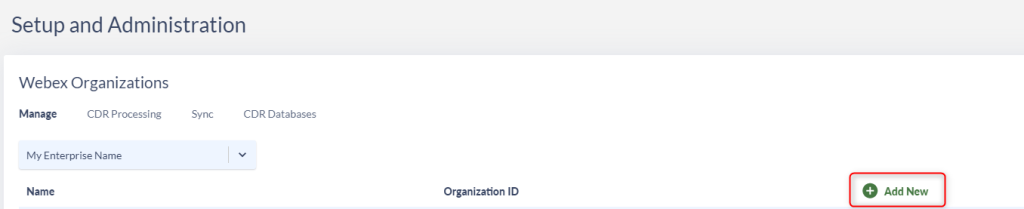
3. Click Add New.
4. In the configuration modal:
A. Name your Webex Organization.
B. Assign it to an Enterprise Group.
C. Leave the Webex Calling CDR Base API URL to Default or change it based on your Webex organization’s requirements.
D. Leave the Webex Contact Center CDR Base API URL as us1 or change it based on your Webex organization’s requirements.
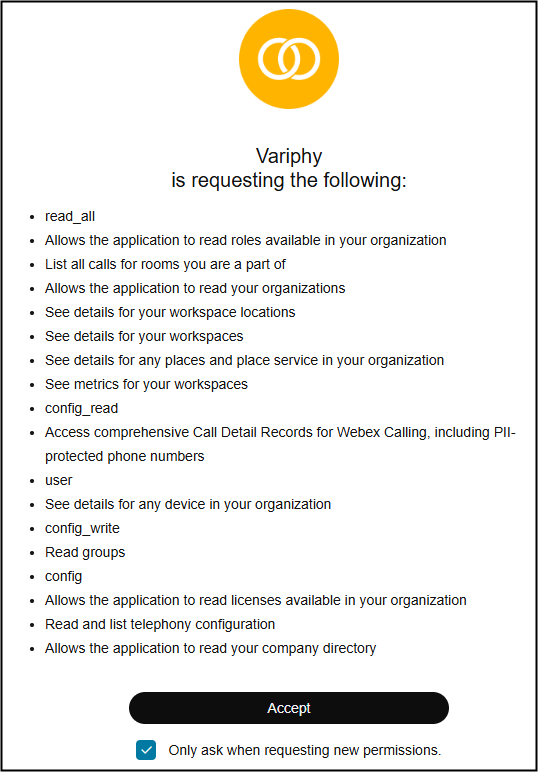
E. Click Authorize Variphy App and accept permissions.
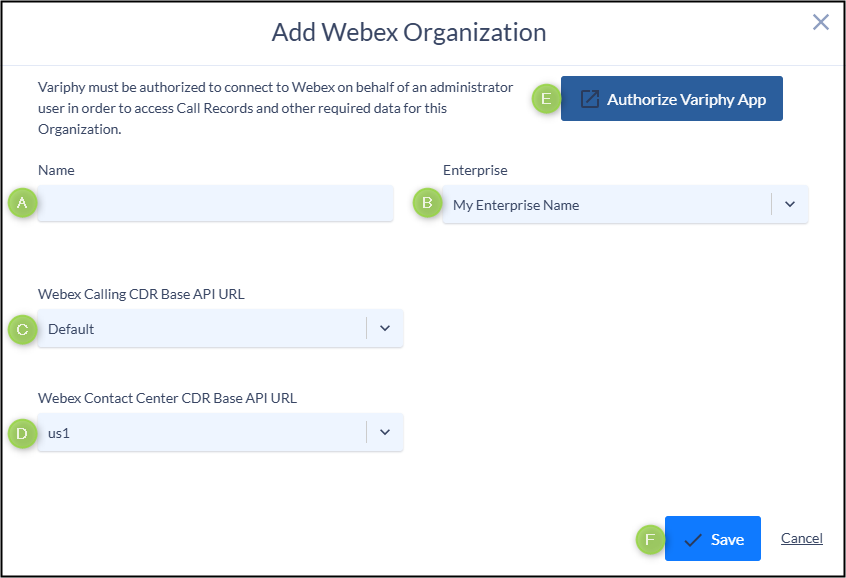
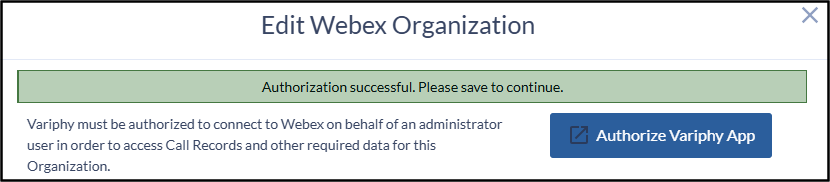
F. Click Save.
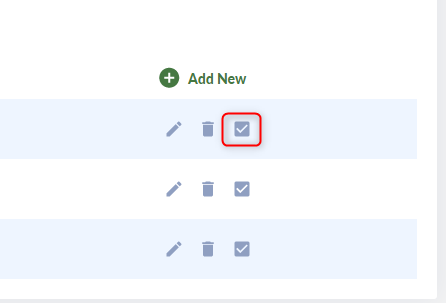
G. Check the box next to your organization and click Organization Check.
H. Confirm license validity for Webex Calling and Contact Center.
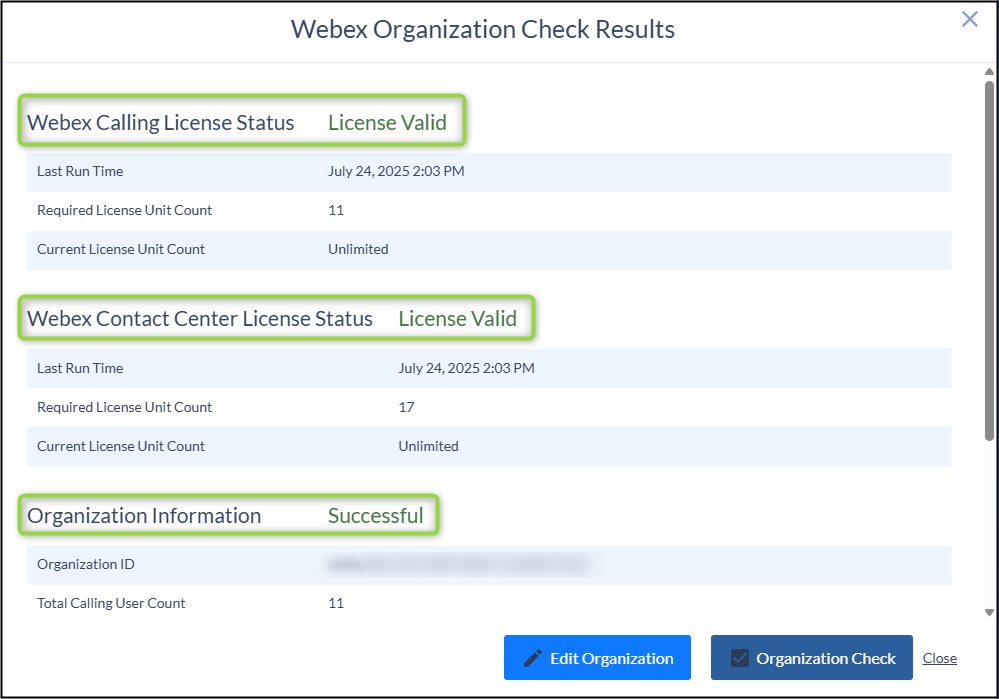
I. Click Close.
4. Configure CDR Processing.
1. Navigate to the CDR Processing menu. You will see one entry for each type of Webex Product you are licensed for (Webex Calling, Webex Contact Center).

Note: You will need to repeat the following steps for each Webex product you are licensed for.
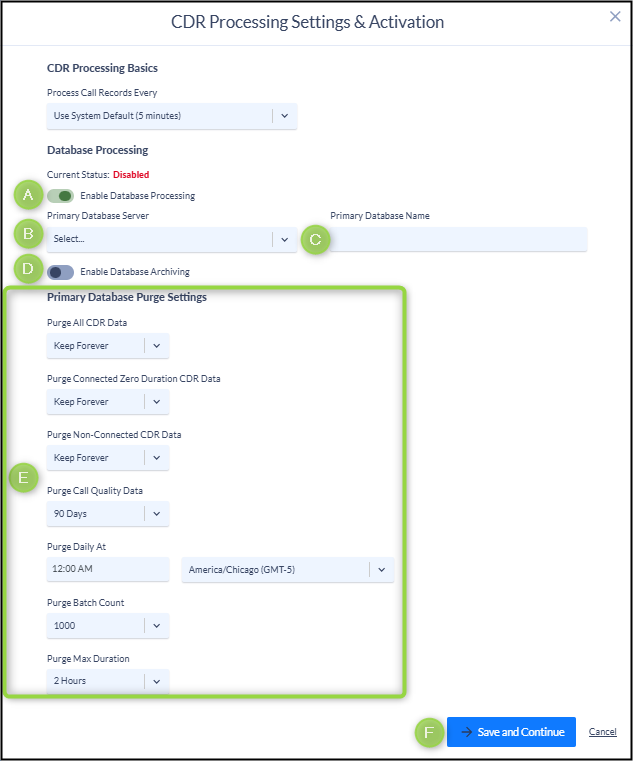
2. Click the gear icon to enter the configuration menu.
- Toggle Enable Database Processing to on.
- Select your SQL Server in the Primary Database Server dropdown.
- Enter the Primary Database Name (no spaces).
- (Optional if Licensed) Enable Database Archiving.
- Set Database Purge Settings per your company’s requirements.
- Click Save and Continue.
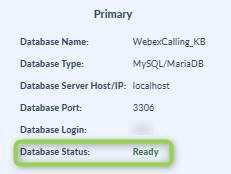
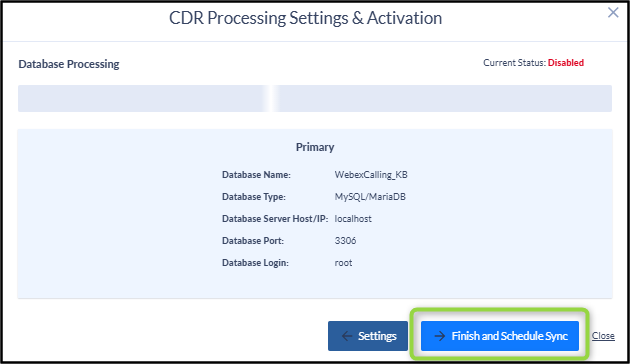
3. On the next screen, click Create Database, wait for it to be “Ready,” then click Activate.
4. Click Finish and Schedule Sync. There is no need to wait for the sync to finish; the initial sync may take some time during first setup.
5. Schedule Your Automatic Data Sync.
Scheduled Syncs are used to pull Webex Organization metadata into the Variphy database for reporting. Unlike call data, which is pulled on the CDR Processing Schedule, metadata includes info like Webex Calling Users, Groups, Departments, and Queues.
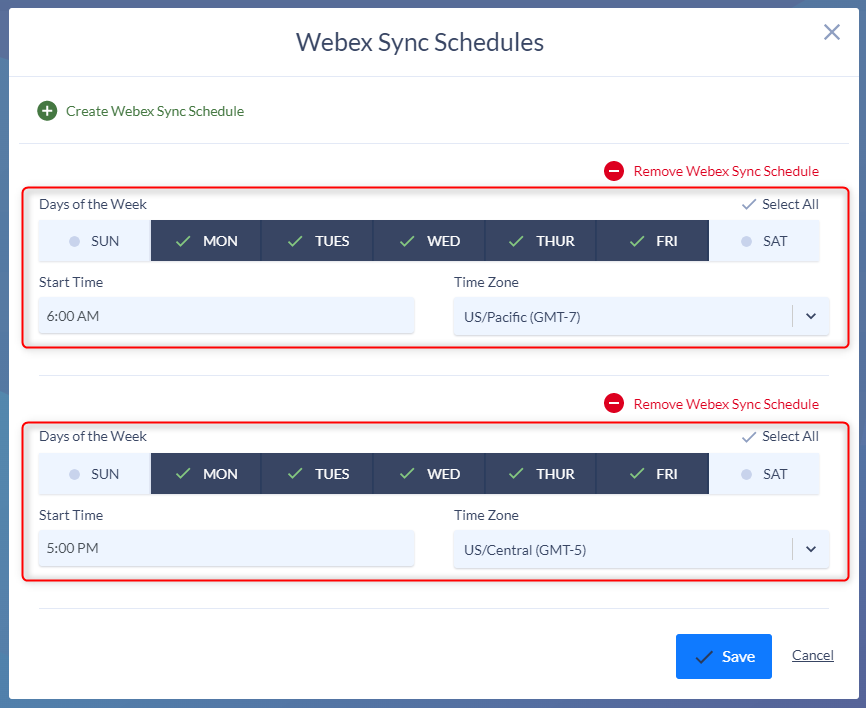
1. Go to Create Webex Sync Schedule.
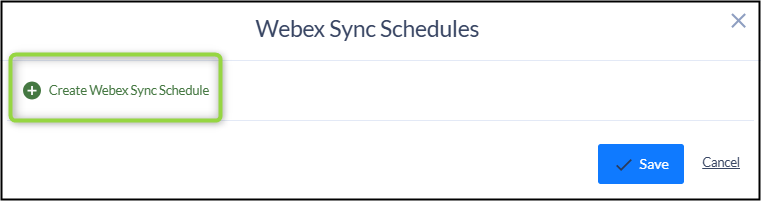
2. Select the days of the week, start time, and time zone for when the sync should run.
- If you need to create more than one sync schedule, such as in environments with frequent user changes, click Create Webex Sync Schedule again to add additional schedules.
3. Click Save.
In the example below, I am running a sync twice a day, once at 6:00 AM and again at 5:00 PM Monday through Friday.
Your Webex Organization setup is now complete. Be sure to repeat the Configure CDR Processing steps for each Webex product type you plan to integrate with Variphy.
Still Need Help?
Email our support team at support@variphy.com or click the button below to access our ticket portal.
Please provide details about your question or issue, including any applicable screenshots, reports, or Variphy application log files.