Applies to:
- Variphy Cloud users (technical and non-technical).
- System administrators configuring report delivery.
Common Causes or Issues
- Need to automate report delivery to external systems.
- Requirement for secure file transfer of reports.
- Centralizing report storage outside of Variphy.
Interactive Walkthrough
How to Configure and Use FTP/SFTP Report Delivery in Variphy Cloud
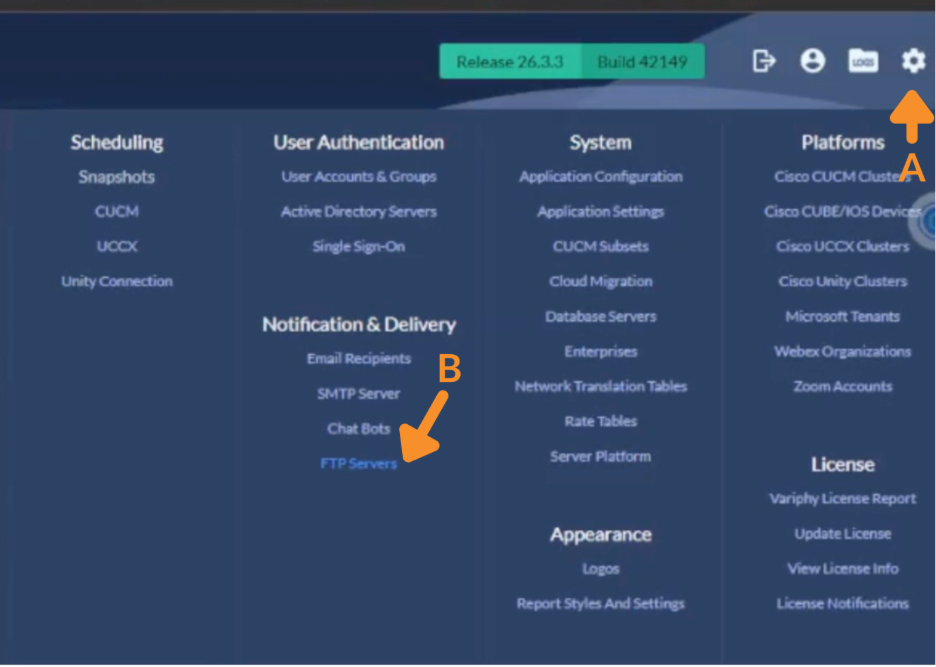
1. Access FTP Server Settings.
A. Click the Settings (gear icon).
B. Navigate to Notification & Delivery > FTP Servers.
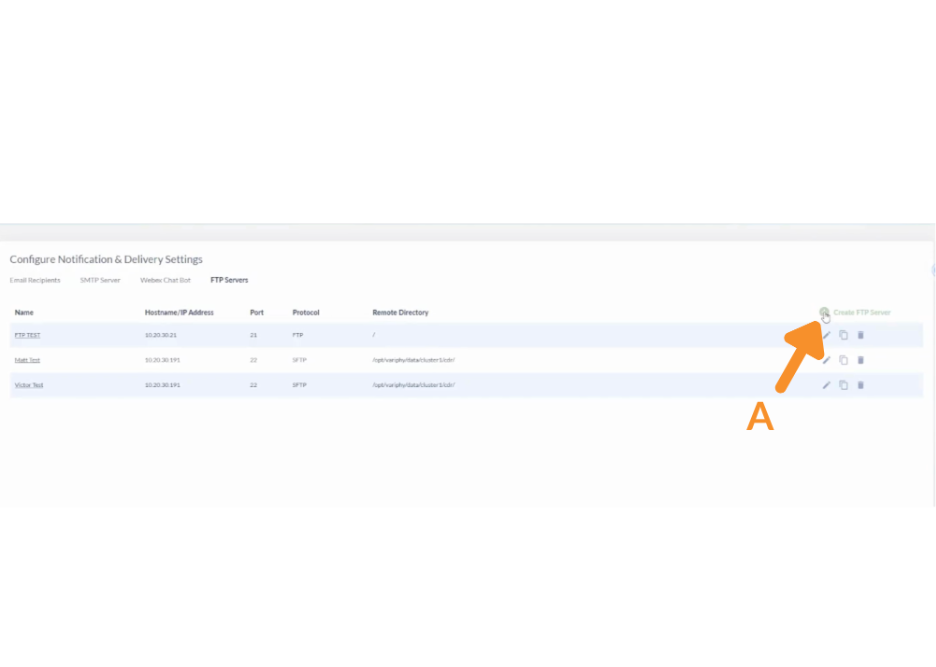
2. Create a New FTP/SFTP Server.
A. Click Create FTP Server (+).
B. Enter the following details:
- Name (friendly identifier).
- Hostname or IP Address.
- Port.
- FTP: 21.
- SFTP: 22.
- Username and Password.
- Remote Directory Path.
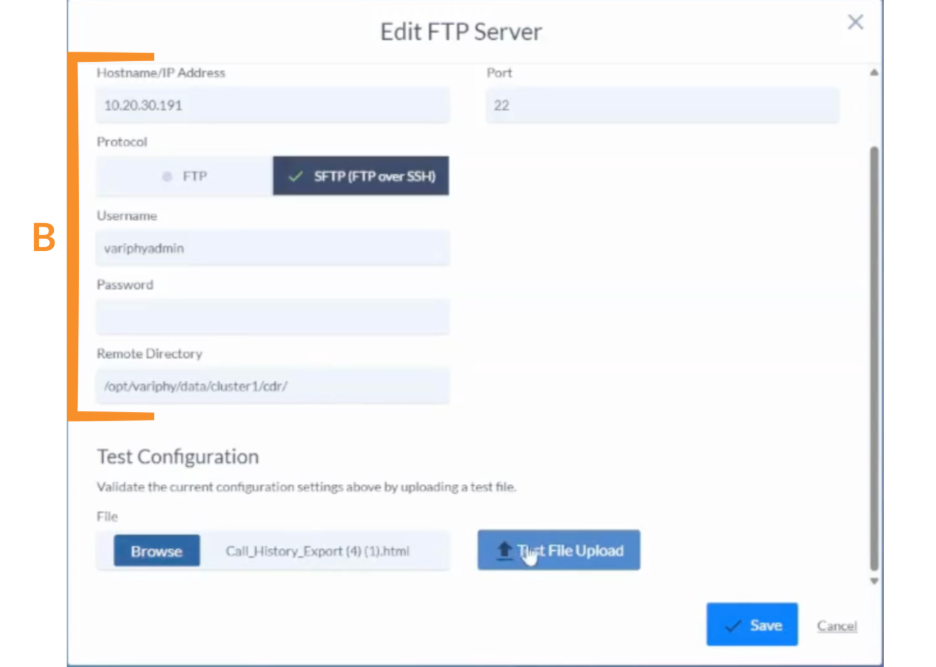
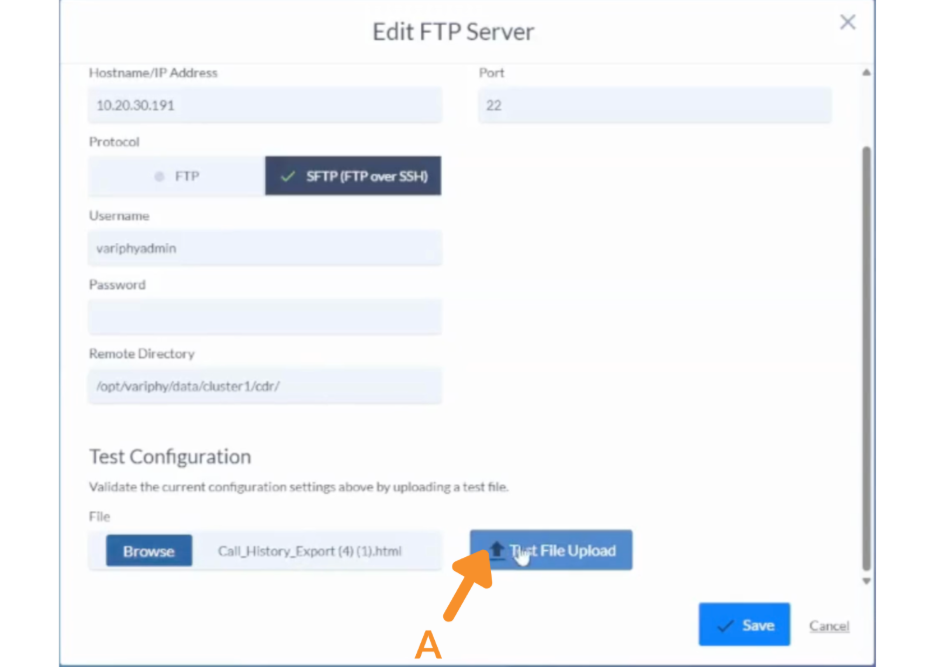
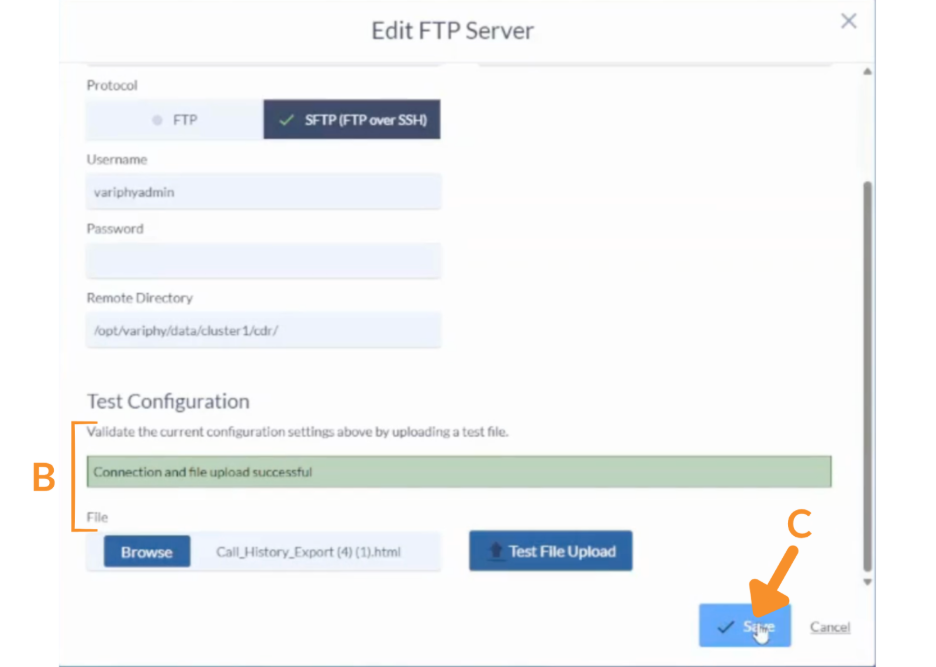
3. Test the Connection.
A. Use the Test option to upload a sample file.
B. Confirm a successful transfer message. If the test fails, verify credentials and connectivity.
C. Click Save to store the FTP/SFTP server configuration .
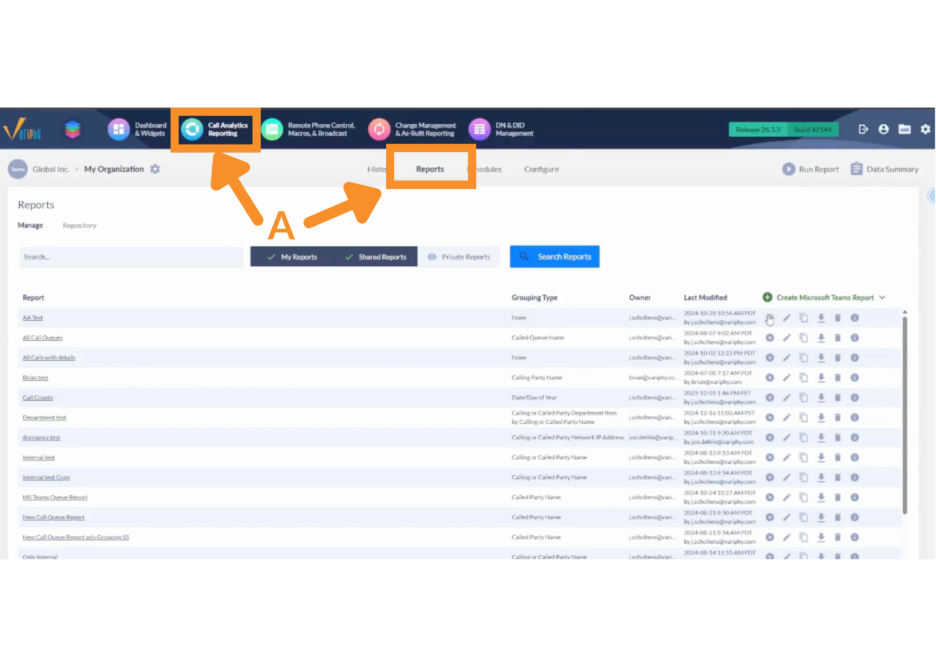
4. Run a Report with FTP/SFTP Delivery.
A. Navigate to Call Analytics > Reports.
B. Click the Run (play) icon on a report.
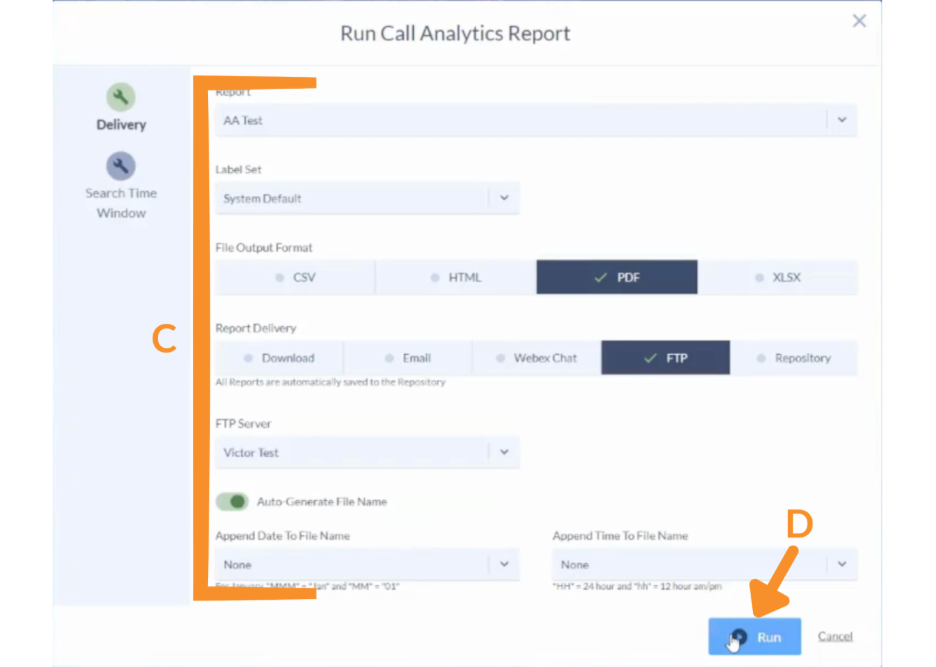
C. Configure delivery:
- Select output format (e.g., PDF).
- Choose FTP as the delivery method.
- Select your configured server.
D. Click Run.
The report will be delivered to the specified FTP/SFTP location.
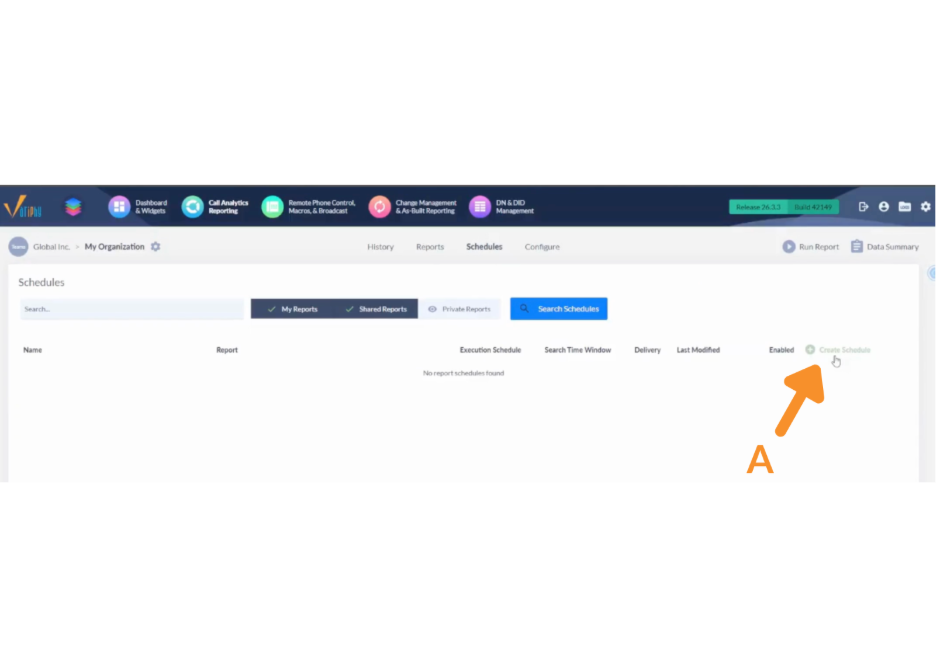
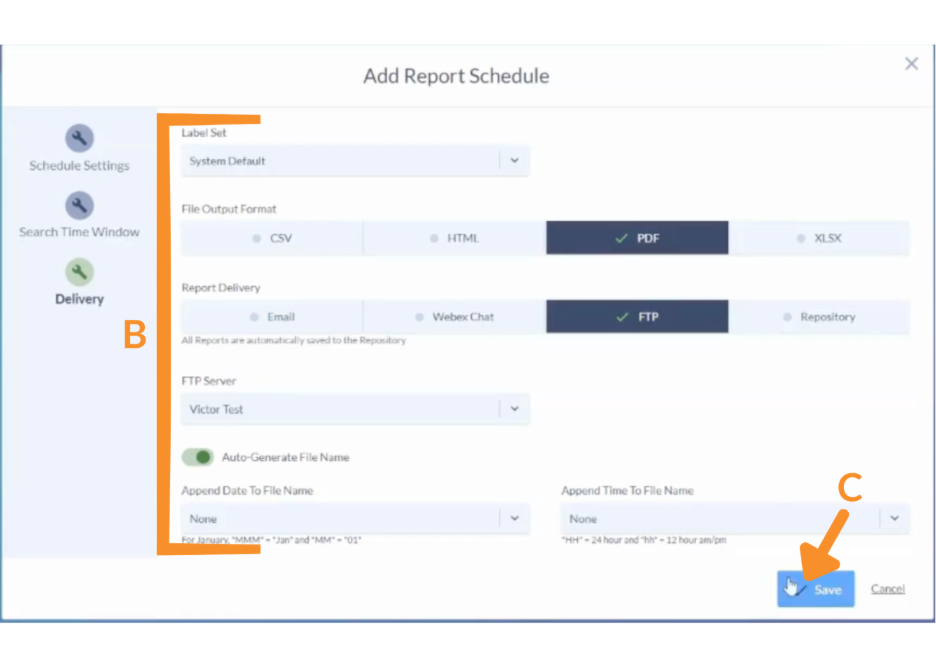
5. Schedule Reports with FTP/SFTP Delivery.
A. Click Create Schedule.
B. Configure report parameters:
- Time range.
- Filters.
- Select FTP.
- Choose the desired server.
C. Click Save.
Reports will now be automatically delivered based on the schedule.
Still Need Help?
Email our support team at support@variphy.com or click the button below to access our ticket portal.
Please provide details about your question or issue, including any applicable screenshots, reports, or Variphy application log files.