Applies to:
- Variphy users with Webex Calling integrations.
- Administrators managing virtual lines through Variphy’s provisioning interface.
- Teams responsible for creating, updating, or decommissioning virtual lines in Webex Calling.
Common Causes or Issues
- Provision new virtual lines in Webex Calling directly from Variphy without switching to Control Hub.
- Update virtual line settings — including display name, extension, phone number, and caller ID — from a single interface.
- Manage voicemail configuration and passcodes as part of the provisioning workflow.
- Delete virtual lines that are no longer needed and verify removal through the Edit job lookup.
Interactive Walkthrough
How to Create, Edit, and Delete Virtual Lines
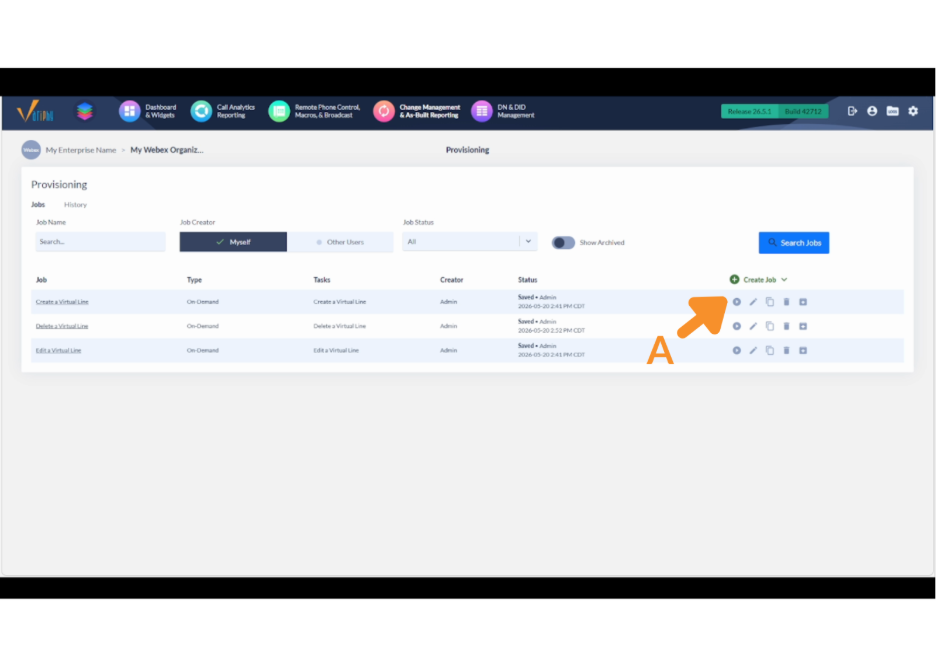
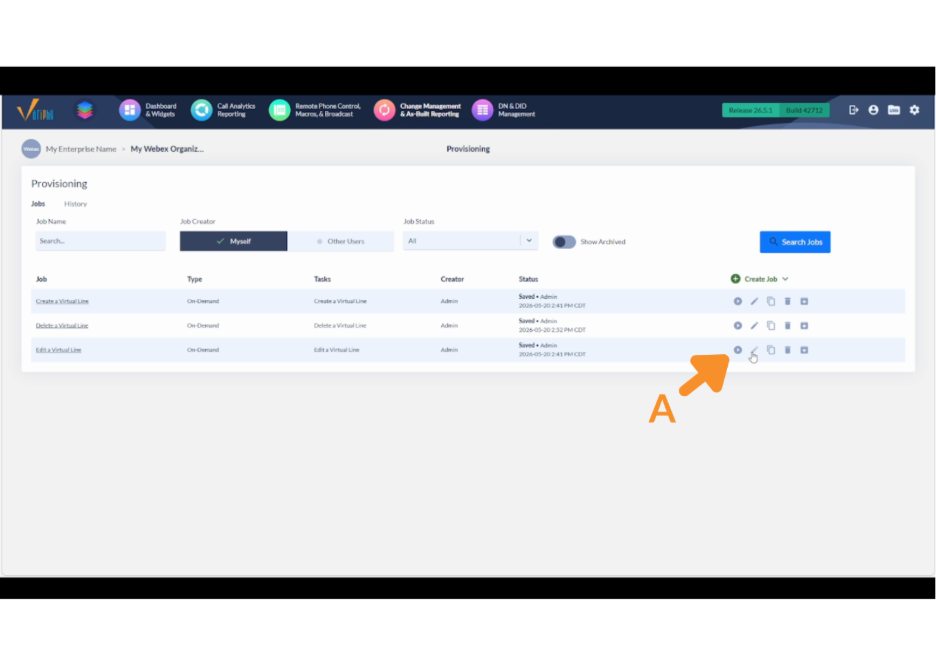
1. Create a Virtual Line.
A. In the Variphy provisioning interface, locate the Create a Virtual Line and click the play button to run.
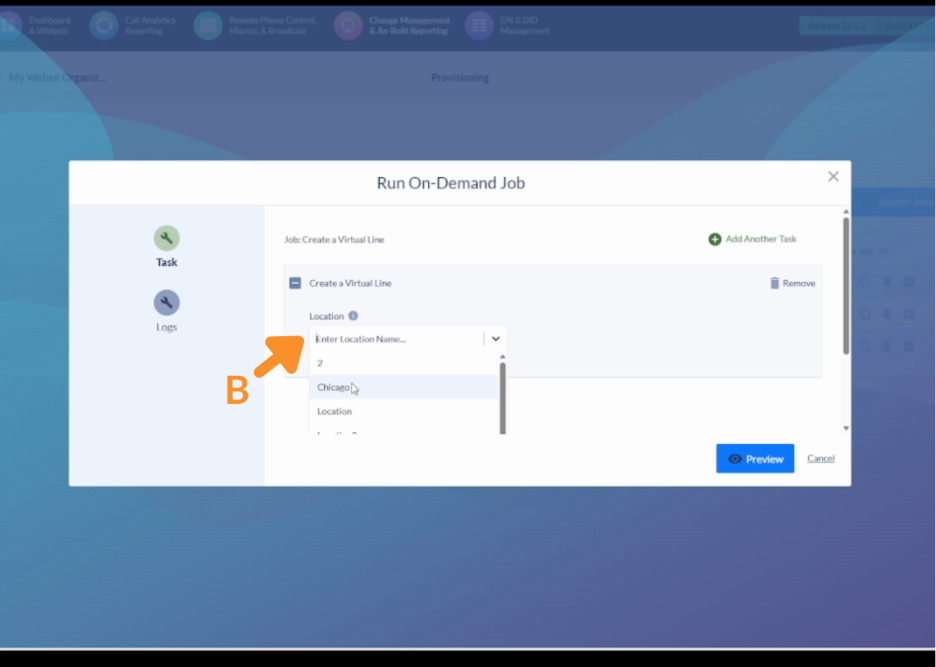
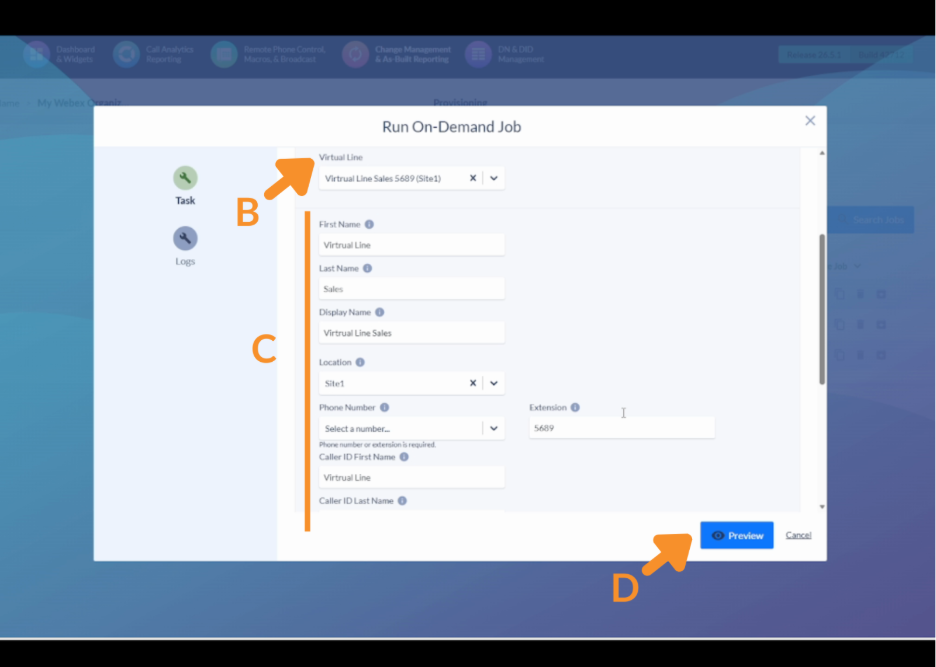
B. In the Location field, type or select the location for the new virtual line. This field is required.
- Typing filters the list; select the matching location name.
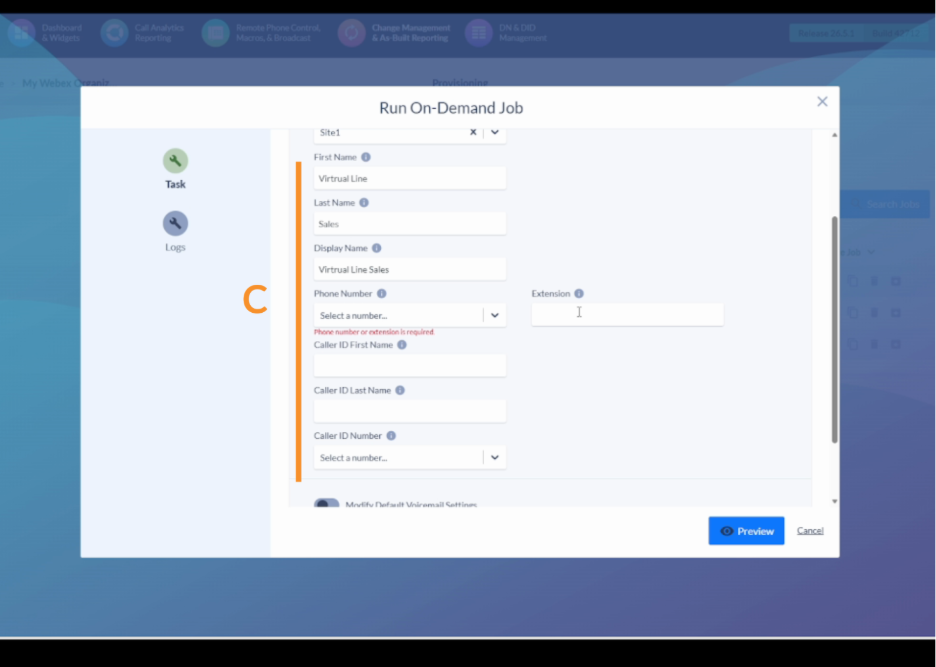
C. Fill in the line settings:
- Enter the virtual line’s Display Name.
- Select a Phone Number from the dropdown or type an Extension directly.
- Optionally, enter Caller ID fields: First Name, Last Name, and Caller ID Number.
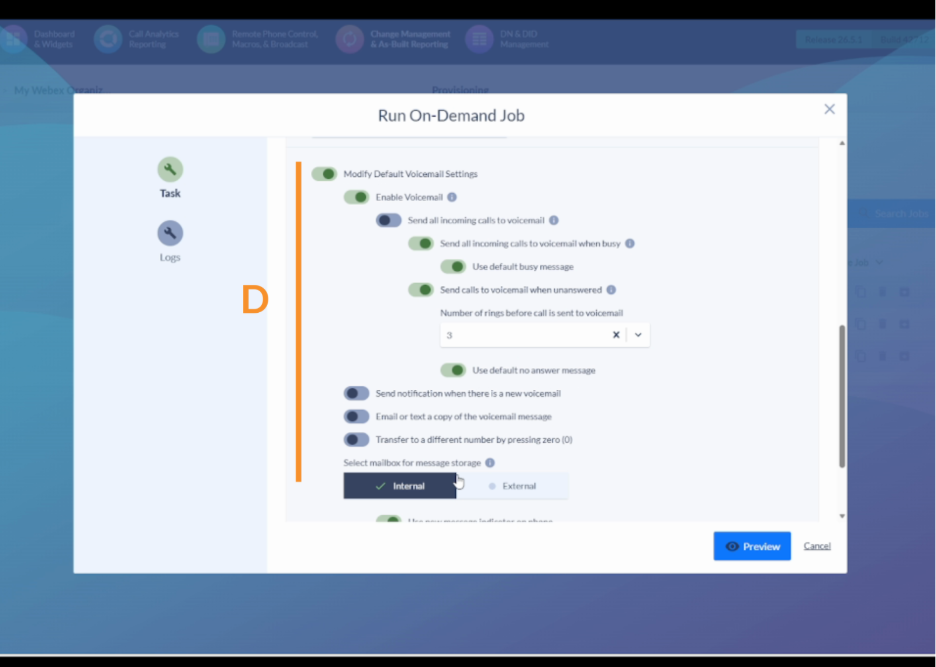
D. Under Voicemail Settings, enable or disable voicemail and toggle individual options as needed:
- Enable/disable voicemail
- Forward incoming calls to voicemail
- Additional voicemail settings matching Control Hub options
E. To set a voicemail passcode, enable Modify Voicemail Passcode and enter the desired passcode.
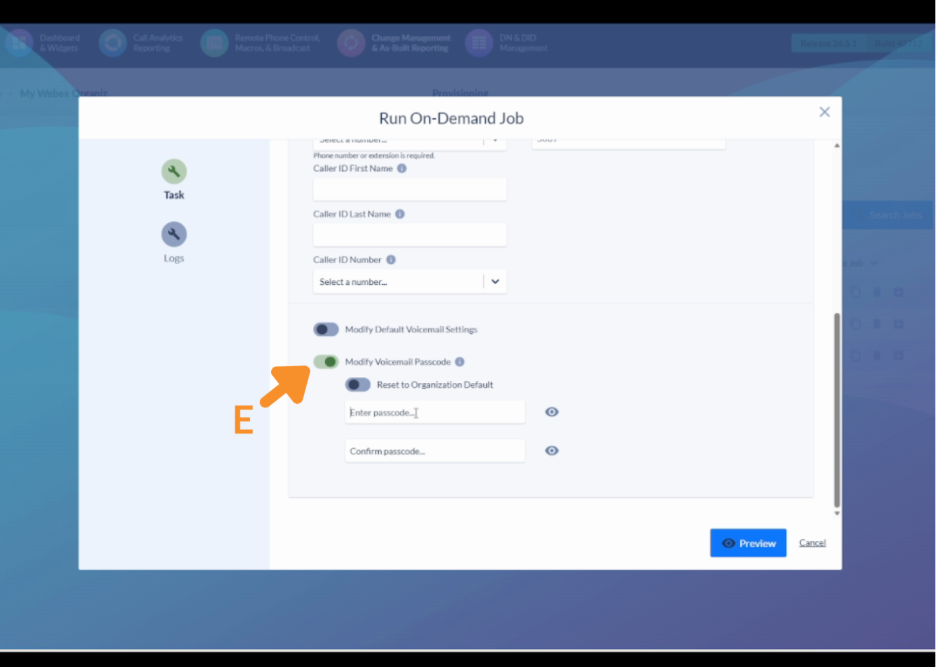
F. If voicemail notifications are enabled, enter the Destination (the email or address to receive new voicemail alerts).
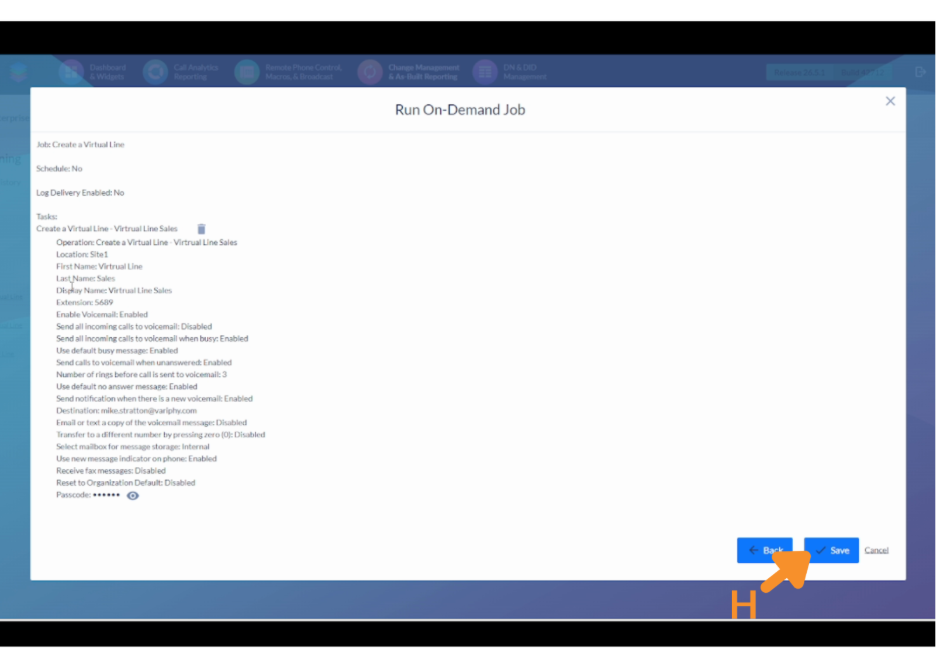
G. Click Preview to review all settings.
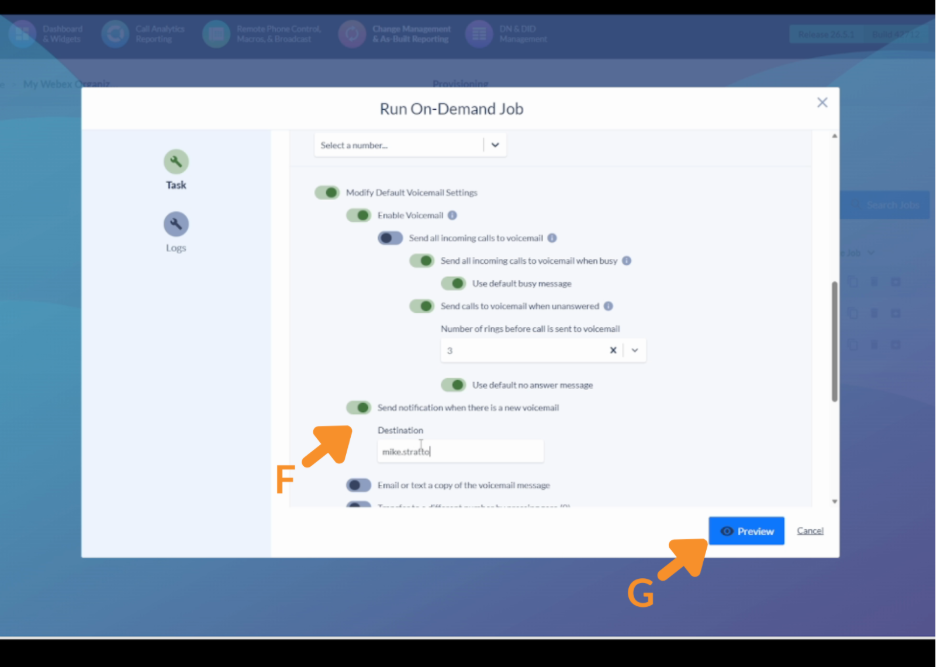
H. Click Save.
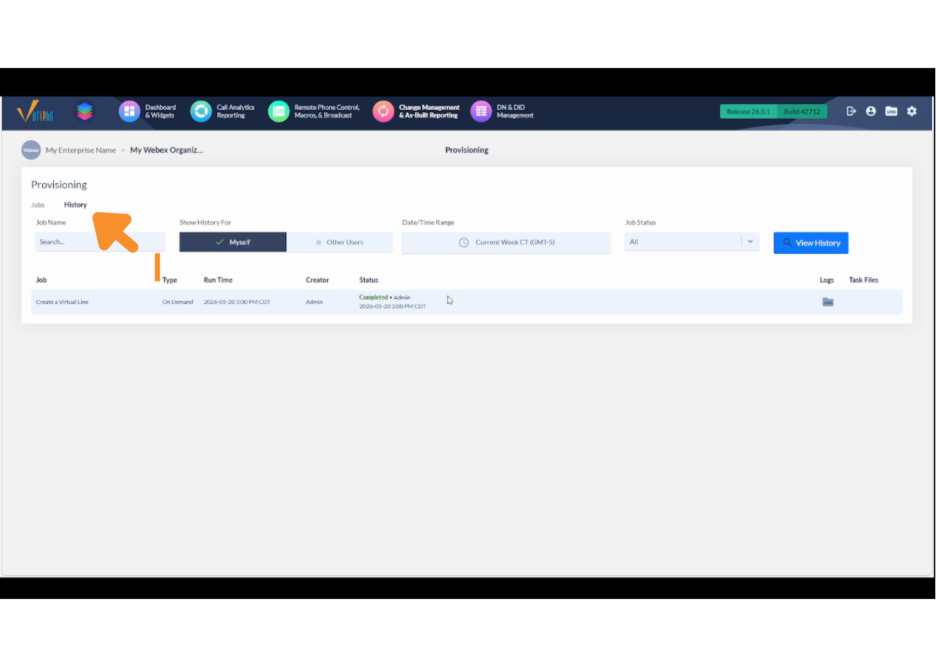
I. Open the History tab and confirm the status shows Completed.
2. Edit a Virtual Line.
A. Locate the Edit a Virtual Line job and click the play button to run.
B. Select the Location where the virtual line resides. In the virtual line lookup field, type the name or extension to search, then select the matching result — all current settings load automatically.
C. Update any fields as needed:
- Display Name
- Extension or Phone Number
- First Name / Last Name
- Optionally, adjust Voicemail Settings or update the Voicemail Passcode.
D. Click Preview to review the changes.
E. Click Save.

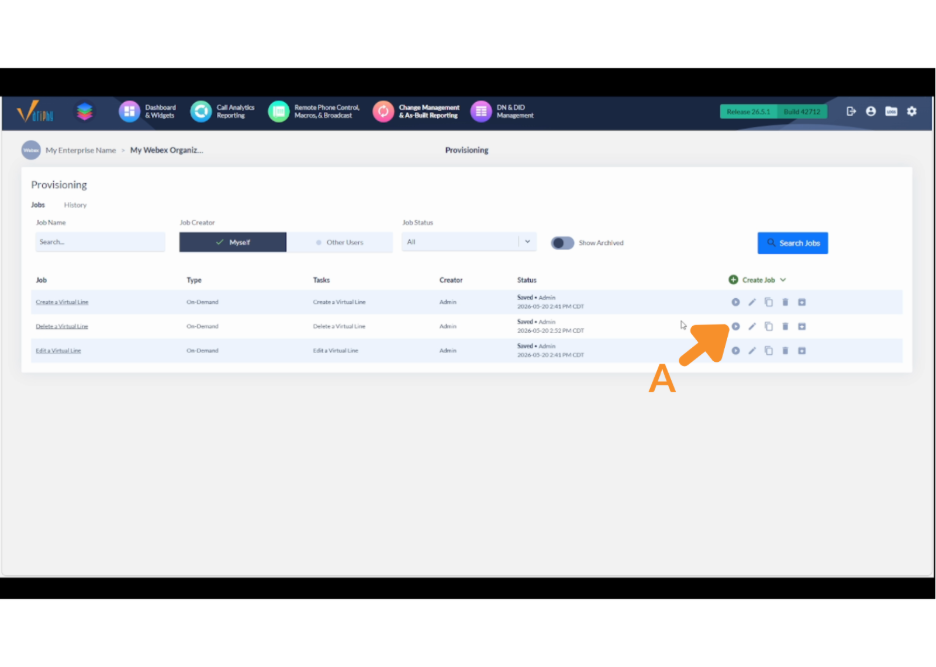
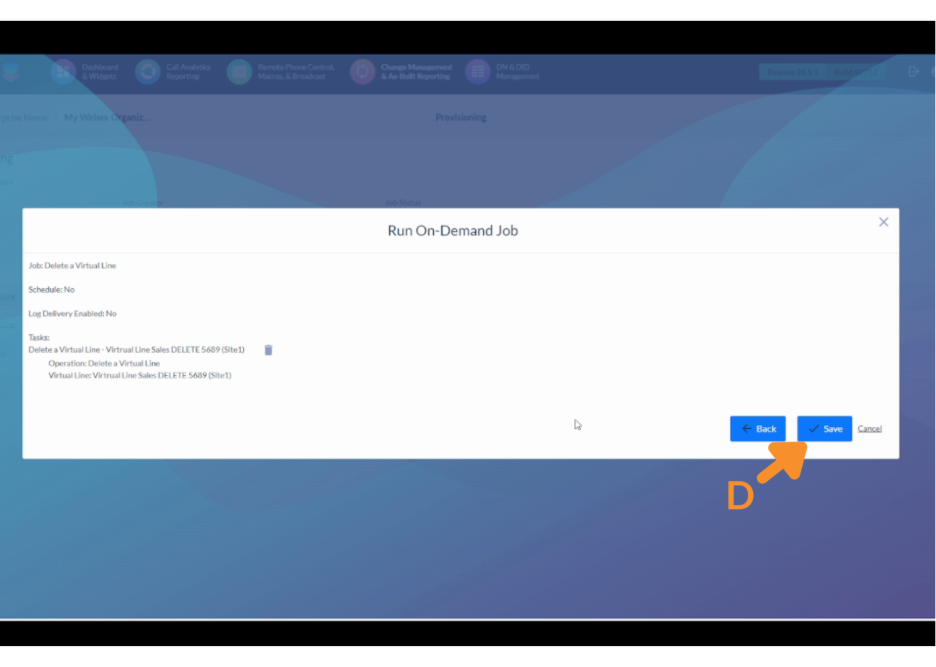
3. Delete a Virtual Line.
A. Locate the Delete job and click the play button to run.
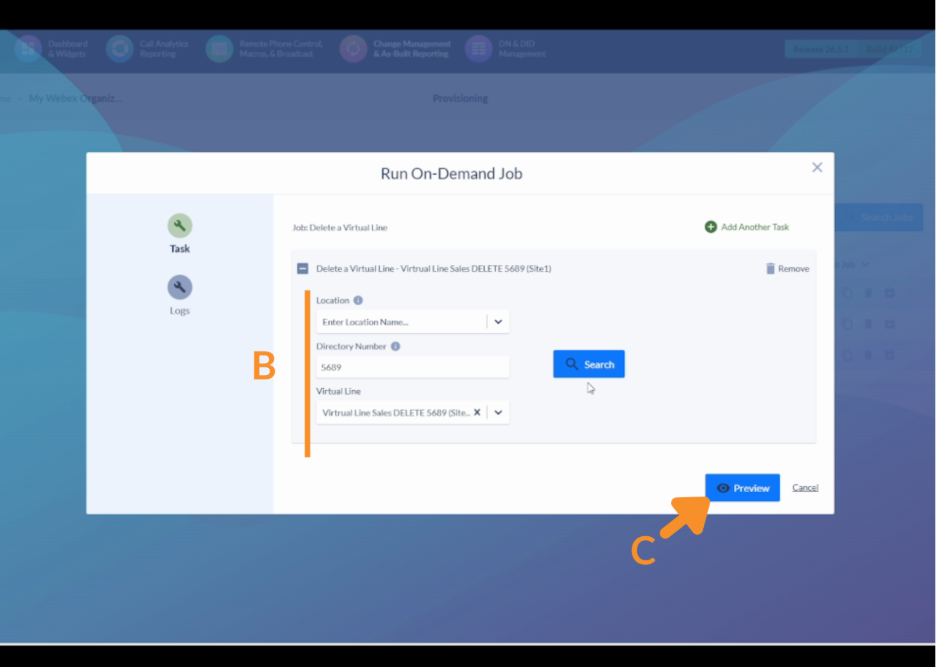
B. In the virtual line lookup field, type the name or extension of the line to delete, then select the matching result.
C. Click Preview to confirm the deletion target.
D. Click Save.
Still Need Help?
Email our support team at support@variphy.com or click the button below to access our ticket portal.
Please provide details about your question or issue, including any applicable screenshots, reports, or Variphy application log files.