Applies to:
- Variphy users with Webex Calling integrations.
- Administrators provisioning devices for remote or off-site users.
- Teams managing device deployment without requiring on-site activation.
Common Causes or Issues
- Provision Webex Calling devices for users who receive phones by mail and activate them remotely.
- Enable self-activation so users can plug in and activate without IT assistance on-site.
- Send a customized or auto-generated activation code email directly from Variphy at provisioning time.
Interactive Walkthrough
How to Create a Device Activation Code
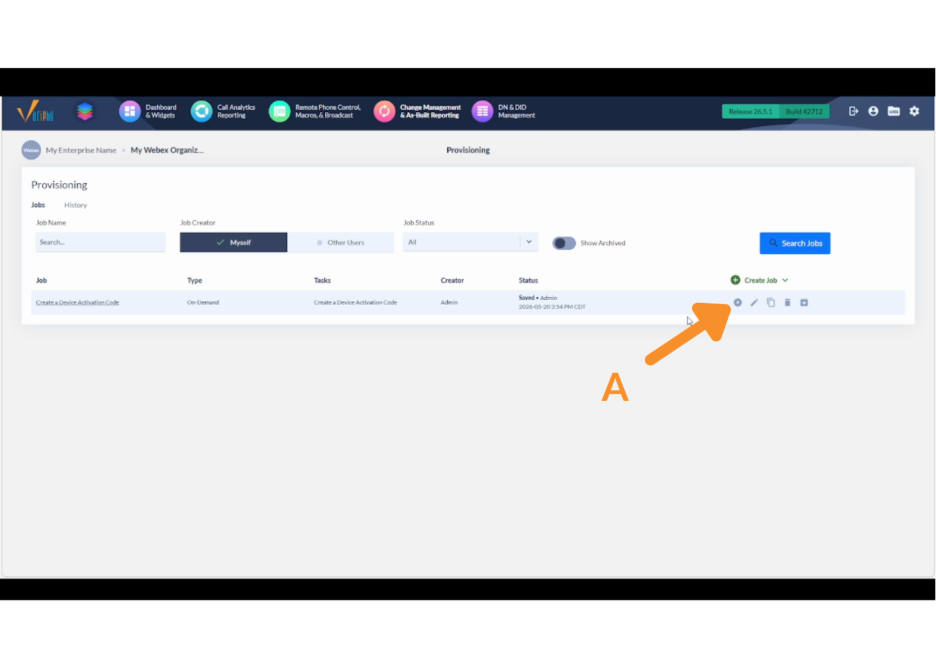
1. Run the Job.
A. Click the plus icon to run the provisioning job.
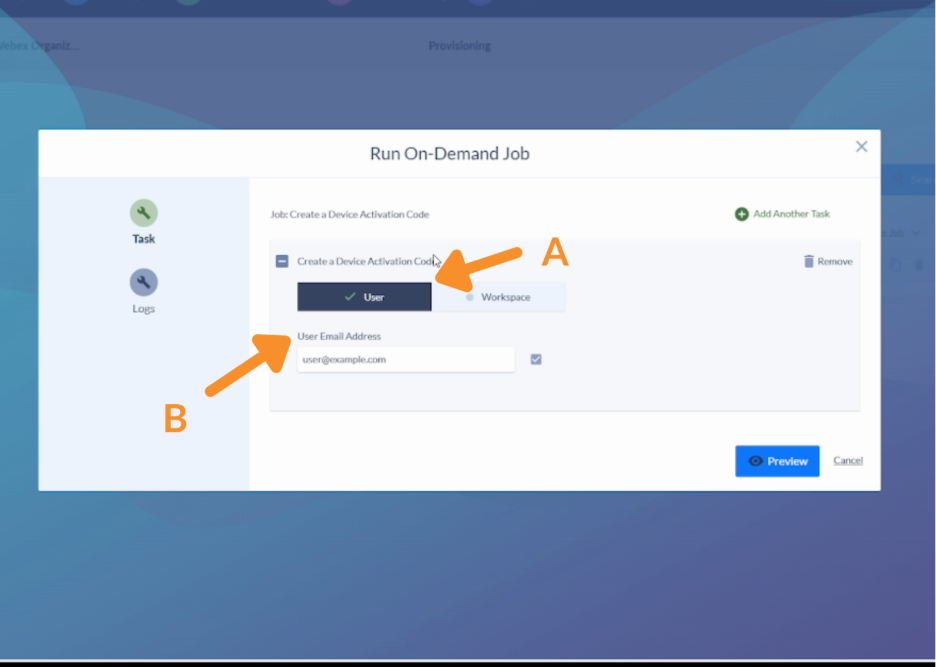
2. Configure Device Assignment.
A. Choose whether the device will be associated to a user or a workspace.
- User: The form will display a User Email Address field. Continue with steps B and C below.
- Workspace: The form will display a workspace selector instead of an email field. Select the target workspace, then continue with step C.
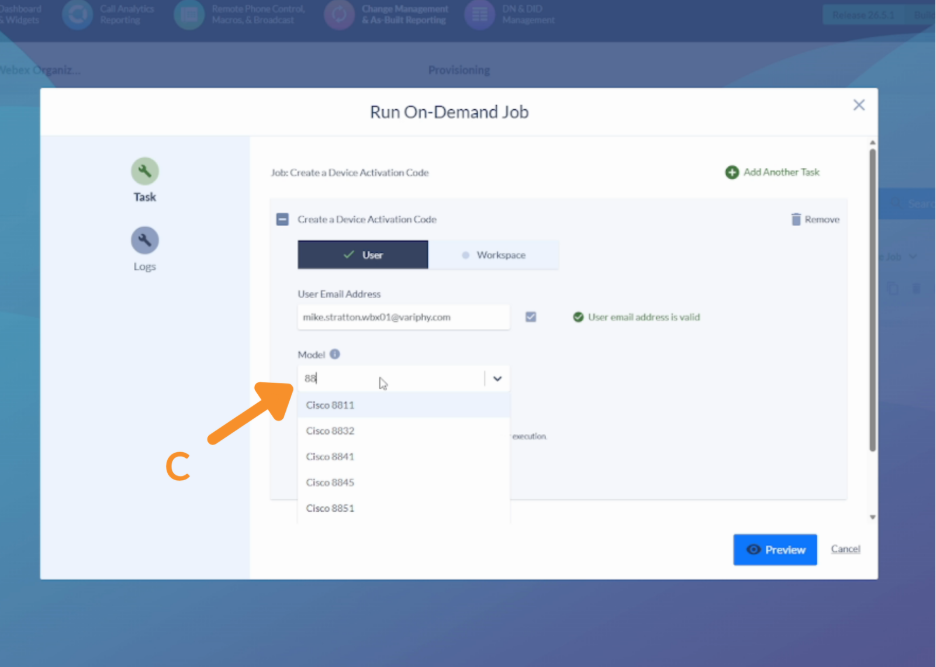
B. (User path only) Enter the user’s email address in the User Email Address field, then click the checkmark button to validate it.
The field will confirm the address is valid before you can proceed.
C. Select the device model from the Model dropdown.
Example: 8845.
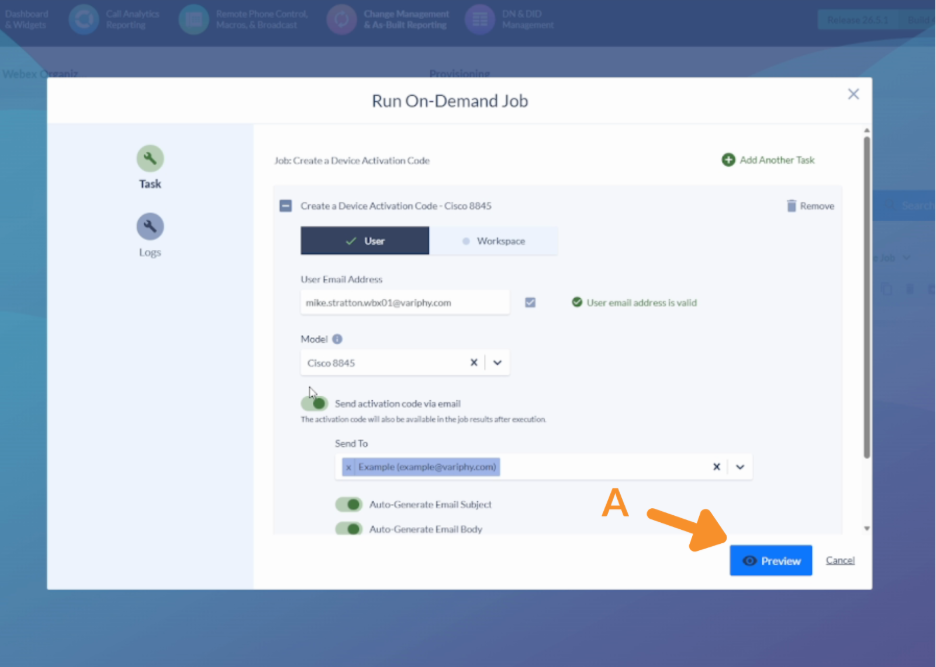
3. Configure Activation Code Email.
A. Click Send activation code via email to enable the option.
- This is the mechanism for remote provisioning: Variphy generates an activation code and emails it to the recipient. When the user plugs in the phone and connects it to the internet, they enter the code to activate it.
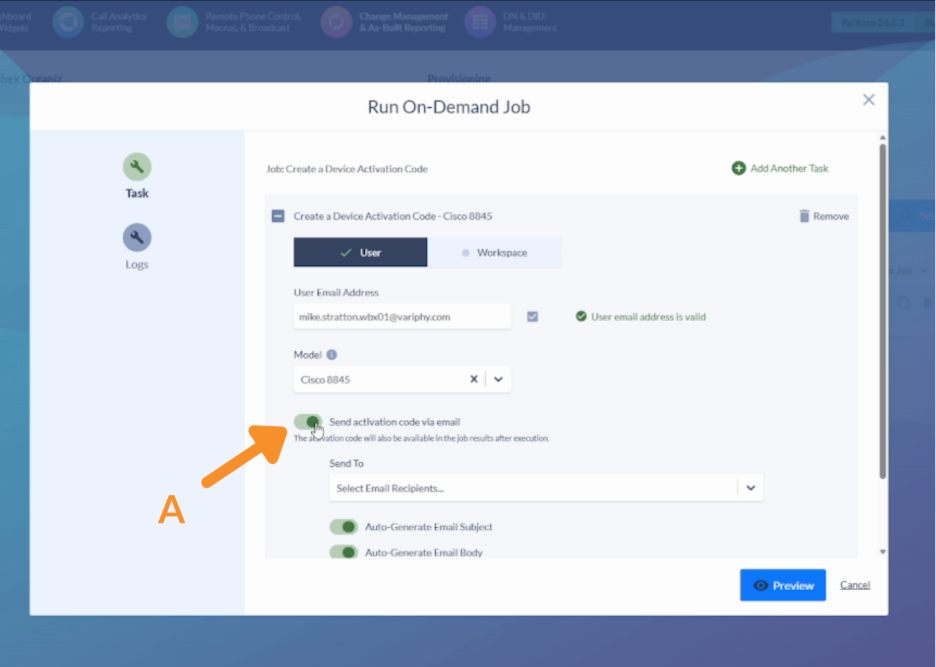
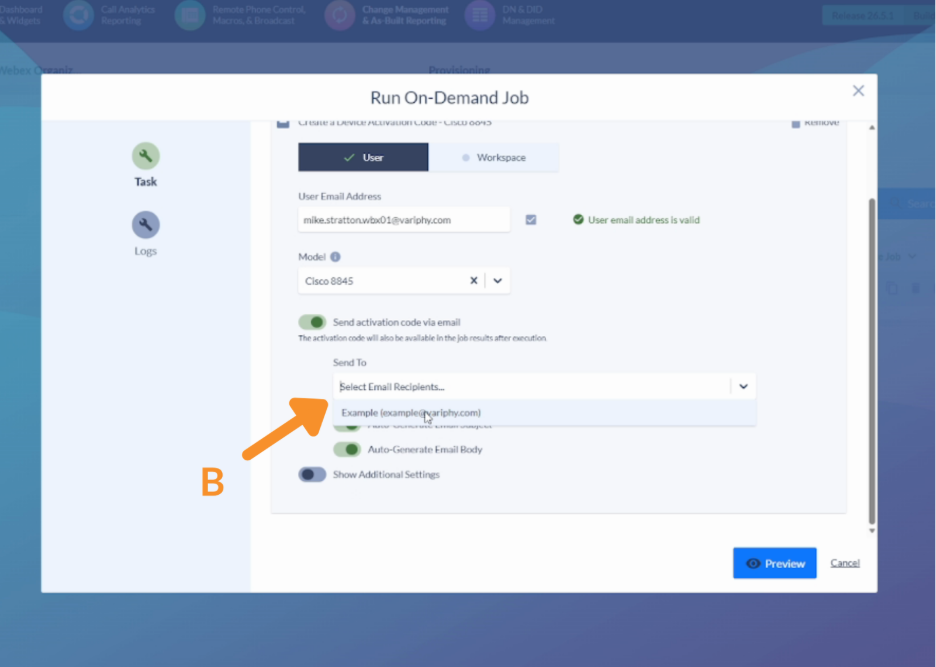
B. Select or add a recipient email address in the recipient dropdown.
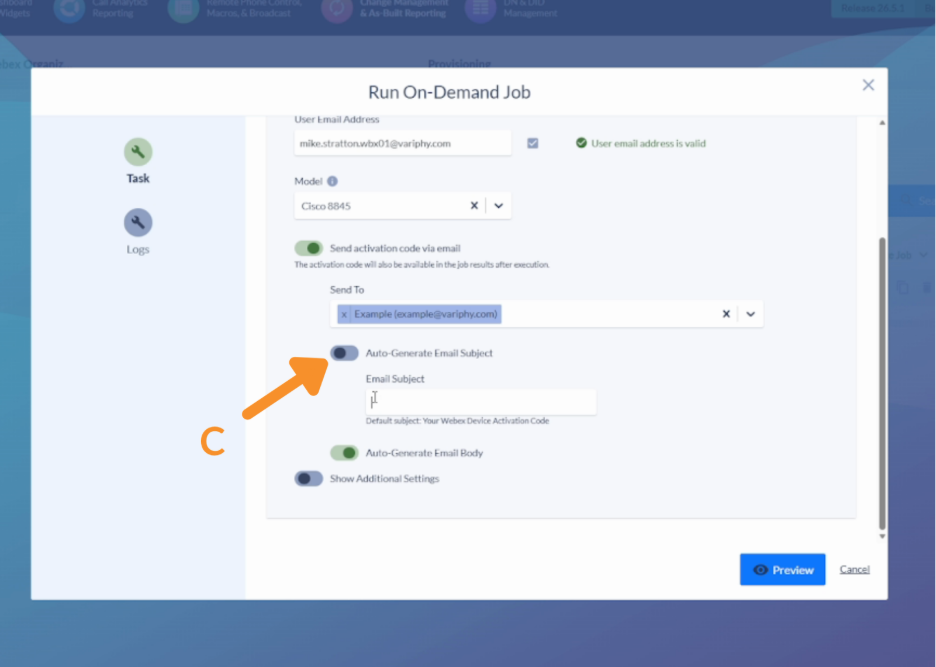
C. Toggle Auto-generate Email Subject on or off.
- On (default): Uses the default subject line.
- Off: Enter a custom email subject.
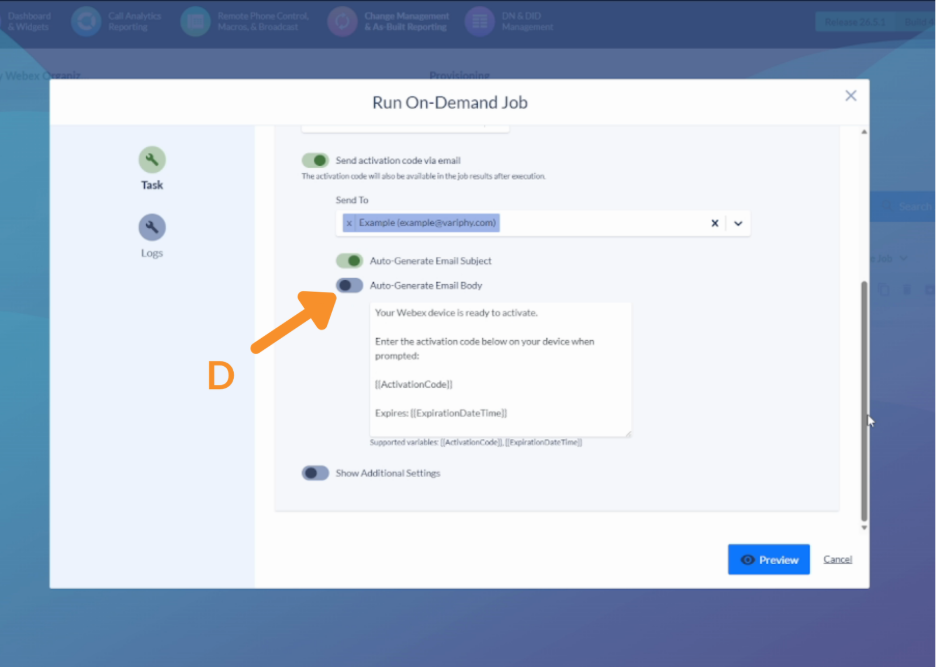
D. Toggle Auto-generate Email Body on or off.
- On (default): Uses the default Webex email template, which includes the activation code and expiration date variables. The activation code expires in 30 days.
- Off: Enter a custom email body.
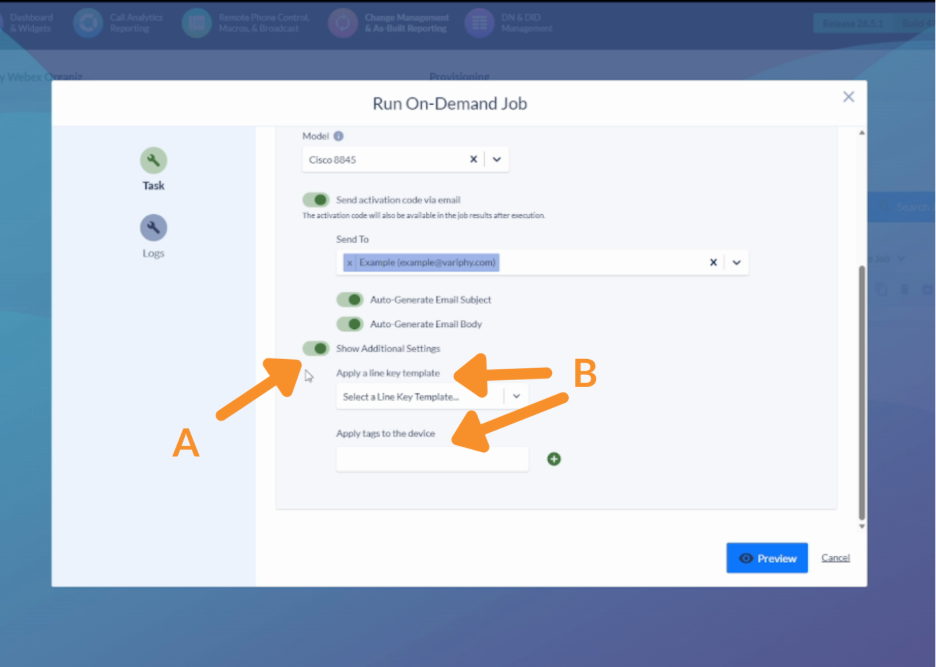
4. Apply Additional Settings.
A. Toggle on “Show Additional Settings” to expand the options panel.
B. Configure any of the following as needed:
- Line key template — apply a template to pre-configure line keys on the device.
5. Preview and Save.
A. Click Preview to review the full job configuration before submitting.
B. Click Save to submit the job.
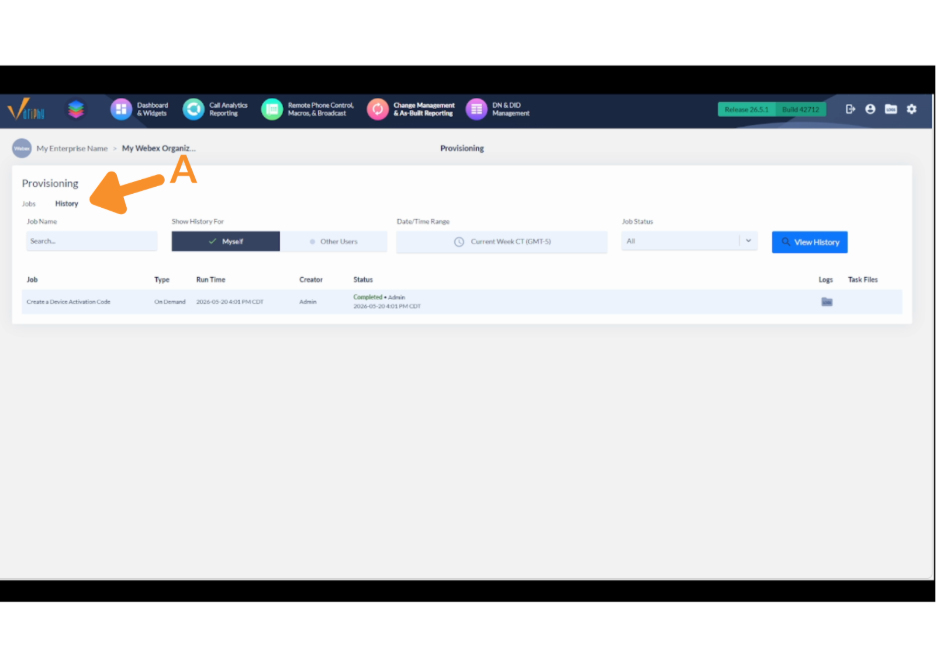
6. Verify the Result.
A. Click the History tab to confirm the job completed successfully.
Still Need Help?
Email our support team at support@variphy.com or click the button below to access our ticket portal.
Please provide details about your question or issue, including any applicable screenshots, reports, or Variphy application log files.