Applies to:
- Webex Contact Center administrators.
- Supervisors monitoring agent performance.
- Workforce management and reporting teams.
Common Causes or Issues
- Need visibility into agent activity throughout the day instead of summary totals.
- Difficulty identifying idle time, not ready states, or after-call work trends.
- Investigating agent performance concerns or staffing efficiency.
- Requirement to include detailed call history alongside agent states.
Interactive Walkthrough
- Interactive Walkthrough
- How to Create an Agent State Details Report
- 1. Open Settings.
- 2. Select the Correct Platform.
- 3. Create a Contact Center Report.
- 4. Name the Report.
- 5. Enable Agent State Details.
- 6. Create an Agent Search Set.
- 7. Add Search Criteria.
- 8. Select Agents.
- 9. Customize State Detail Options.
- 10. Configure Call History Details (Optional).
- 11. Run the Report.
- 12. Select Output and Delivery Options.
How to Create an Agent State Details Report
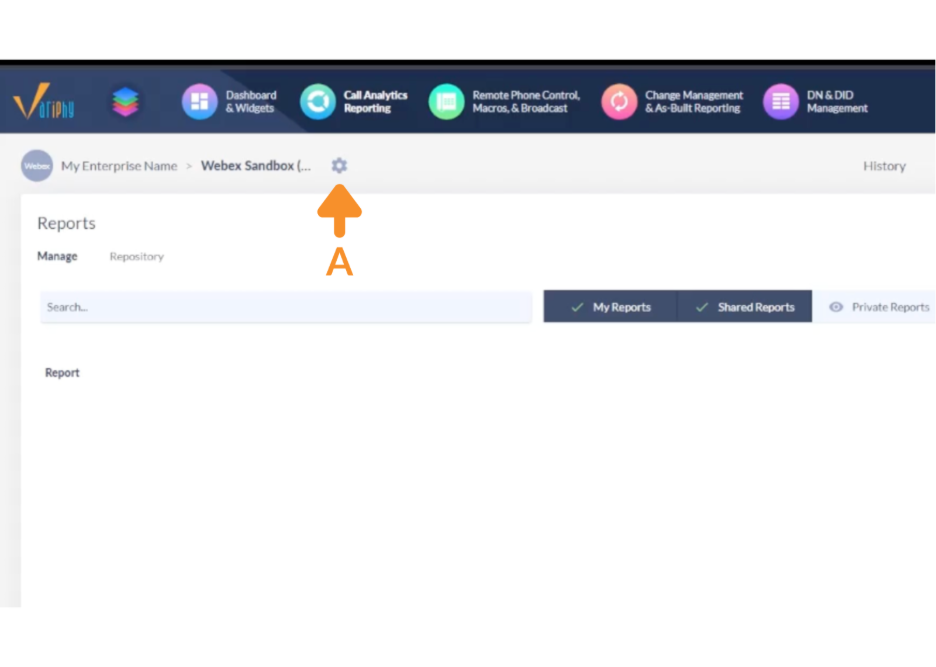
1. Open Settings.
A. Click the gear icon to open Settings.
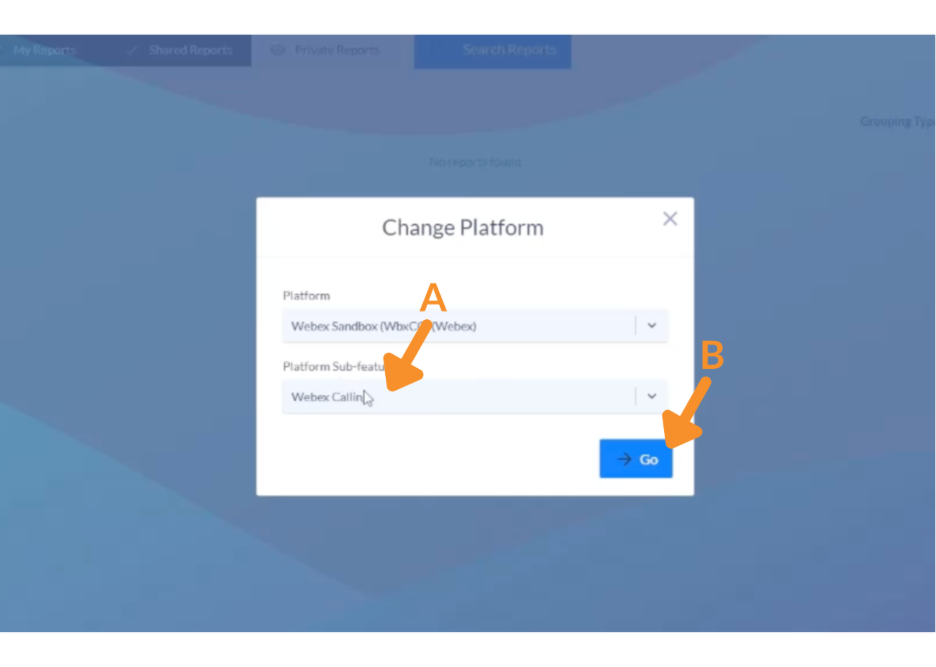
2. Select the Correct Platform.
A. Under Platform Sub-feature, select Webex Contact Center.
B. Click Go.
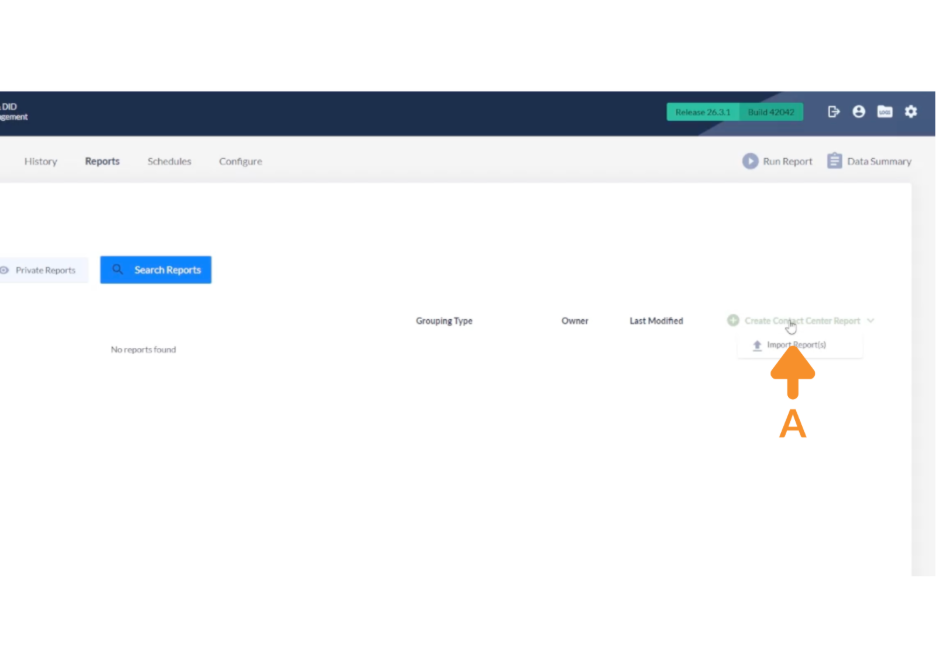
3. Create a Contact Center Report.
A. Click Create Contact Center Report.
4. Name the Report.
A. Enter a title for the report.
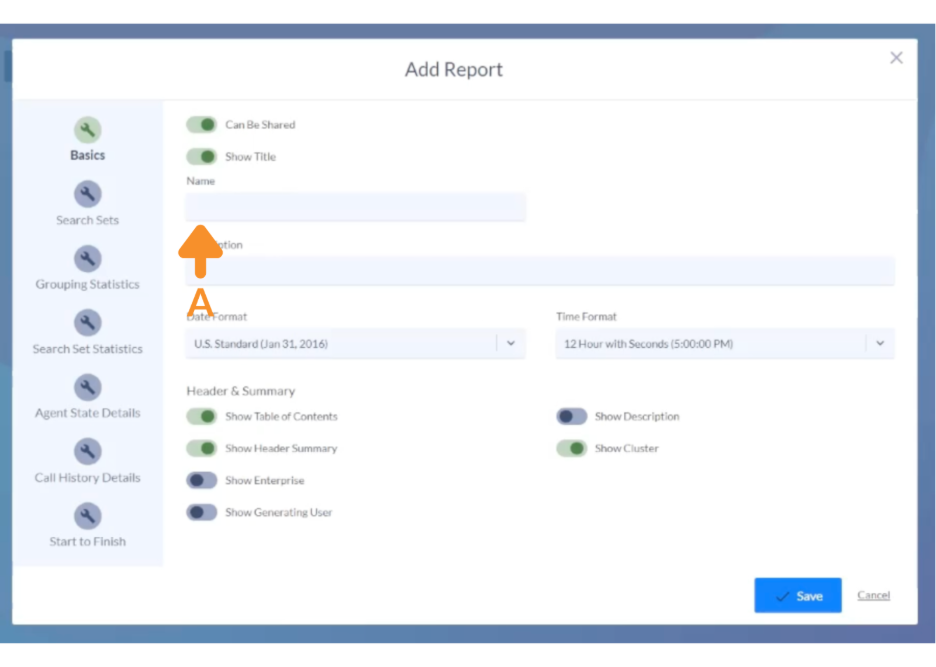
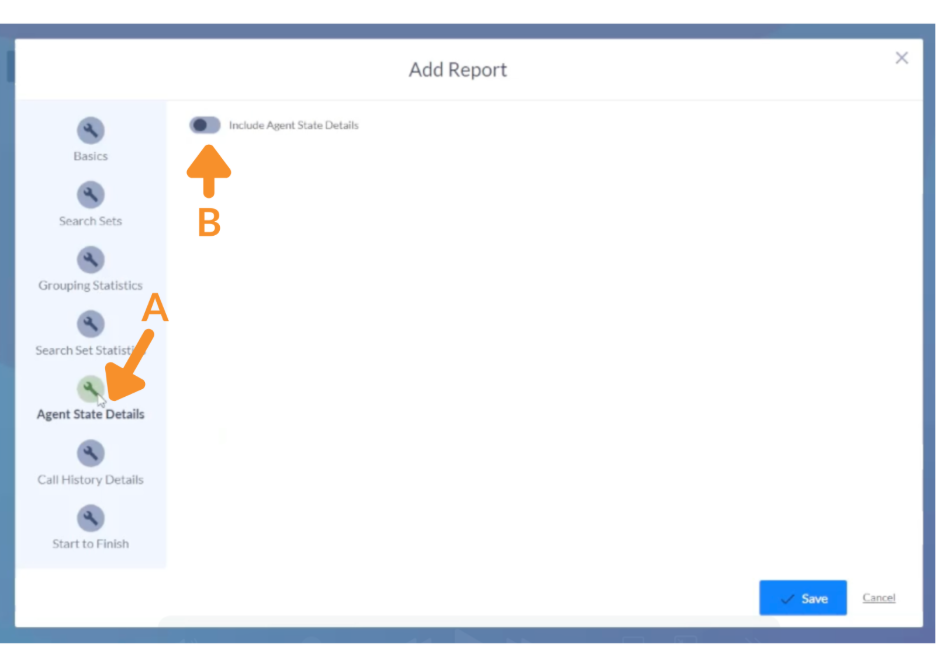
5. Enable Agent State Details.
A. Navigate to the Agent State Details tab.
B. Toggle ON to enable Agent State Details.
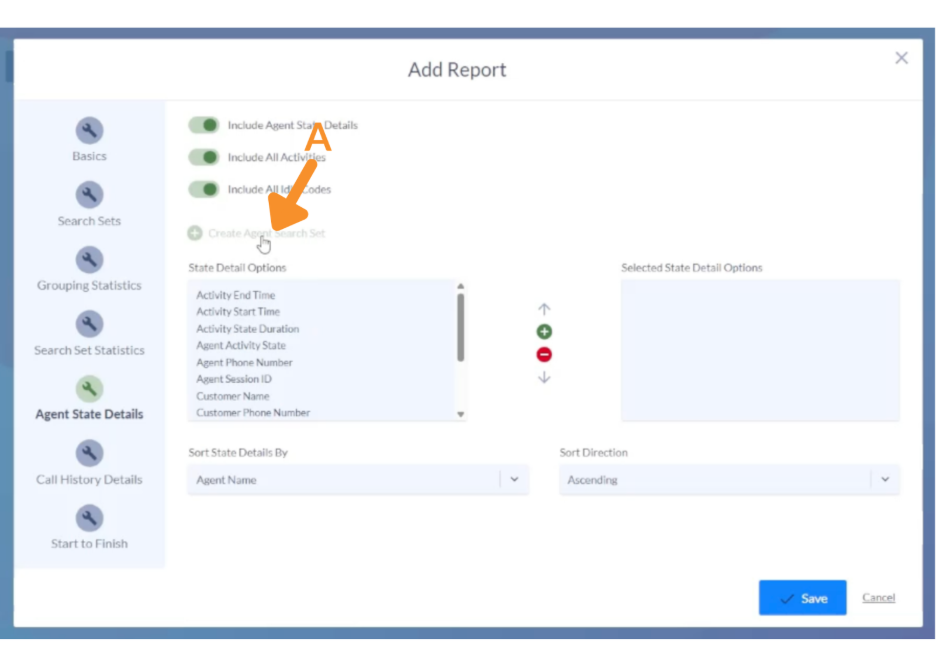
6. Create an Agent Search Set.
A. Click Create Agent Search Set.
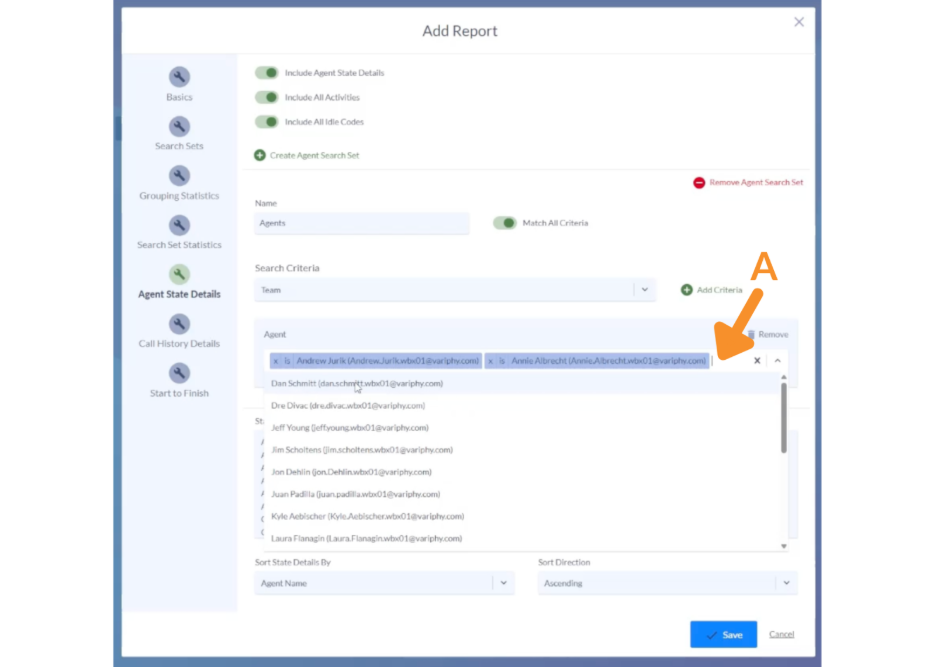
7. Add Search Criteria.
A. Enter a descriptive name for your search set.
B. Under Search Criteria, select either:
- Agent: For specific individuals.
- Team: For grouped reporting.
C. Click Add Criteria.

8. Select Agents.
A. Choose agents from the dropdown list.
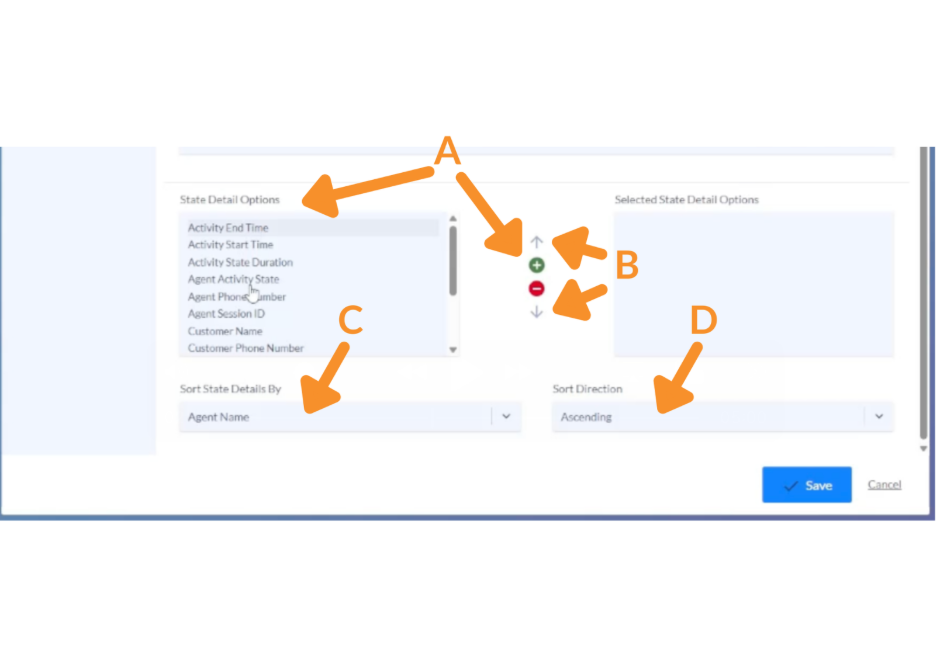
9. Customize State Detail Options.
A. Select state detail options from the left column and move them using the green plus arrow.
B. Reorganize columns by selecting state detail options from the right column and using the up/down arrows to move them.
C. Choose how details should be sorted in the report.
D. Select a sort direction.
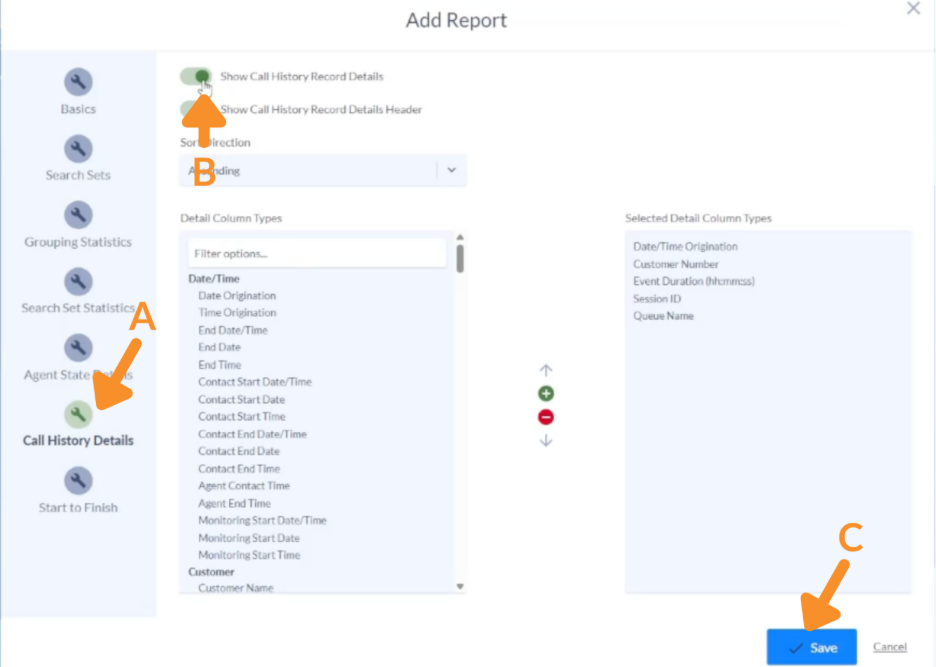
10. Configure Call History Details (Optional).
A. Navigate to the Call History Details tab.
B. Toggle Show Call History Details ON or OFF.
C. Click Save.
11. Run the Report.
A. Locate the report and click the play button.
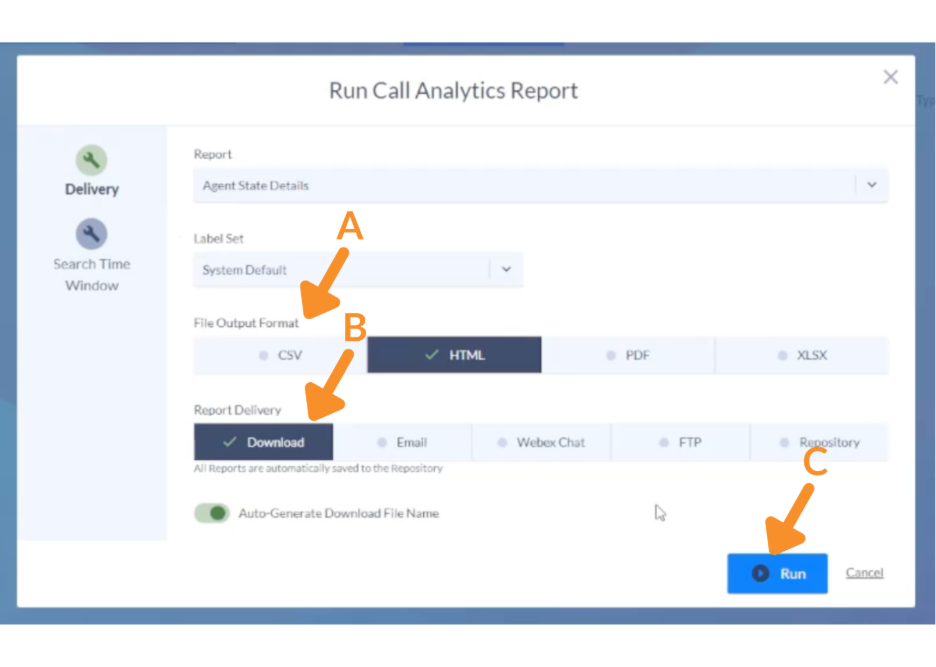
12. Select Output and Delivery Options.
A. Choose an output format.
B. Pick a report delivery method.
C. Click Run.
The report provides insight into details such as:
- When agents enter each state.
- Duration of each state.
- When states end.
- Idle or Not Ready reason codes.
- Queue and team activity.
- Wrap-up codes.
- Customer interaction details (if enabled).

This helps identify patterns in agent performance, availability, and workload distribution.
Still Need Help?
Email our support team at support@variphy.com or click the button below to access our ticket portal.
Please provide details about your question or issue, including any applicable screenshots, reports, or Variphy application log files.