Applies to:
- Variphy users with Webex Calling integrations.
- Administrators who need to perform targeted provisioning actions outside of a scheduled job.
- Teams managing virtual lines, devices, or users and needing to apply changes on demand.
Common Causes or Issues
- Reset a virtual line passcode directly from Variphy without accessing the Webex portal.
- Run one-off provisioning actions — such as edits, additions, or deletions — against specific resources.
- Review a preview of all changes before committing them to your Webex Calling environment.
- Audit completed provisioning activity through the job history and downloadable logs.
Interactive Walkthrough
How to Create and Run an On-Demand Provisioning Job
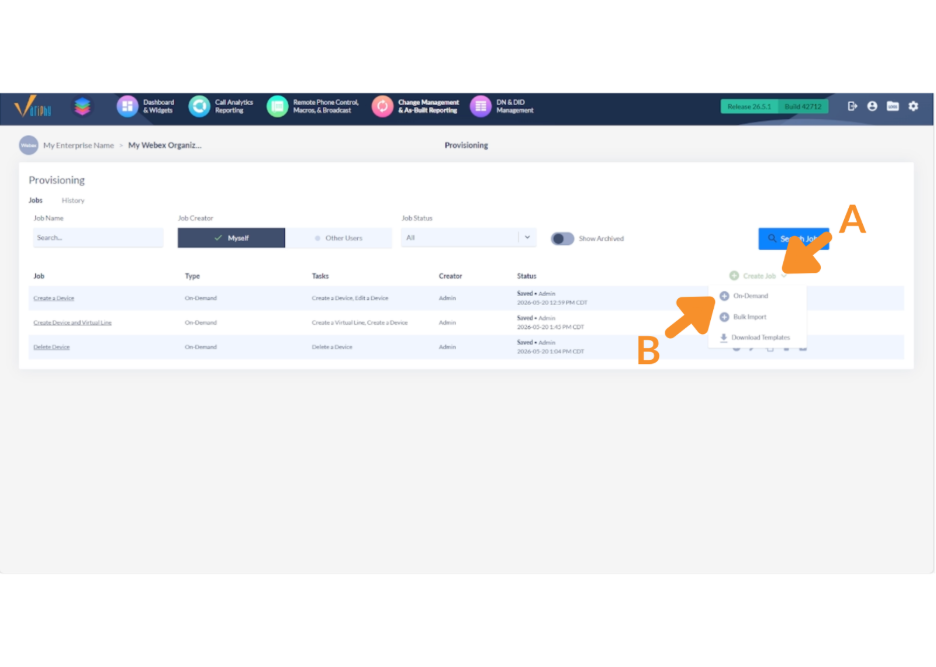
1. Create a new on-demand job.
A. Click Create Job.
B. Select On-Demand from the dropdown.
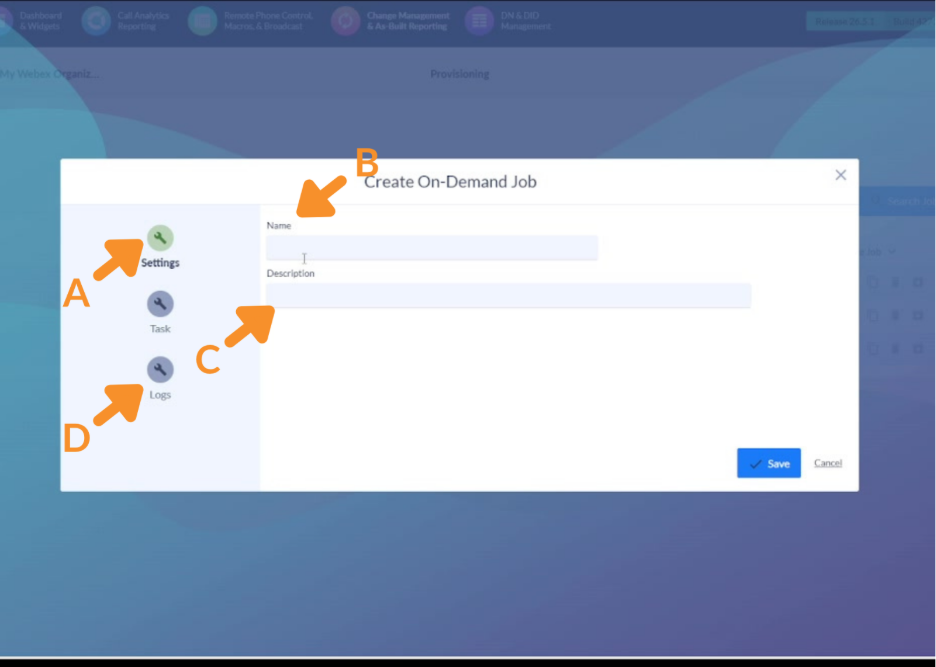
2. Configure the job settings.
A. In the new job modal, select the Settings tab (left-hand icon panel).
B. Enter a descriptive name for the job in the Name field.
- Example: Edit Virtual Line Passcode
C. Optionally, enter a Description to clarify the job’s purpose.
D. If you want logs delivered by email, configure your log delivery settings here.
- Note: An SMTP server must be configured in Variphy for email delivery to function.
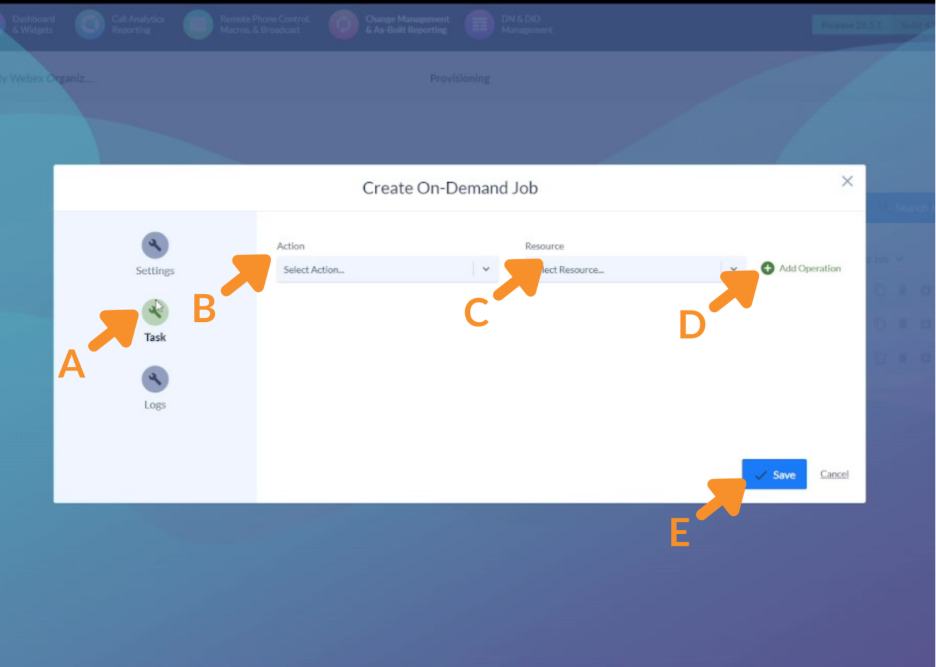
3. Add a task and define the operation.
A. Select the Task tab (second icon in the left-hand panel).
B. Click to select an Action from the dropdown.
- Options include: Create, Add, Delete, or Edit.
- For this example, select Edit.
C. Select a Resource — what the action will be performed on.
- For this example, select Virtual Line.
D. Click Add Operation to apply the action/resource combination to the task.
- Repeat to add additional operations to the same task if needed.
E. Click Save.
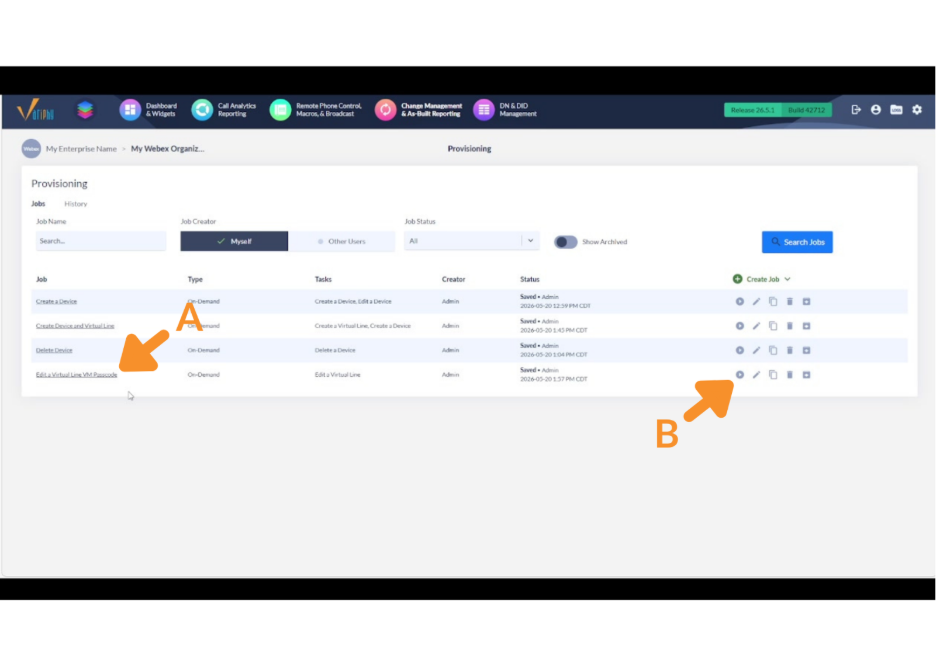
The job now appears in your Provisioning jobs list.
5. Run the job.
A. Locate the job in the Provisioning jobs list.
- To edit the job before running, click the pencil icon.
B. Click the Run button to open the Run On-Demand Job modal.
6. Select the target resource and apply changes.
A. Search for the virtual line to edit:
- Search by Location — scroll down, select your site, and search within it.
- Or search by Directory Number.
B. Select the target virtual line from the results list. Variphy will load all editable parameters for that line.
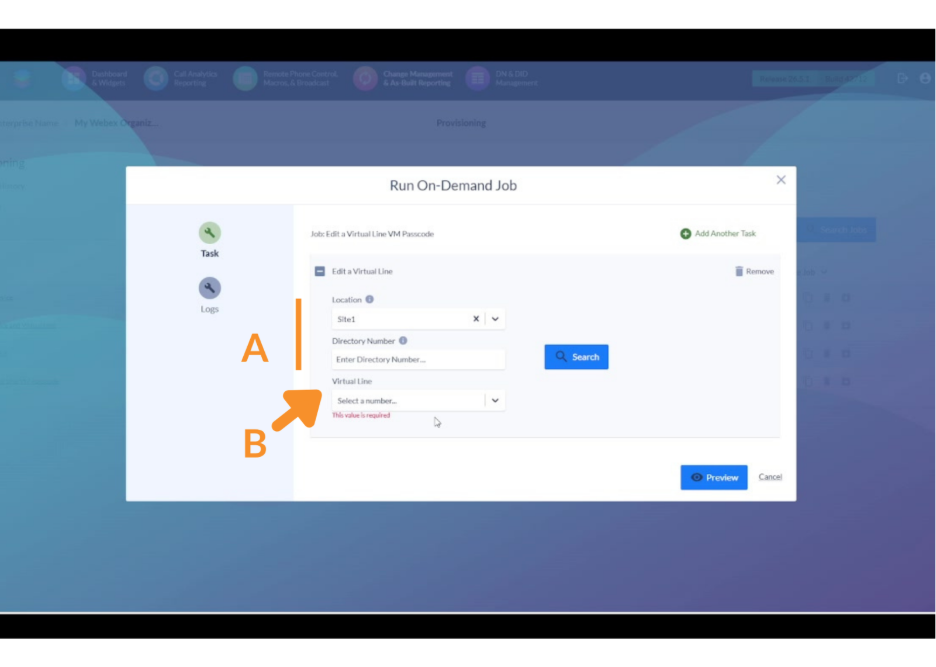
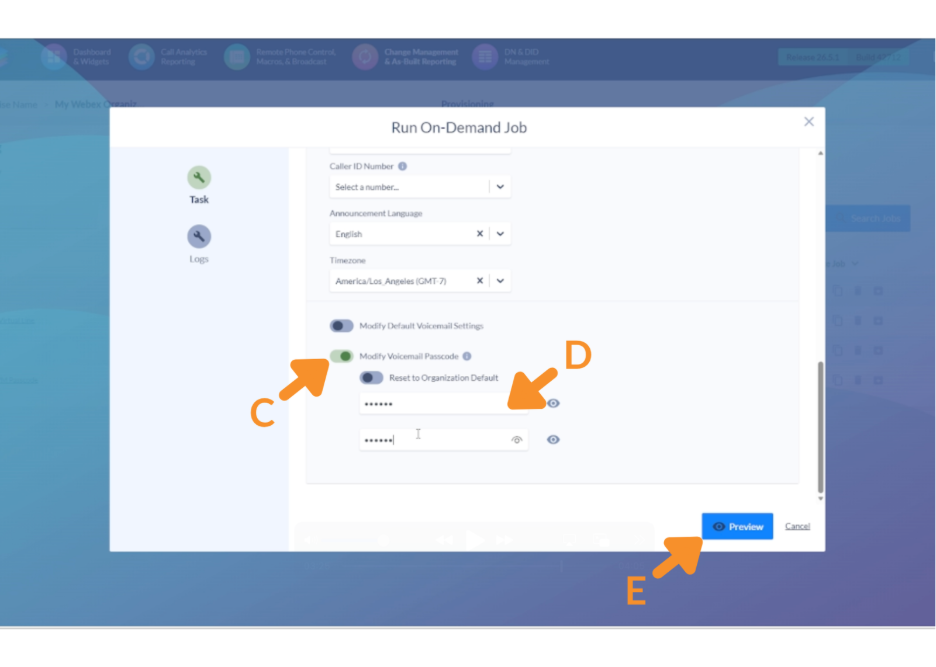
C. Toggle on the Passcode field (or whichever parameter you want to modify).
D. Enter the new passcode value.
E. Click Preview to review all changes before committing.
- The preview displays what will be modified — in this case, the new passcode.
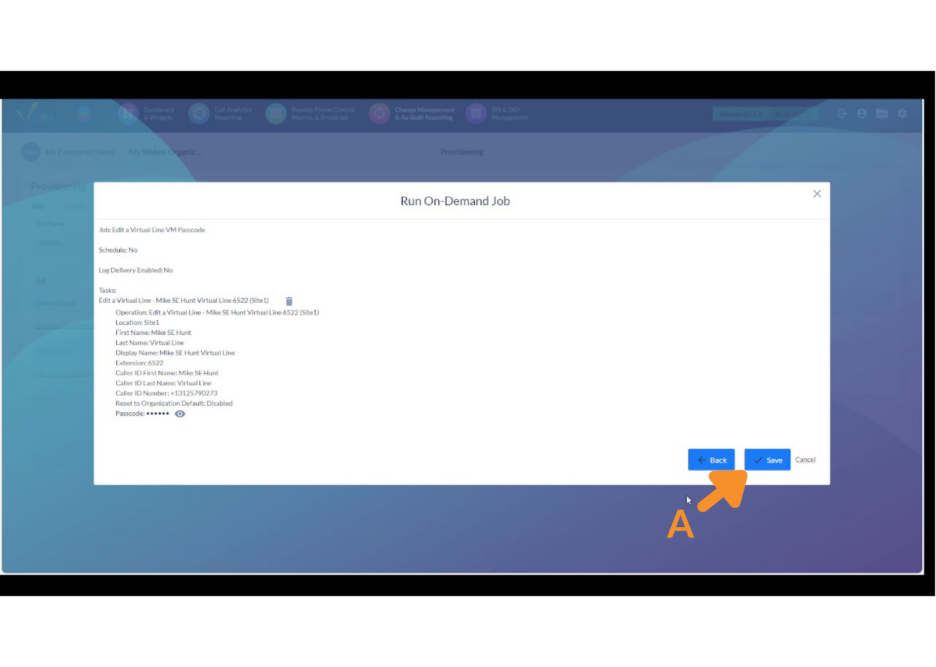
7. Save to run the job.
A. Click Save to execute the job.
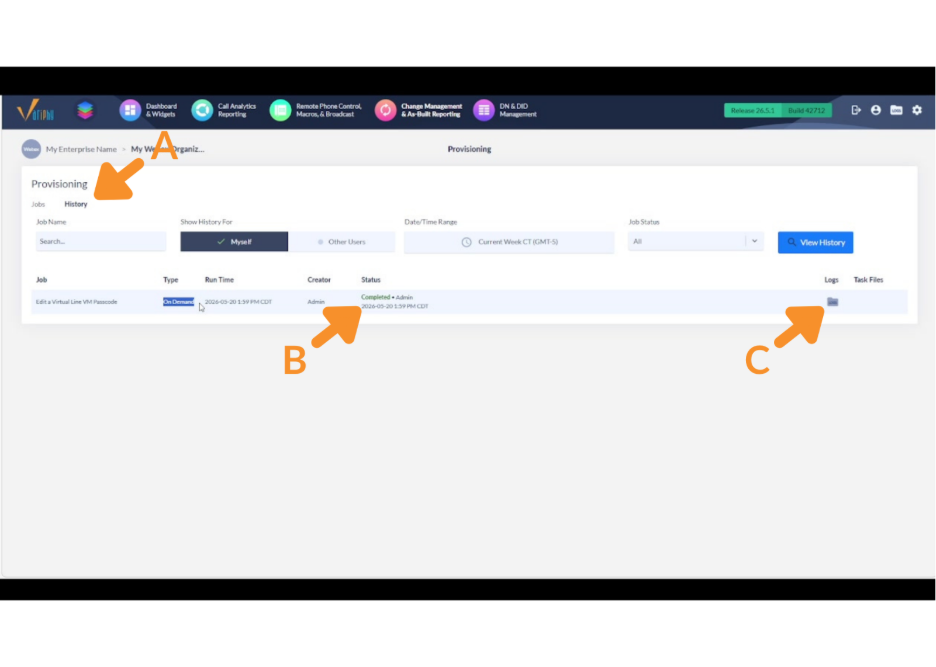
8. Verify in History.
A. Navigate to the History tab in Provisioning.
B. Locate the job by name and confirm the Status shows as completed.
- The history entry also displays the job type, run time, and the user who ran it.
C. To review granular results, click to download the logs for the job.
Still Need Help?
Email our support team at support@variphy.com or click the button below to access our ticket portal.
Please provide details about your question or issue, including any applicable screenshots, reports, or Variphy application log files.