Applies to:
- Administrators managing dashboard access and permission levels.
Common Causes or Issues
- Grants specific users or groups access to a dashboard without making it public.
- Lets you control the exact level of access — view only, edit, or full co-ownership.
Interactive Walkthrough
How to Enable Dashboard Sharing
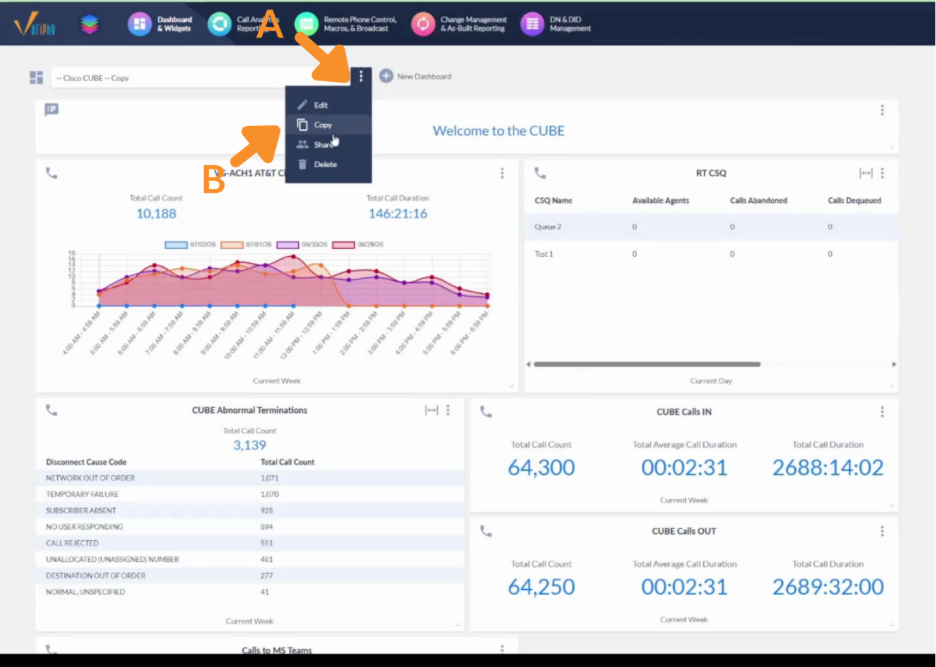
1. Open the dashboard sharing menu.
A. Click the “⋮” (three dots) icon next to the dashboard dropdown.
B. Select Share from the menu.
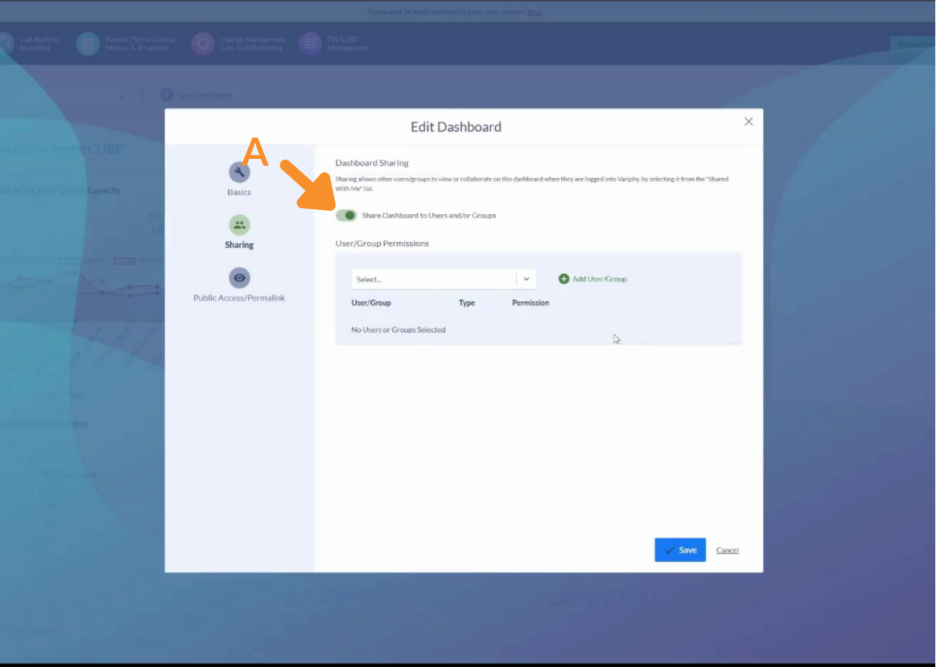
2. Enable sharing.
A. Toggle Share Dashboard to Users and/or Groups on.
How to Add a Shared User
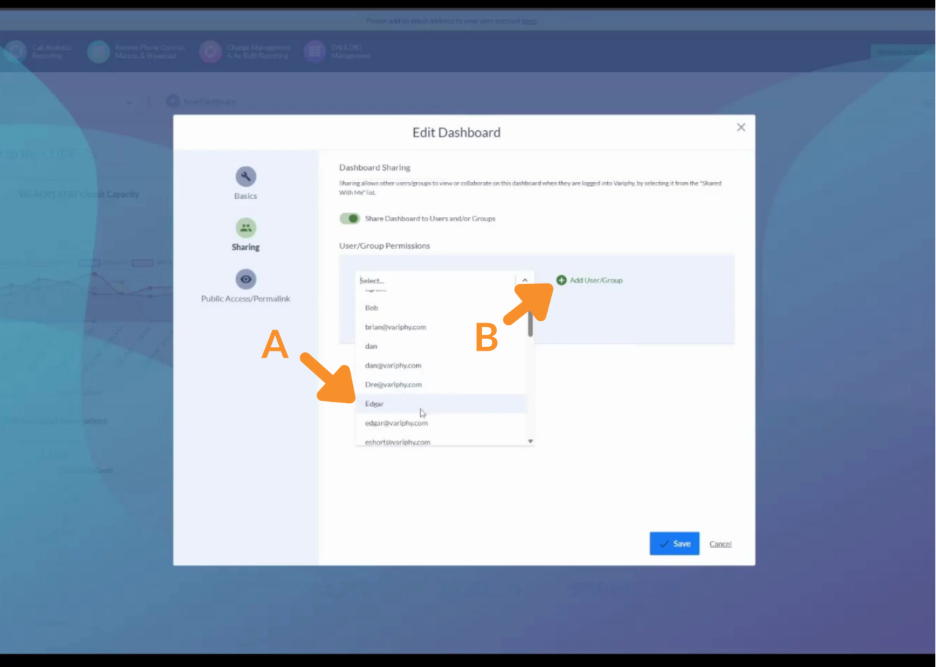
1. Choose a user or group.
A. Select an email or group from the dropdown field.
B. Click Add User/Group to add the selected user to the table.
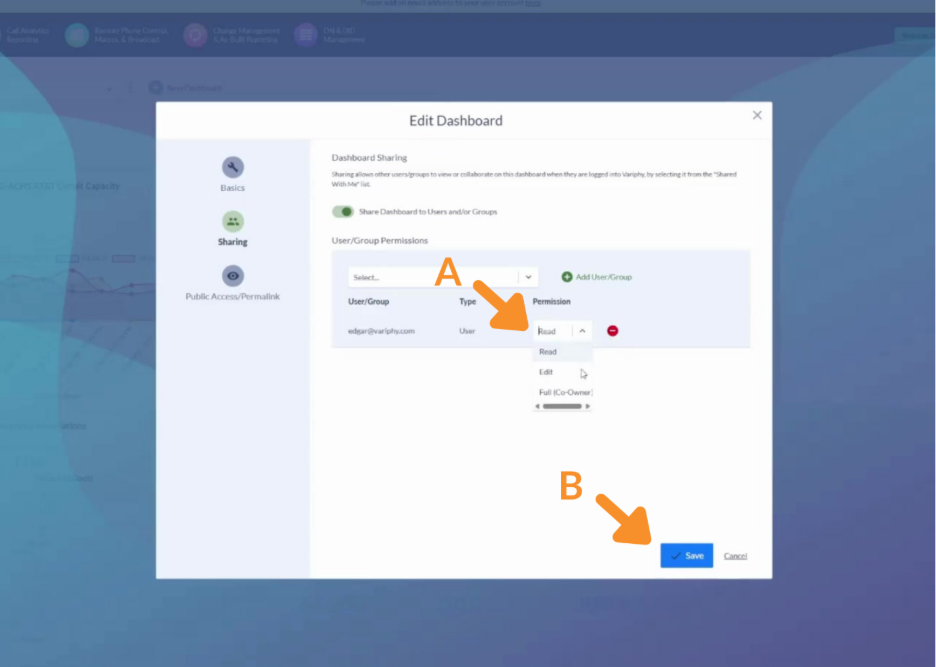
2. Set the permission level and save.
A. Open the Permission dropdown for the new user’s row and choose the appropriate permission level.
- Read — view-only access to the dashboard.
- Edit — can make changes to the dashboard.
- Full (Co-Owner) — full rights, equivalent to co-ownership.
B. Click Save.
Once configured, the shared user will:
- Appear in the dashboard’s sharing list with the assigned permission level.
- Have access matching their assigned permission — view, edit, or full co-ownership.
How to Remove a Shared User
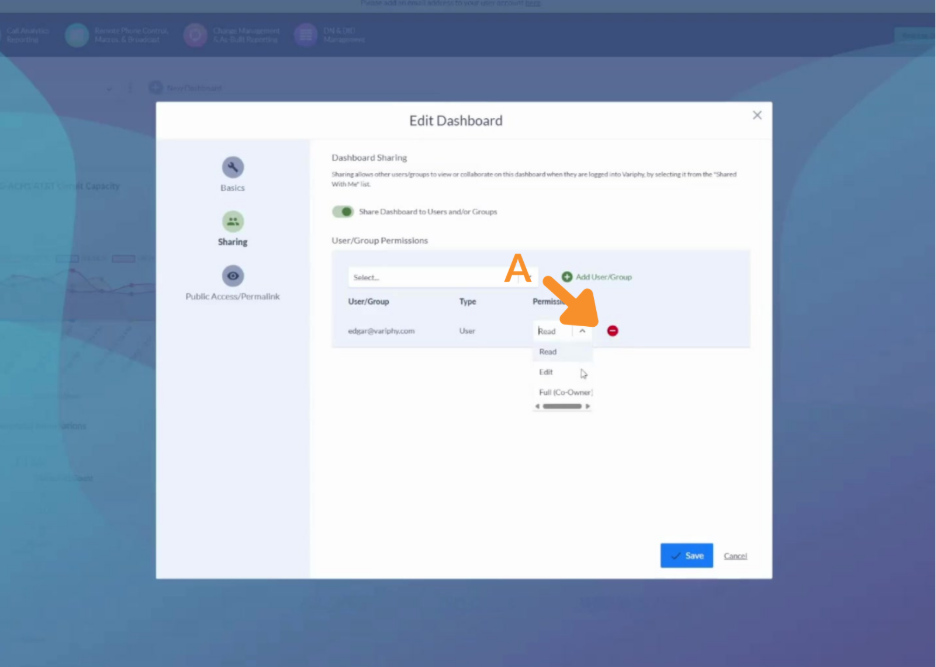
1. Remove a shared user.
A. Click the red minus icon next to a row to remove that user’s access.
Still Need Help?
Email our support team at support@variphy.com or click the button below to access our ticket portal.
Please provide details about your question or issue, including any applicable screenshots, reports, or Variphy application log files.
