
Applies to
- Variphy users with Webex Calling integrations.
- Teams creating or standardizing workspaces across Webex Calling locations.
Common Causes or Issues
Use Variphy’s Provisioning tool to create Webex workspaces on demand, without logging in to the Webex Control Hub. With a Create Workspace job you can:
- Create a workspace for a specific location, floor, and capacity.
- Set a workspace type (for example, Meeting Room) and enable options such as hot desking and device-hosted meetings.
- Configure calling and calendar settings — such as Free Calling and a Microsoft calendar — at the time of creation.
- Save the job once and reuse it to create additional workspaces whenever they’re needed.
Interactive Walkthrough
How to Create a Workspace
1. Open Provisioning
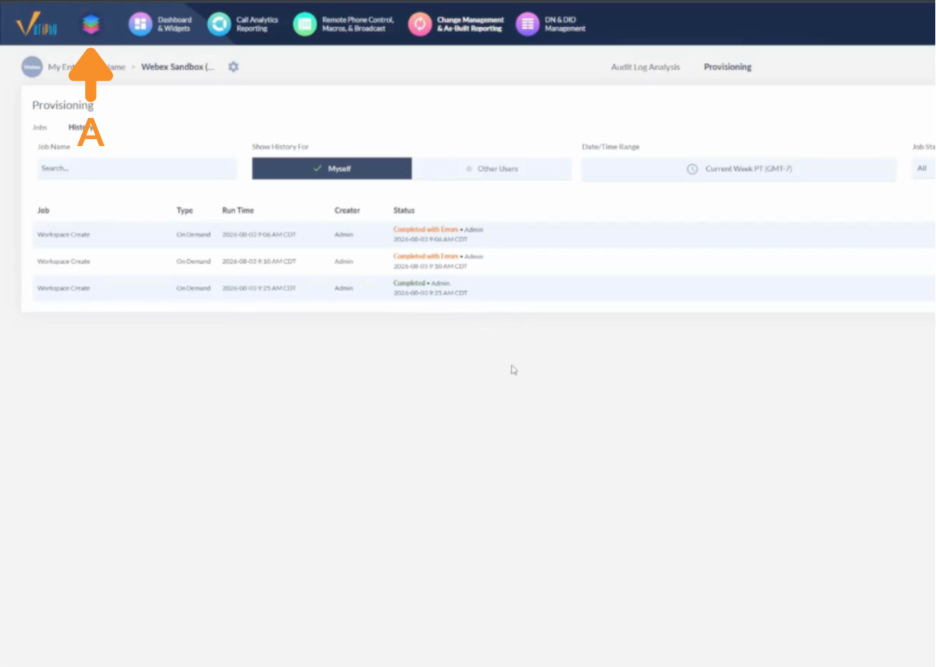
A. Click the App Launcher icon in the top-left corner of the screen.
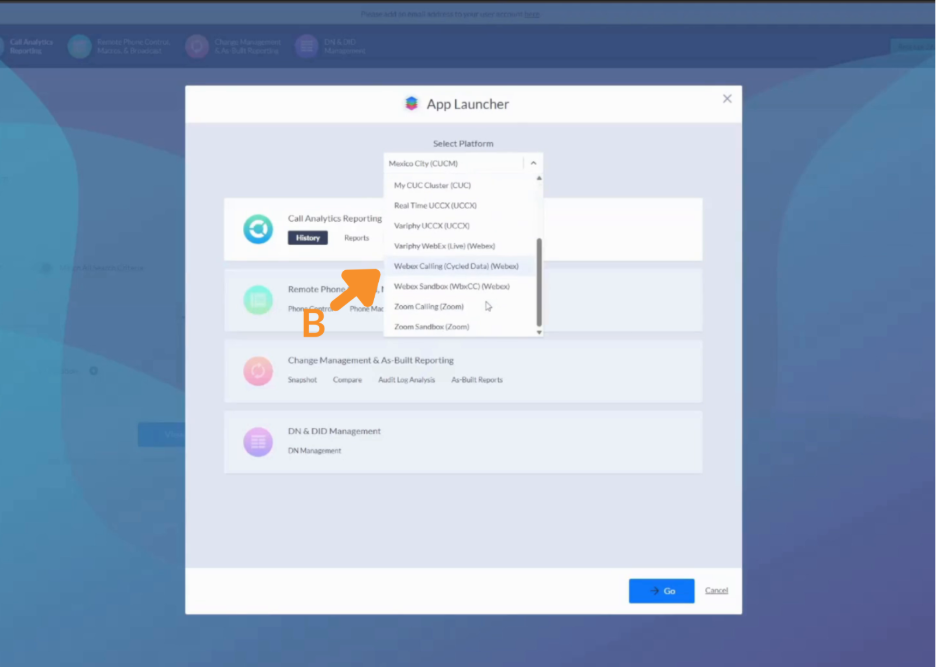
B. In the Select Platform dropdown, choose your Webex platform (in this example, Webex Sandbox).
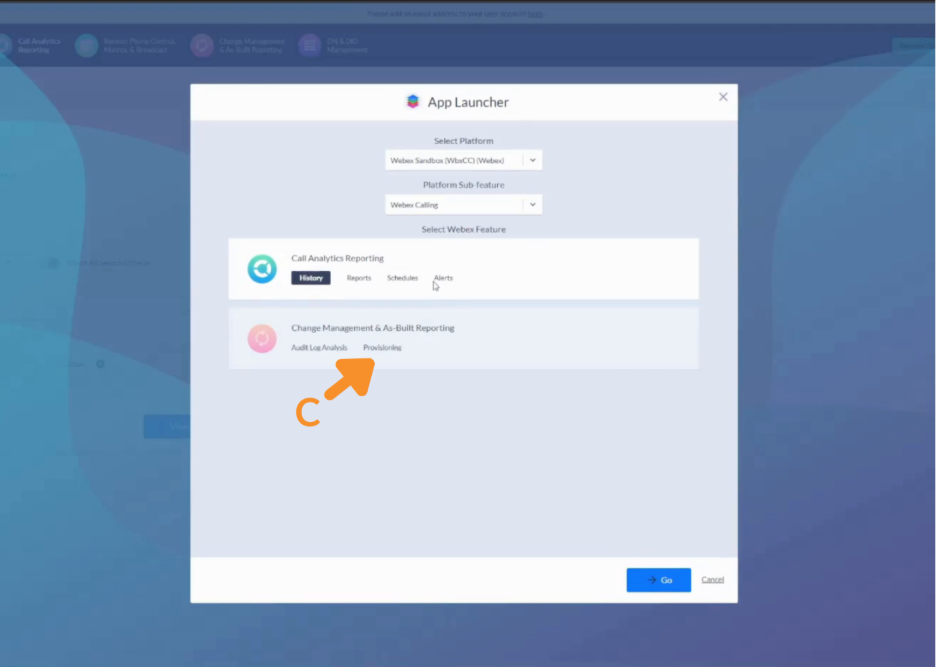
C. Under Change Management & As-Built Reporting, click Provisioning.
2. Create a new on-demand job
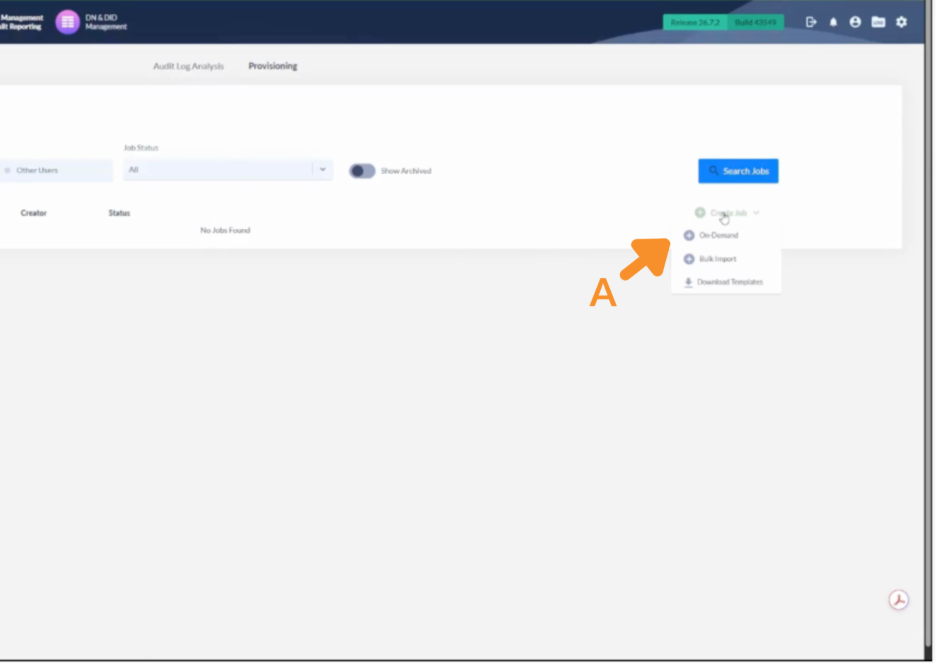
A. On the right, click Create Job and choose On-Demand.
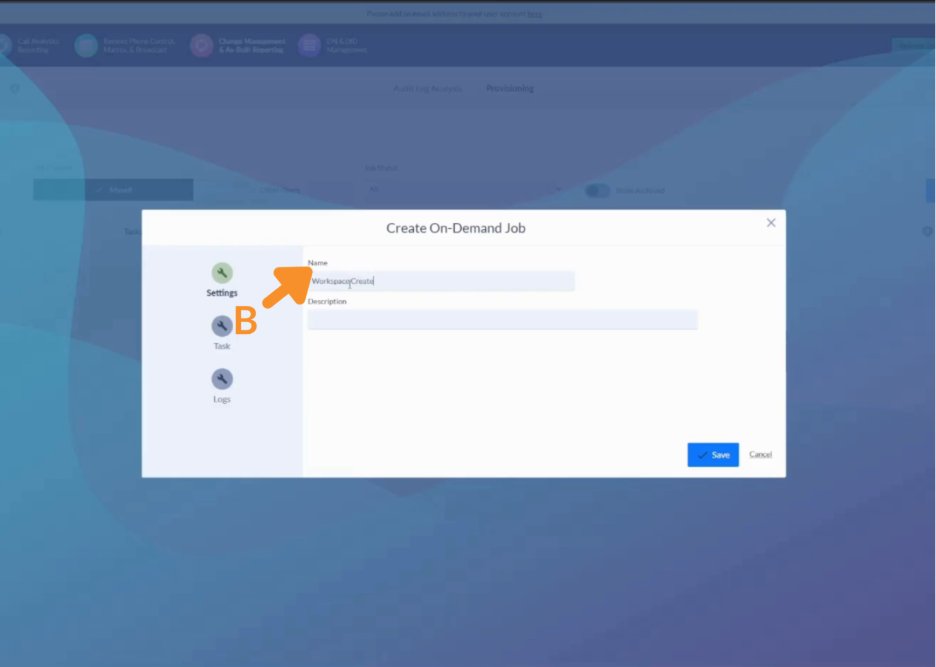
B. On the Settings tab, enter a Name for the job (for example, Workspace Create). This name can be saved and reused for future workspaces. Add an optional Description.
3. Add a task and define the operation
A. Switch to the Task tab.
B. Set Action to Create.
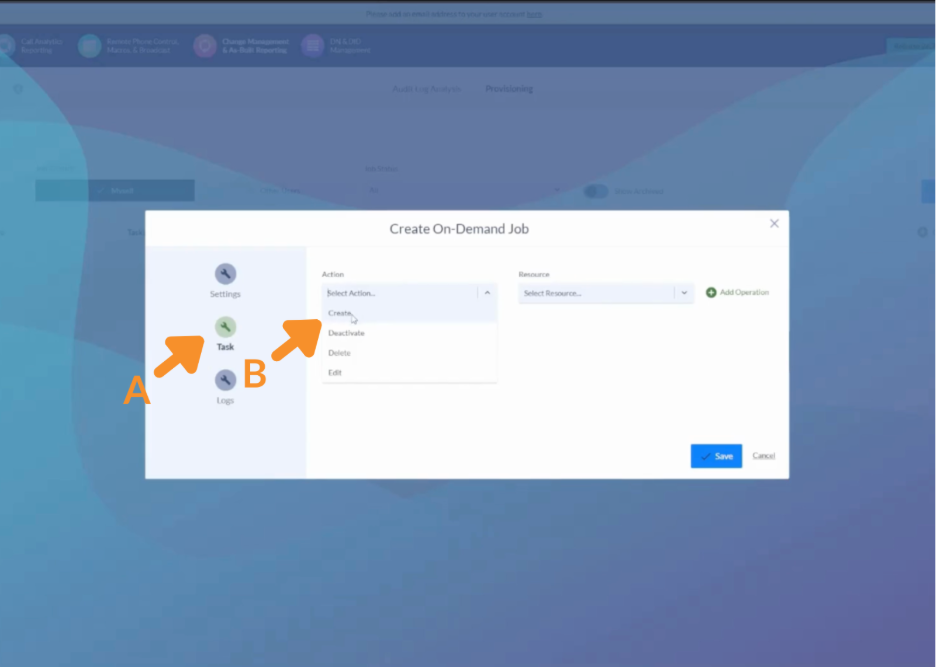
C. Open the Resource dropdown and choose Workspace.
D. Click Add Operation (the green + button).

E. On the Create Workspace operation, turn on or off Show Calling Settings, Show Calendar Settings, and Show Voicemail Passcode Options. Hover the information (i) icon beside each option to see what it does.
F. Click Save to create the job.

4. Run the job
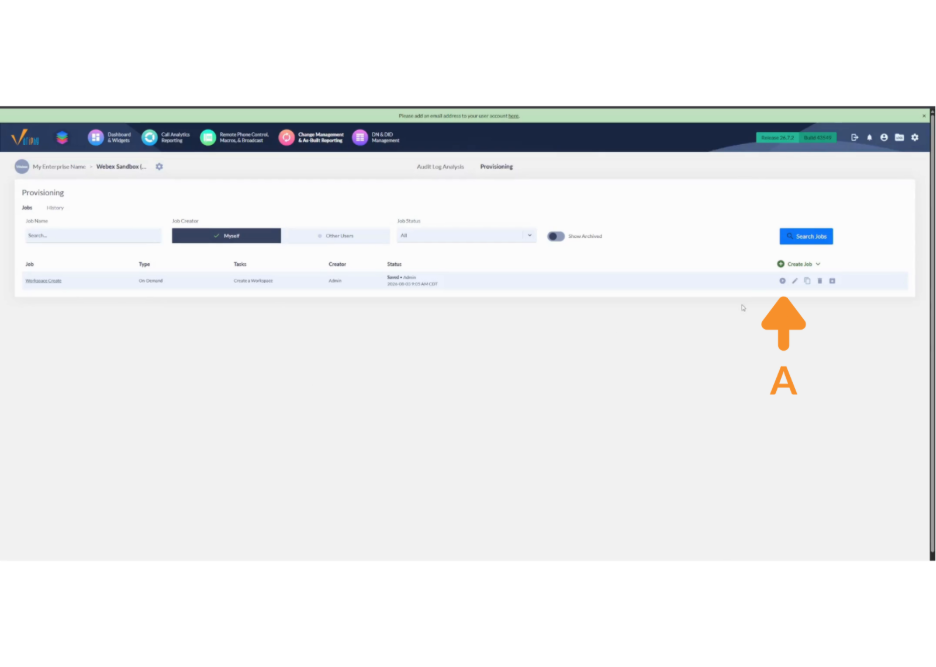
A. Click the Run (play ▶) icon on the right side of the job’s row.
5. Enter the workspace details
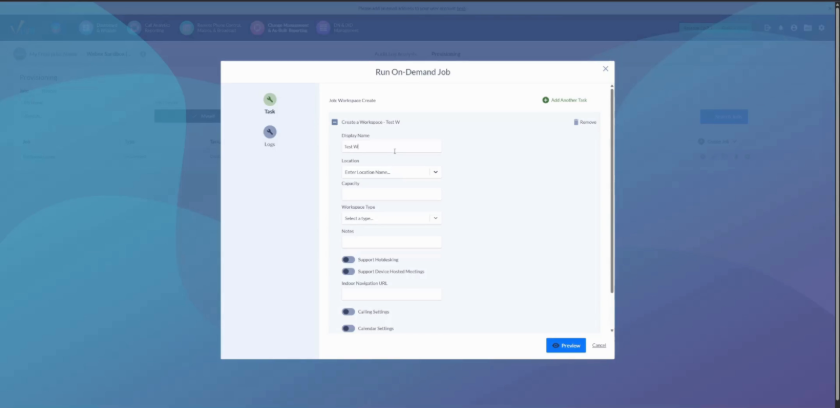
In the Run On-Demand Job window, define the workspace you want to create.
- Display Name: The name of the workspace (for example, Test WebEx).
- Location: Choose the site/location; if it has floors, select a Floor.
- Capacity: The number of people the workspace holds (optional).
- Workspace Type:
- Not Set
- Focus
- Huddle
- Meeting Room
- Open
- Desk
- Other
- Support Hotdesking / Support Device Hosted Meetings: Toggle on or off as needed.
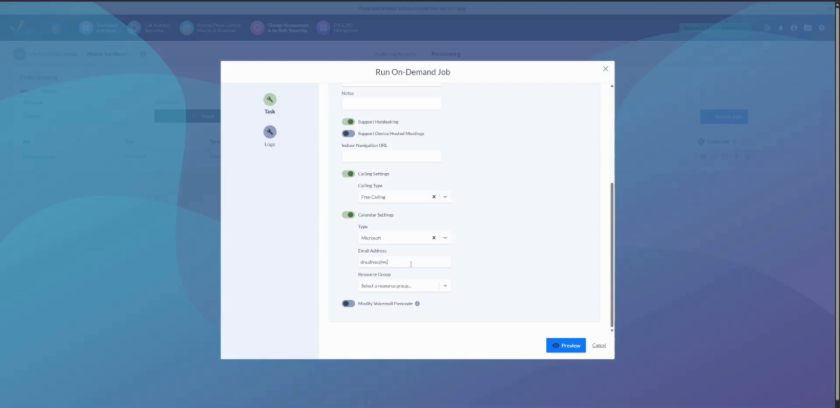
6. Configure calling and calendar settings
Scroll down to set the remaining options:
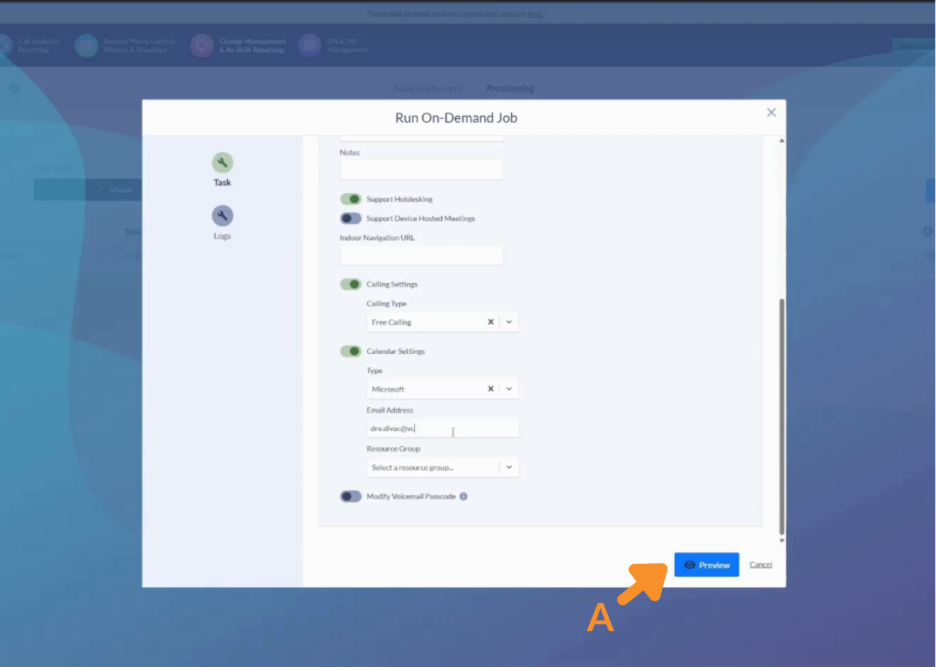
- Calling Settings: When on, choose a Calling Type (for example, Free Calling).
- Calendar Settings: When on, choose the calendar Type (for example, Microsoft) and enter the calendar Email Address.
- Resource Group: Select one if your organization uses them (optional).
- Modify Voicemail Passcode: Leave off unless you need to set a passcode.
7. Preview and run
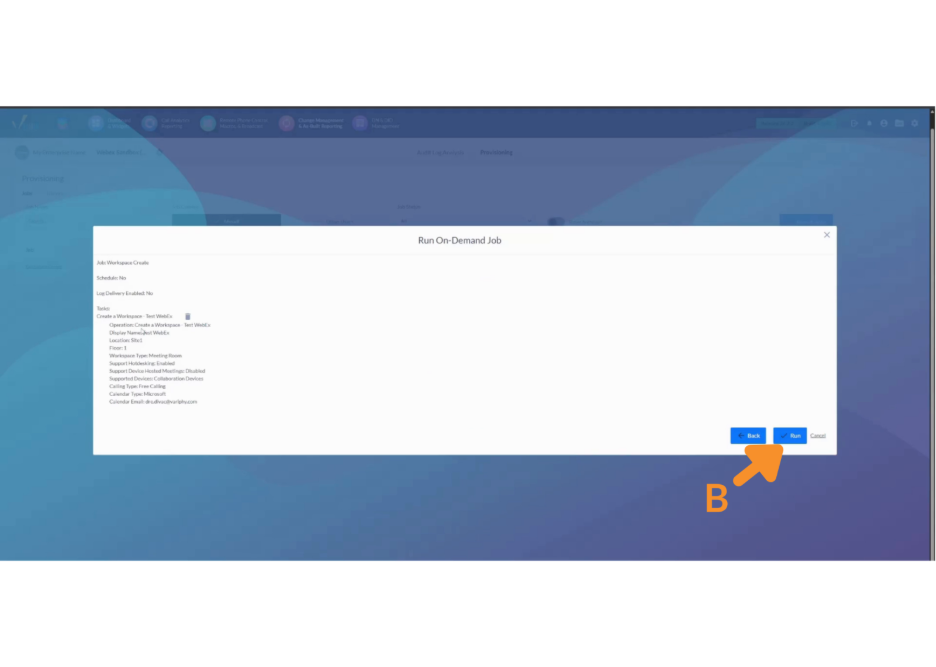
A. Click Preview to review a summary of exactly what will be created.
B. Confirm the details, then click Run. (Use Back if you need to make changes first.)
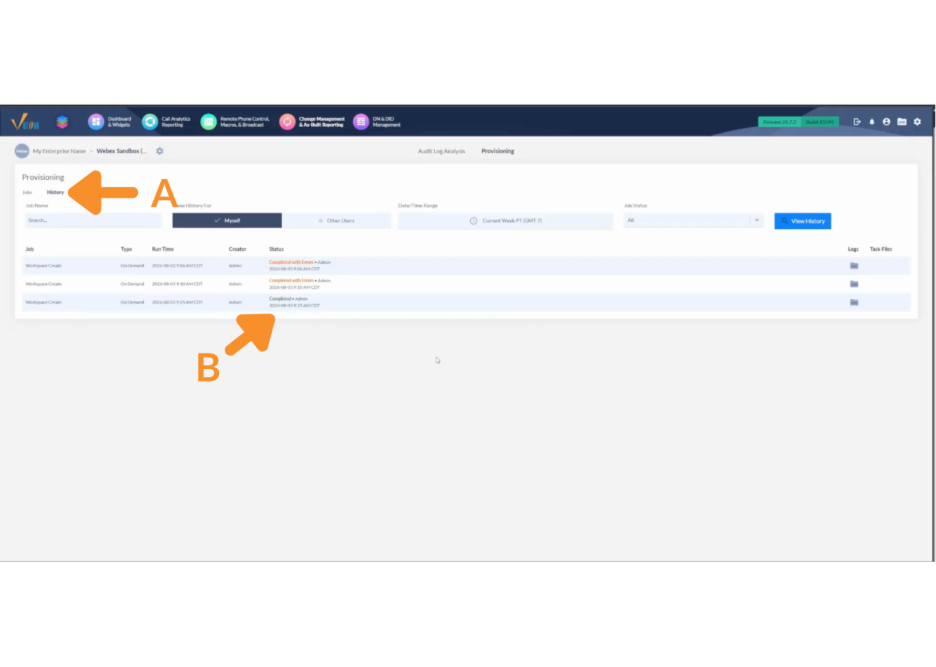
8. Verify in History
A. Open the History tab.
B. Check the Status column to confirm the job Completed or Completed with Errors.
Still Need Help?
Email our support team at support@variphy.com or click the button below to access our ticket portal.
Please provide details about your question or issue, including any applicable screenshots, reports, or Variphy application log files
