
Applies to:
- Variphy users with Webex Calling integrations.
- Administrators managing Webex Calling users through Variphy’s provisioning interface.
- Teams responsible for onboarding, updating, deactivating, or removing users in Webex Control Hub.
Common Causes or Issues
- Create new Webex Calling users — with licenses, location, and profile details — directly from Variphy without switching to Control Hub.
- Edit existing users’ titles, departments, licenses, and other attributes from a single interface.
- Deactivate users in Webex Control Hub to suspend access while preserving their record.
- Permanently delete users that are no longer needed, and confirm each change through job history.
- Configure log delivery so a chosen recipient is notified by email or Webex chat whenever a provisioning job runs.
Provision Users in Variphy for Webex Calling
1. Create a User.
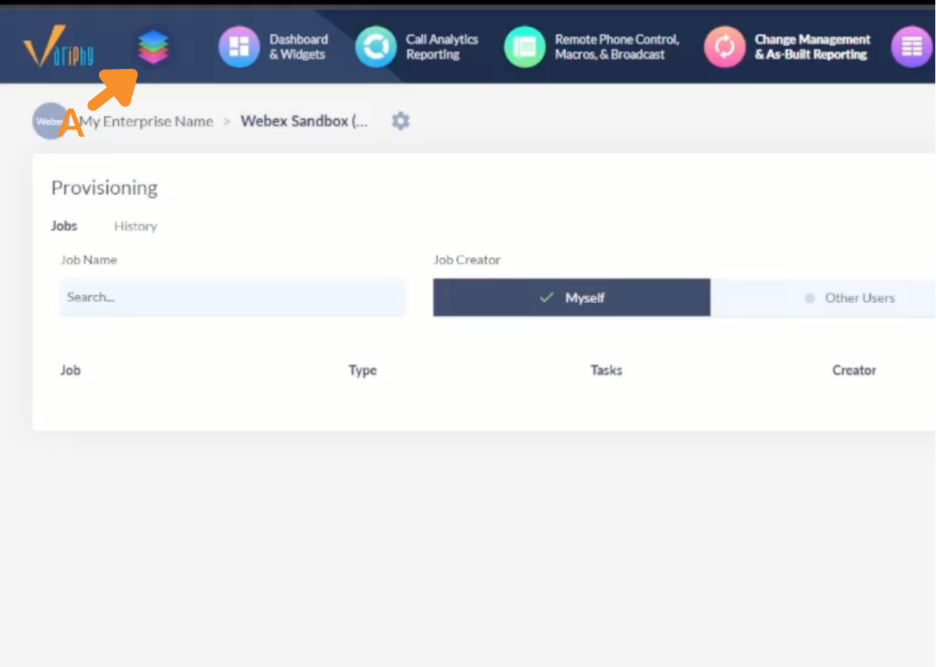
A. Open the App Launcher.
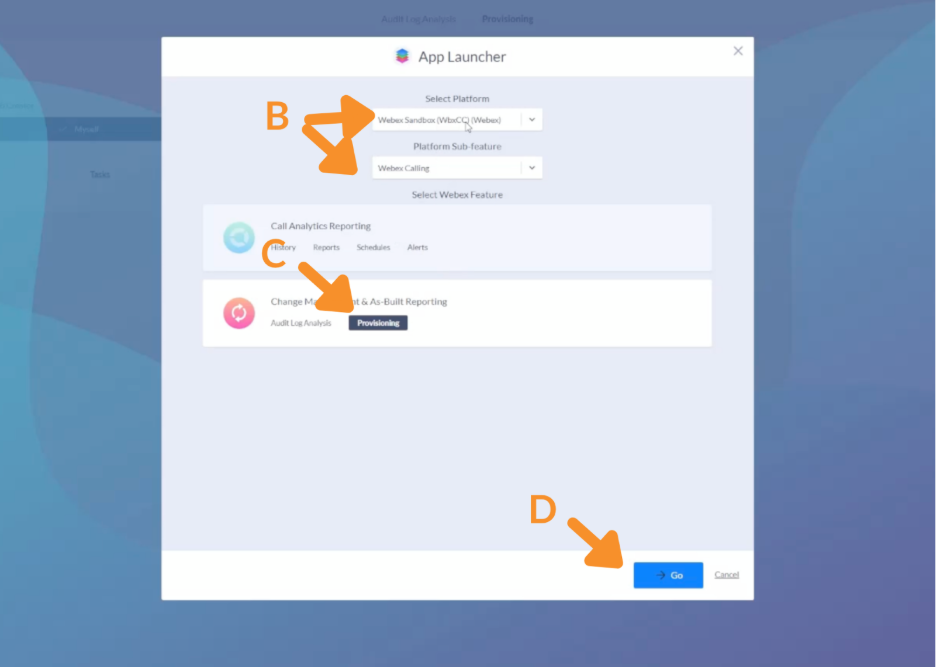
B. Choose your platform and set Platform Sub-feature to Webex Calling.
C. Select Provisioning on the Change Management & As-Built Reporting section.
D. Click Go.
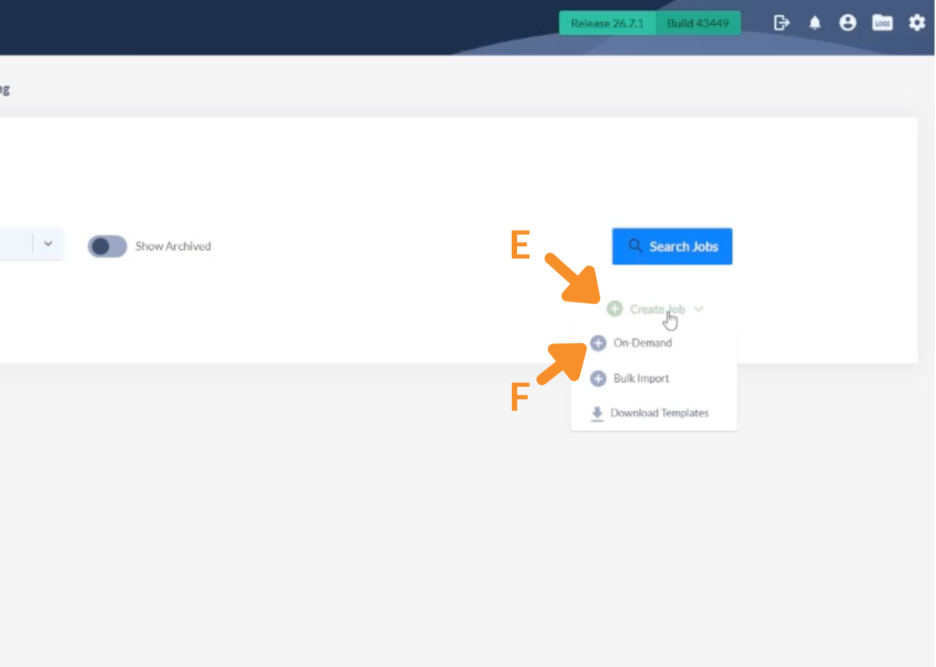
E. Open the Create Job menu.
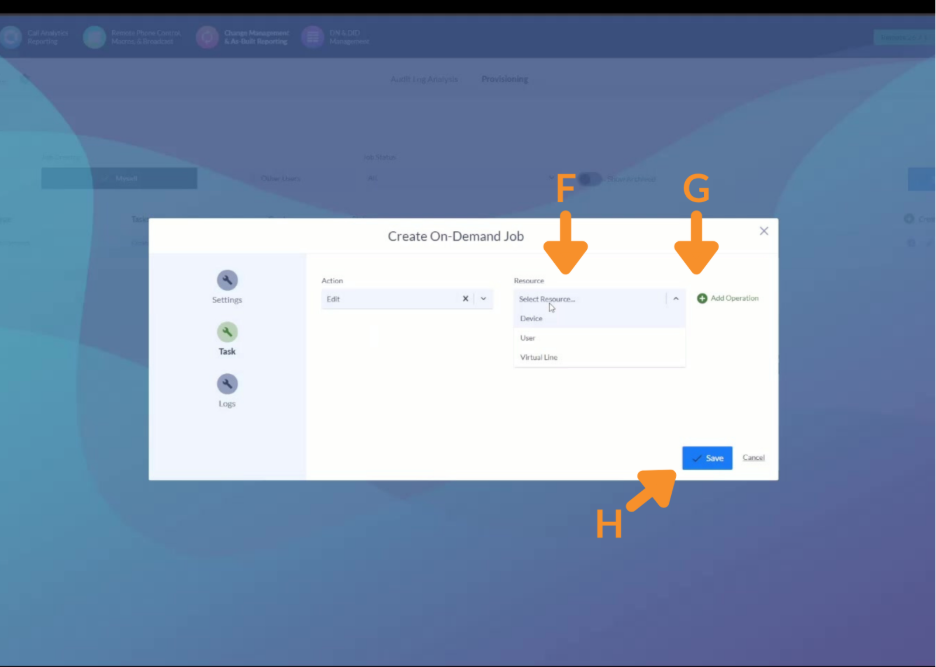
F. Select On-Demand.
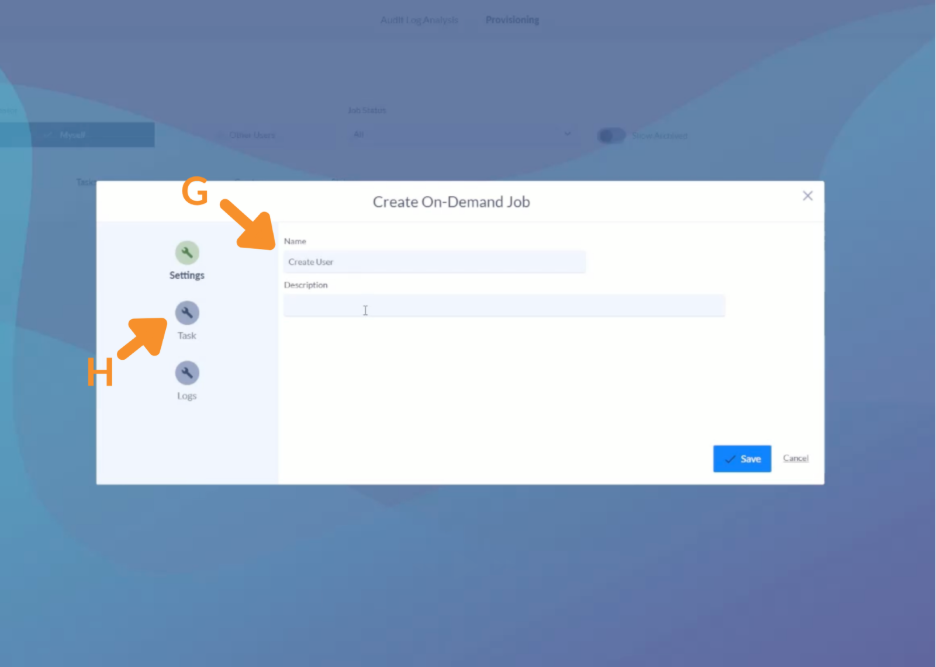
G. In the Settings panel, enter a job Name (e.g., “Create User”).
H. Open the Task tab.
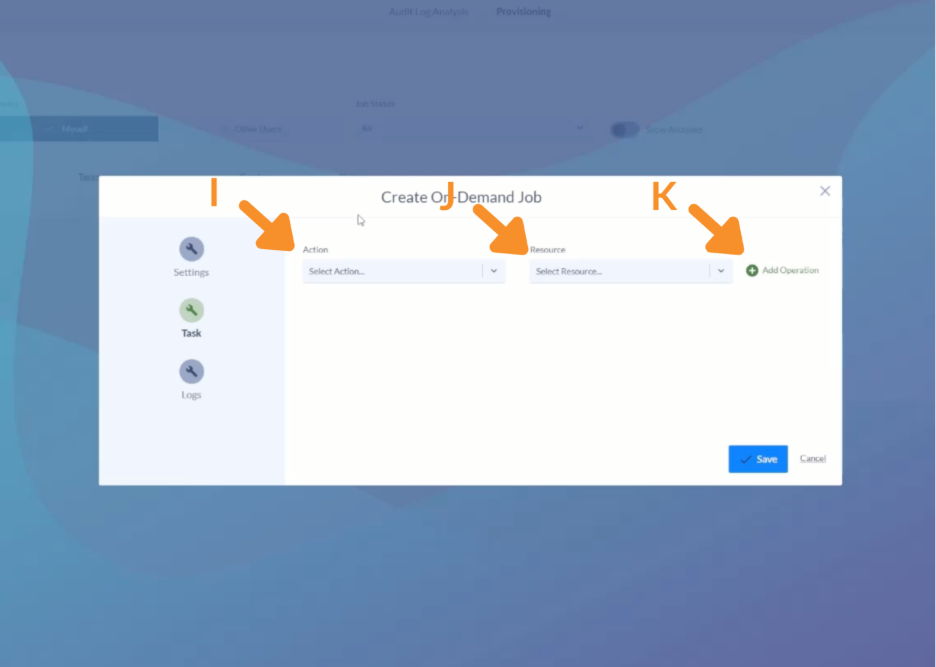
I. Set Action to Create.
J. Set Resource to User.
- Other resources include Device, Virtual Line, and Activation Code.
- Multiple operations can be added to one job.
K. Click Add Operation.
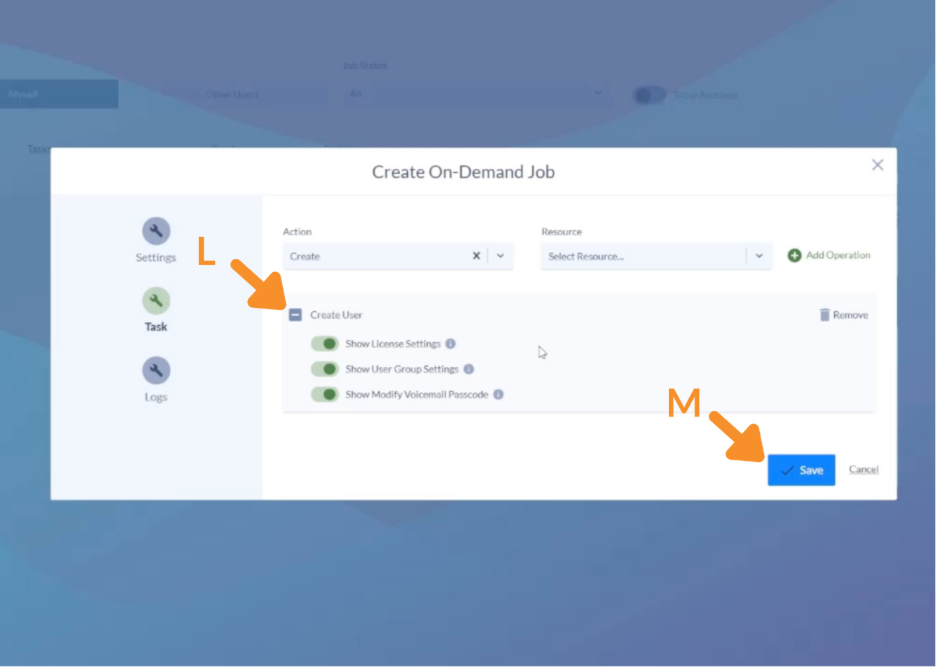
L. Review the display toggles that control which fields appear at run time:
- Show License Settings
- Show User Group Settings
- Show Modify Voicemail Passcode
M. Click Save.
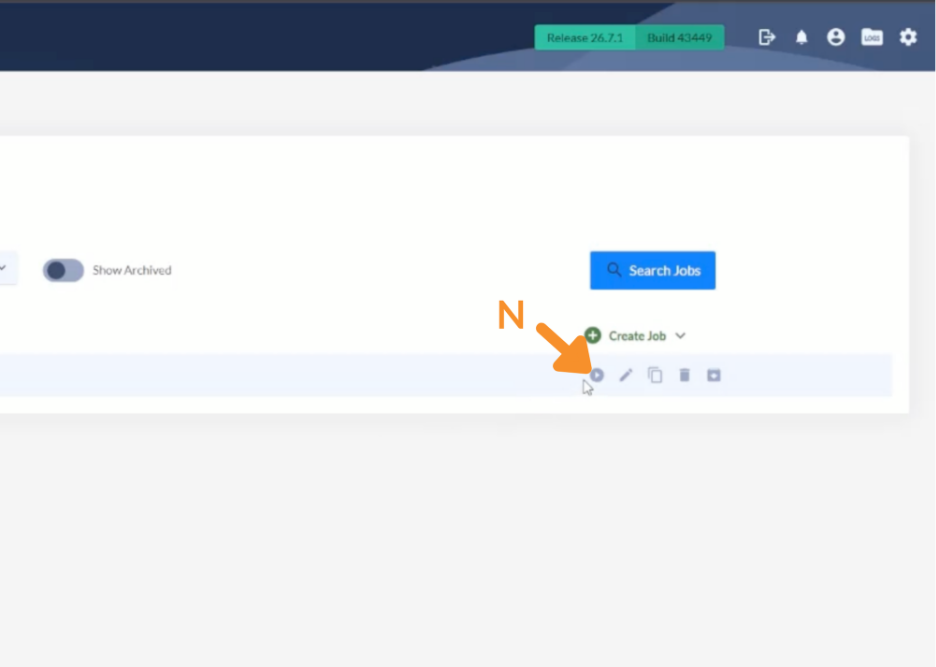
N. On the saved job row, click the run (play) button to open the Run On-Demand Job modal.
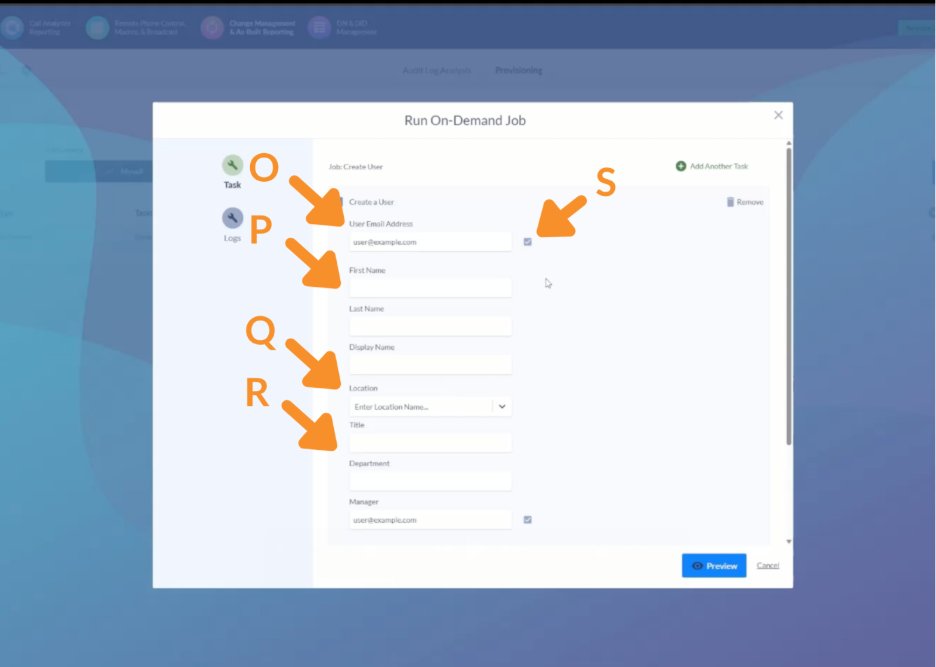
O. Enter the User Email Address (e.g., testuser1@variphy.com).
P. Enter the First Name and Last Name. The Display Name populates automatically.
Q. Select a Location (the Webex Calling location for the user, e.g., Site1).
R. Optionally, enter the Title, Department, and Manager.
S. Select the checkbox beside User Email Address to validate the address against Webex Control Hub.
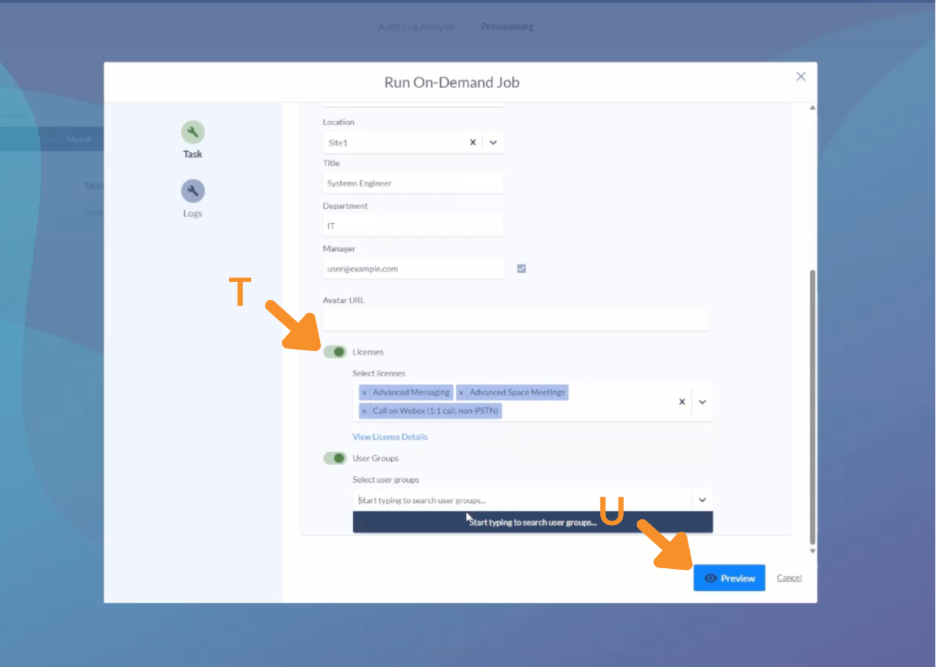
T. Under License Settings, assign the licenses to grant this user.
U. Click Preview to review the job.
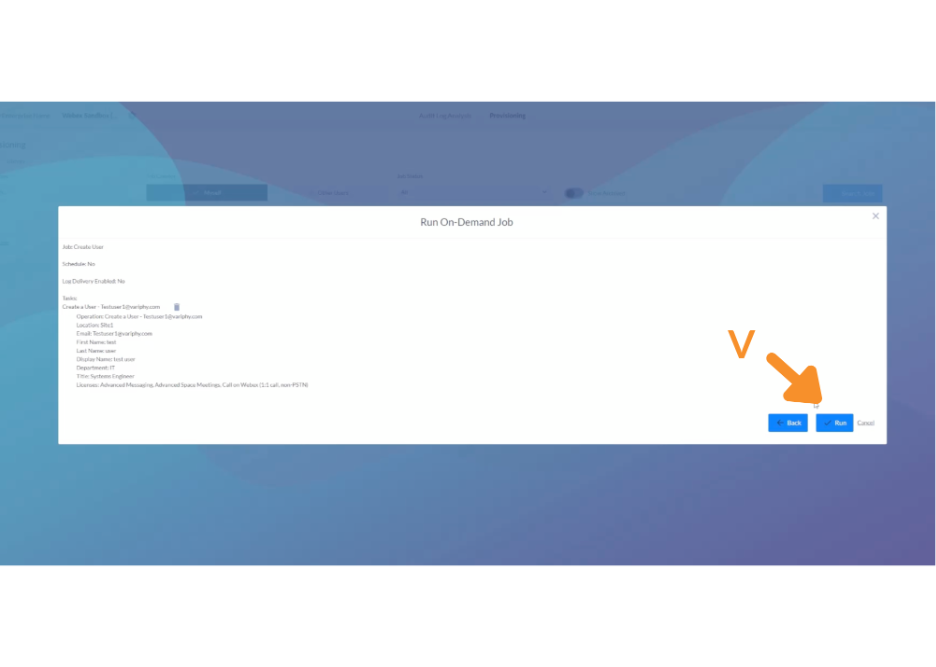
V. Click Run.
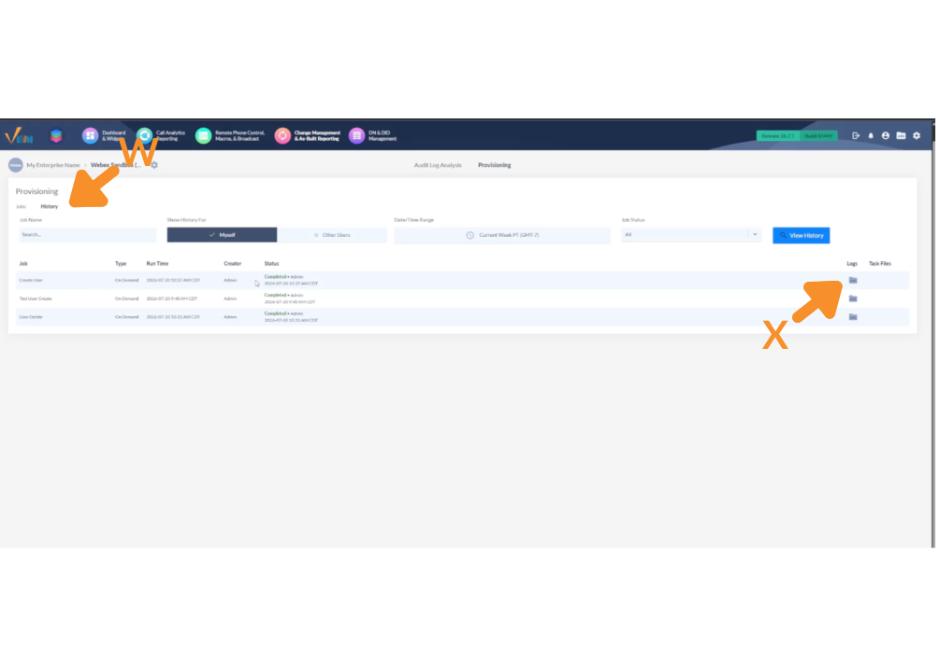
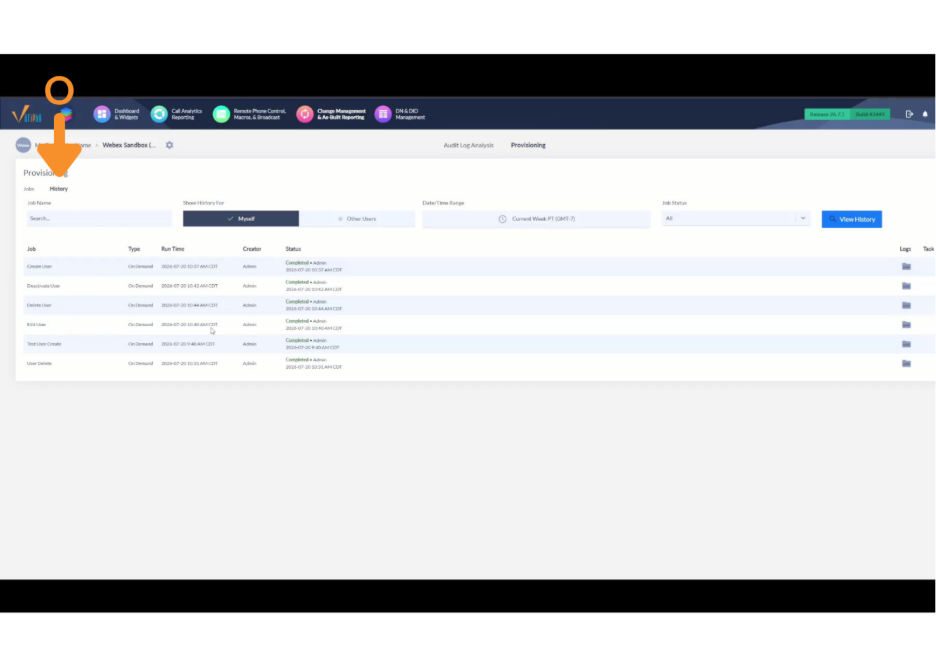
W. Open the History tab and confirm the status shows Completed.
X. If the job errored, click Logs to see why (most often permissions).
2. Edit a User.
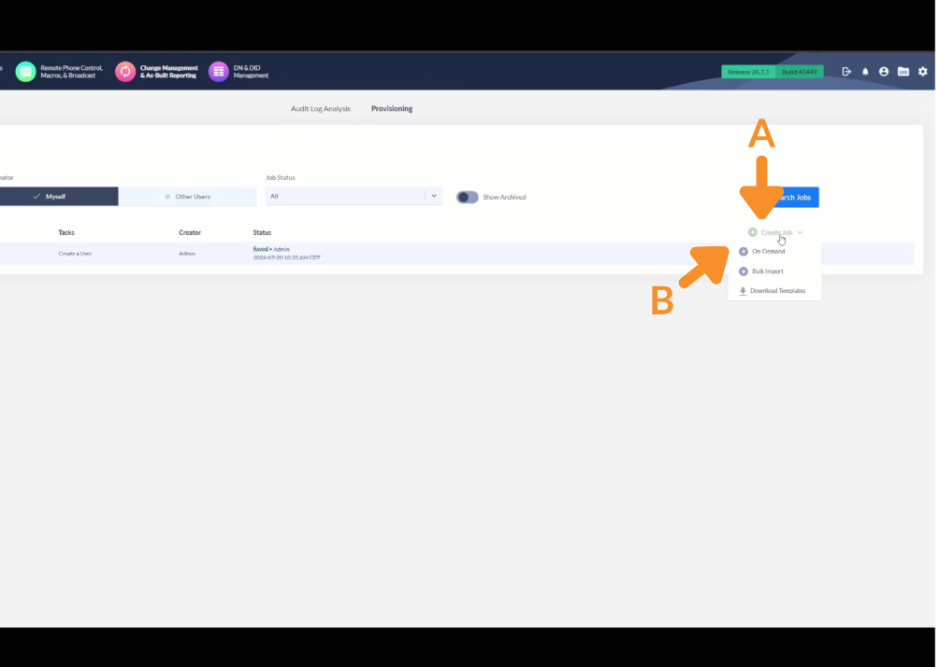
A. Open the Create Job menu.
B. Select On-Demand.
C. In the Settings panel, enter a job Name (e.g., “Edit User”).
D. Open the Task tab.
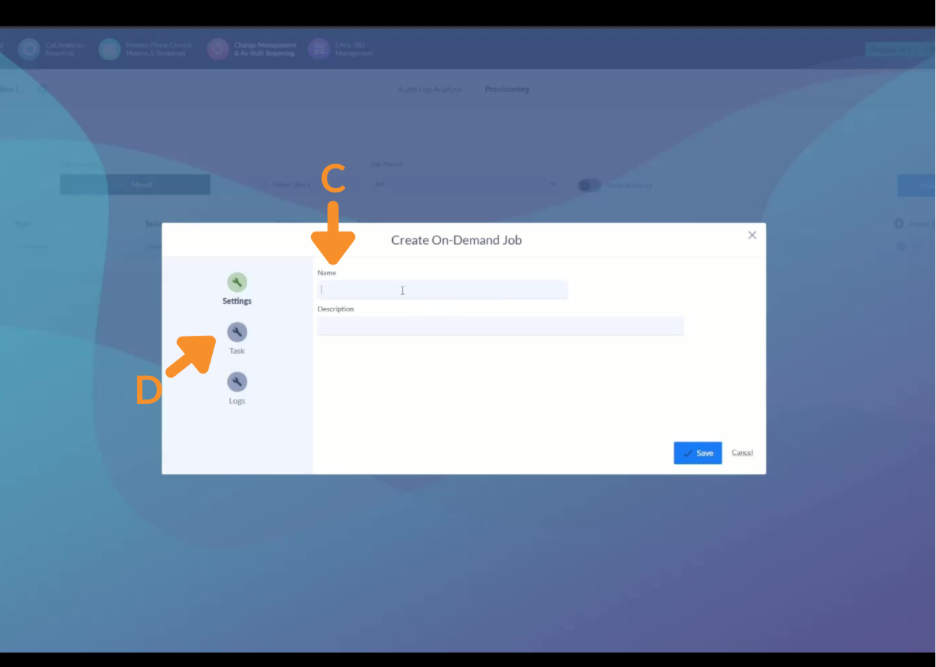
E. Set Action to Edit.
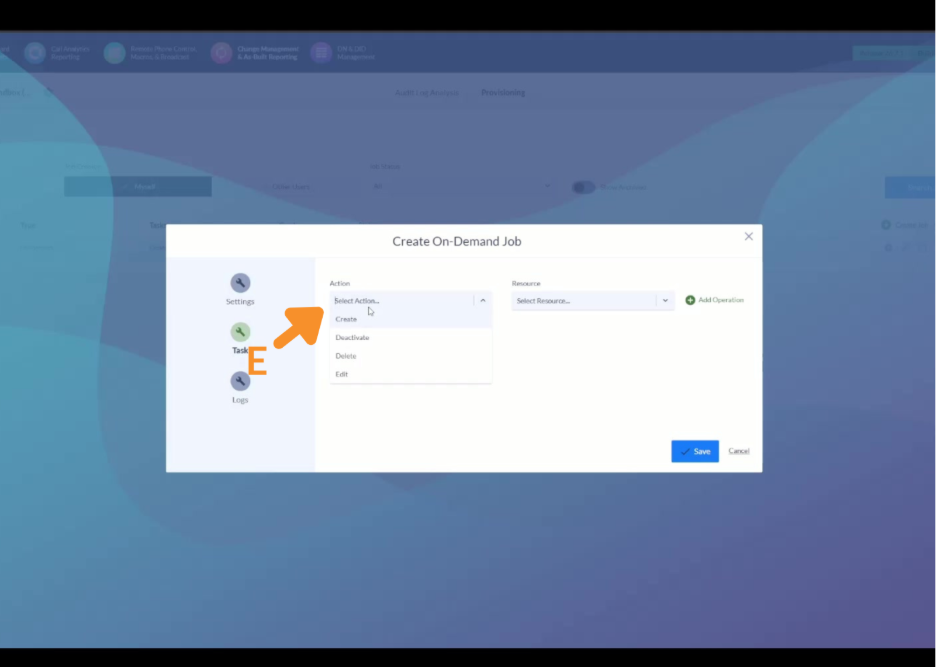
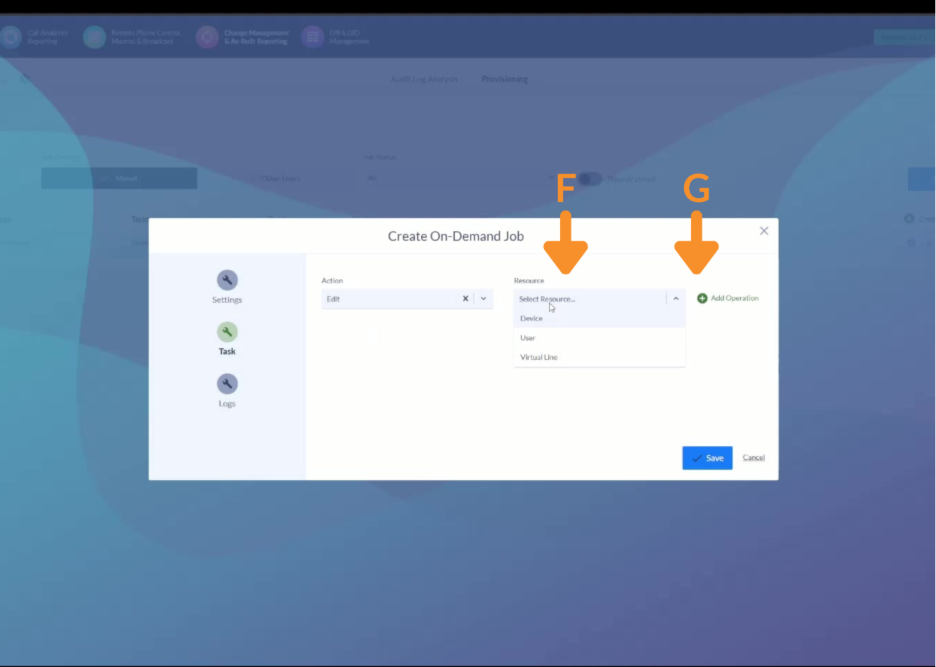
F. Set Resource to User.
- Additional operations (e.g., editing a device) can be added to the same job.
G. Click Add Operation.
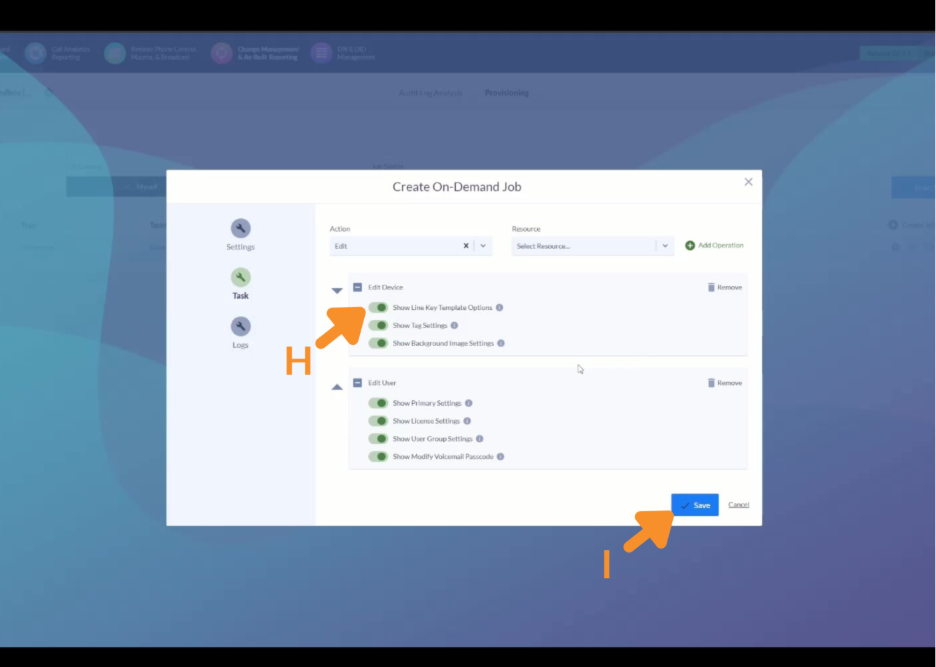
H. Confirm the fields you want available to edit are checked.
I. Click Save.
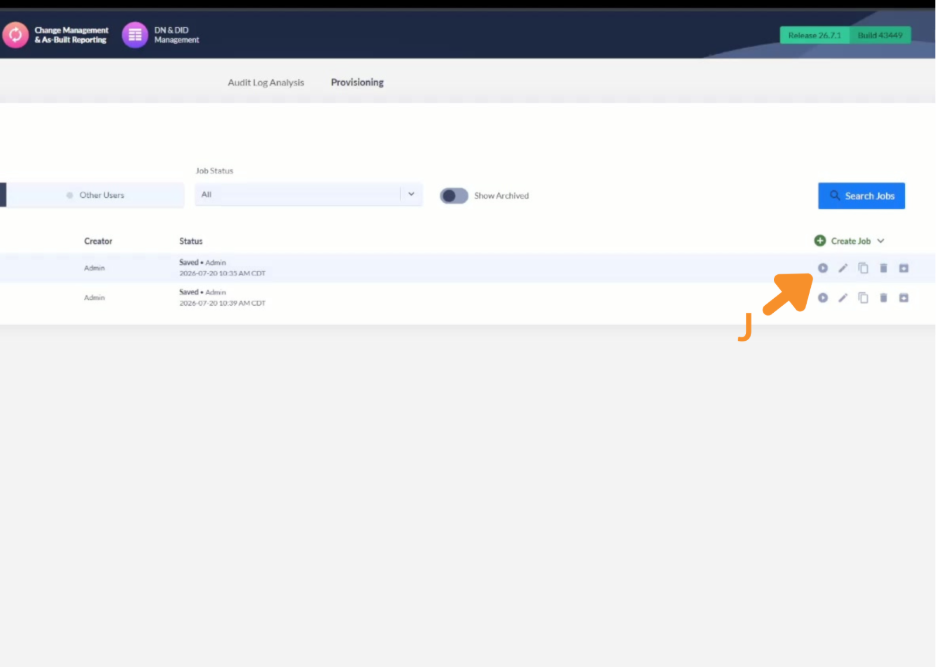
J. On the job row, click the run button.
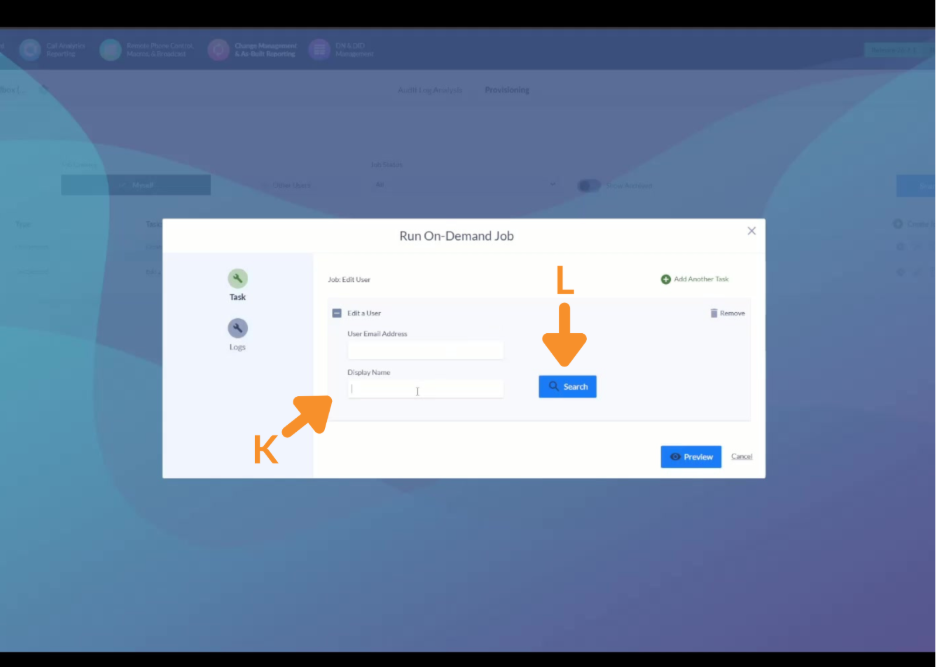
K. Enter the user’s email or Display Name in the lookup field.
L. Click Search.
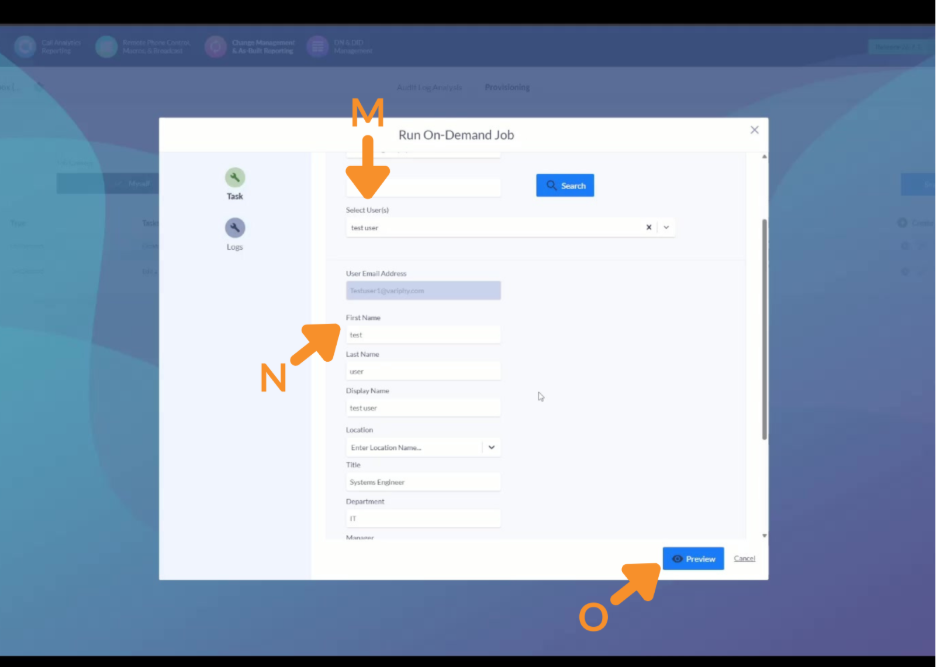
M. Select the user from the results. Their current settings load automatically.
N. Edit the desired fields — for example, change the Title to “IT Manager,” or add and remove licenses.
O. Click Preview to confirm the change.
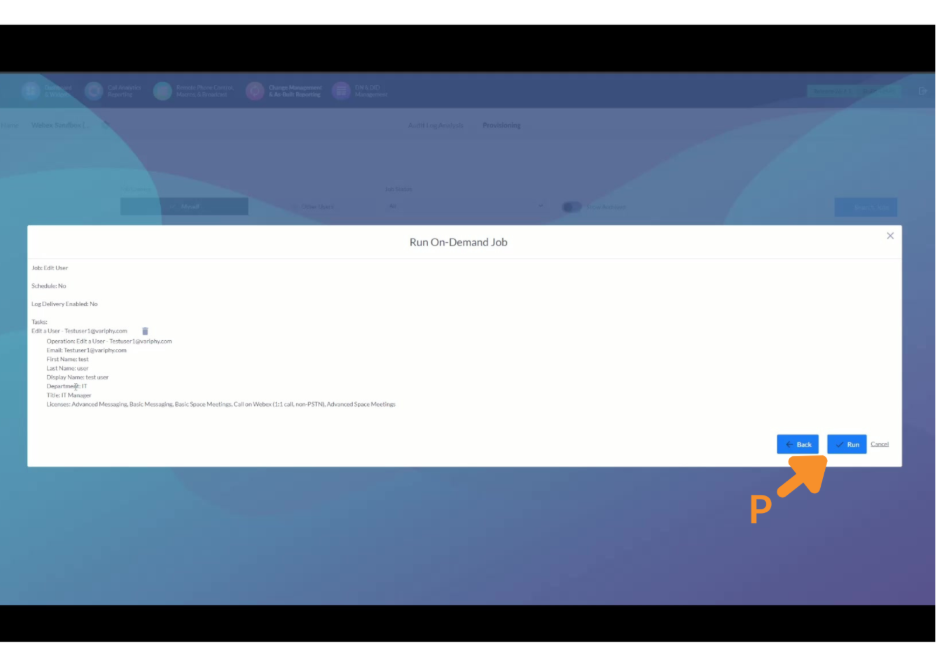
P. Click Run.
3. Deactivate a User.
A. Open the Create Job menu.
B. Select On-Demand.
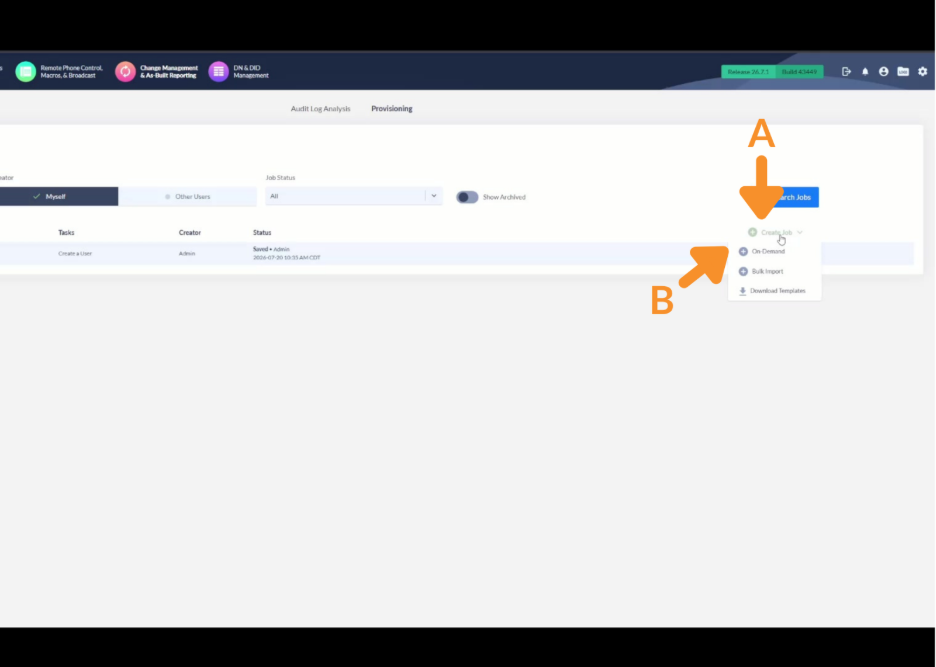
C. In the Settings panel, enter a job Name (e.g., “Deactivate User”).
D. Open the Task tab.
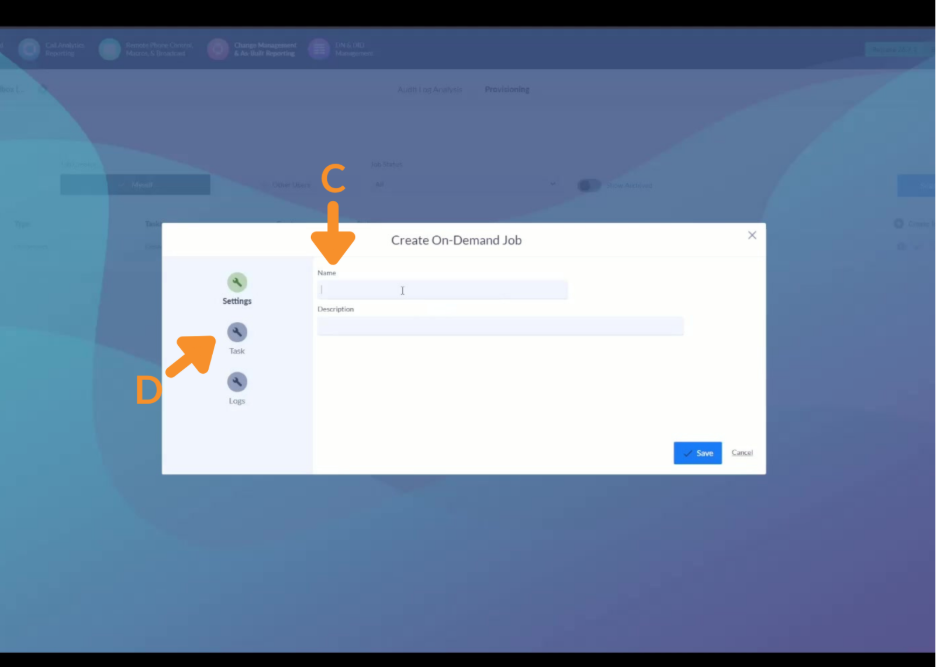
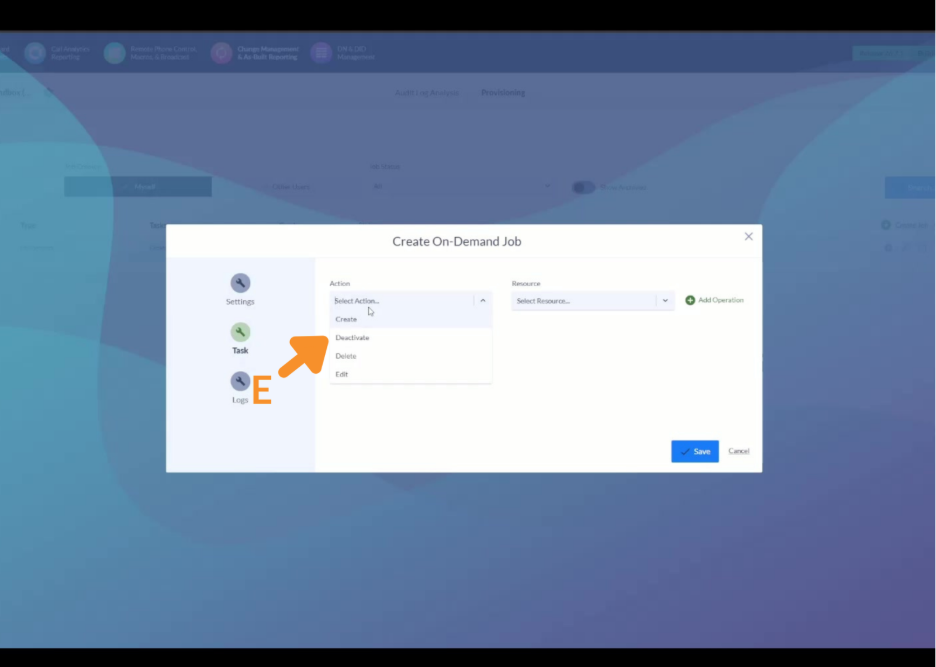
E. Set Action to Deactivate.
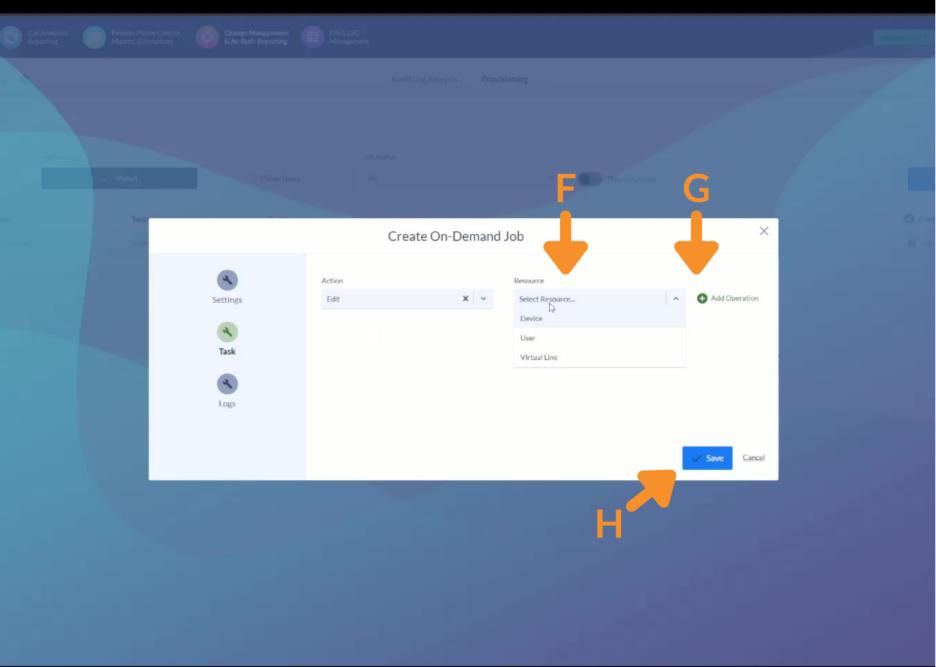
F. Set Resource to User.
G. Click Add Operation.
H. Click Save.
I. On the job row, click the run button.
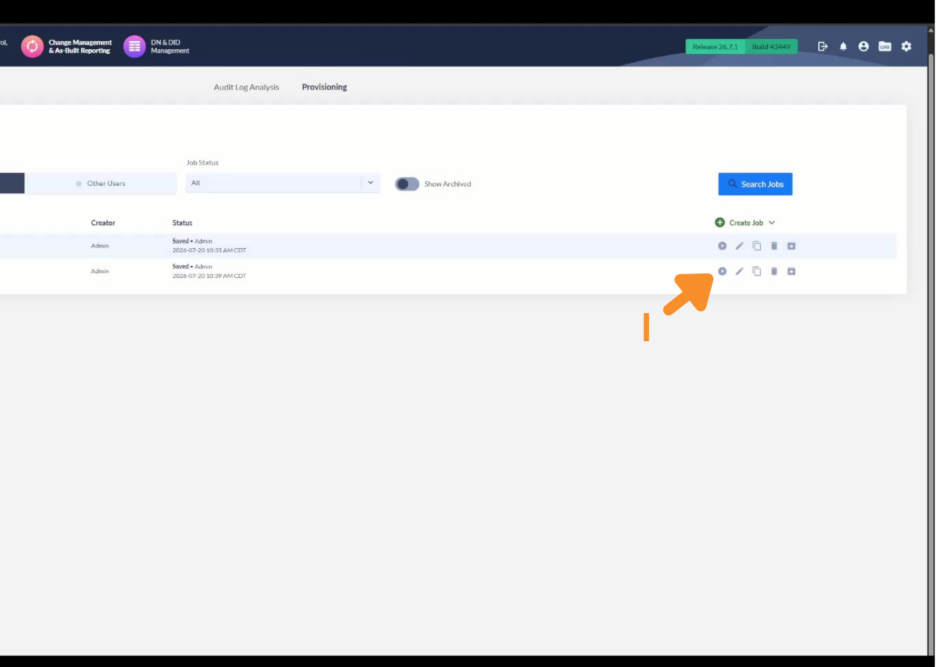
J. Enter the user’s Display Name (or email) in the lookup field.
K. Click Search. The lookup queries Webex Control Hub live — no sync required.
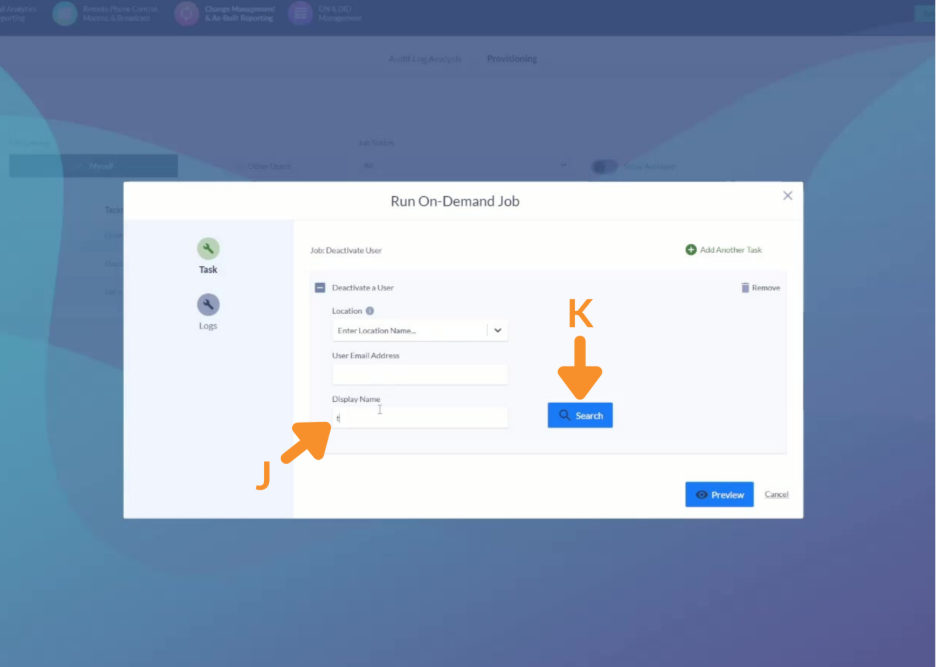
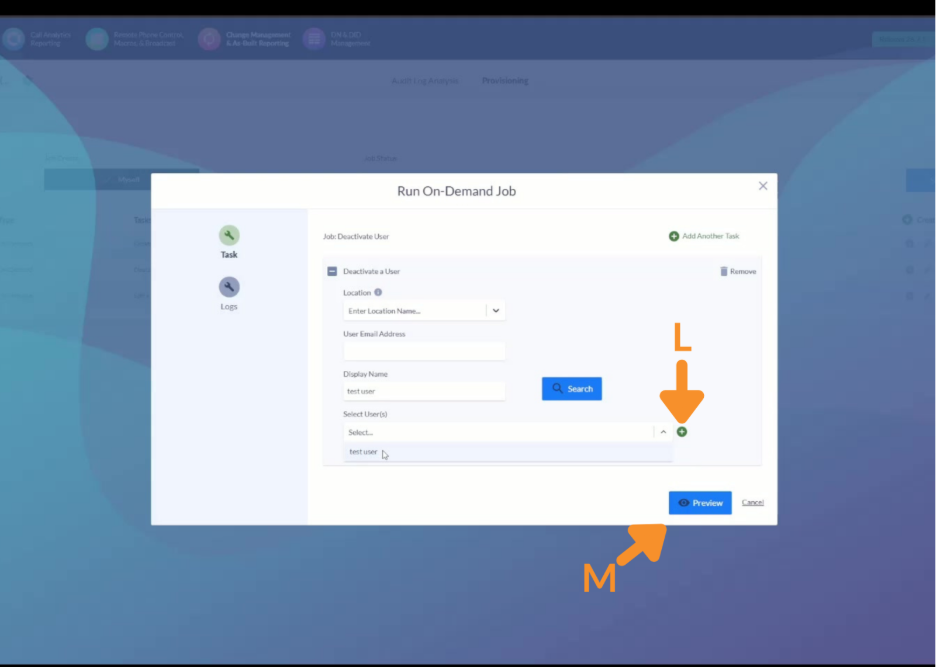
L. Click the + button on the right to set the looked-up user as the selected target.
M. Click Preview to confirm.
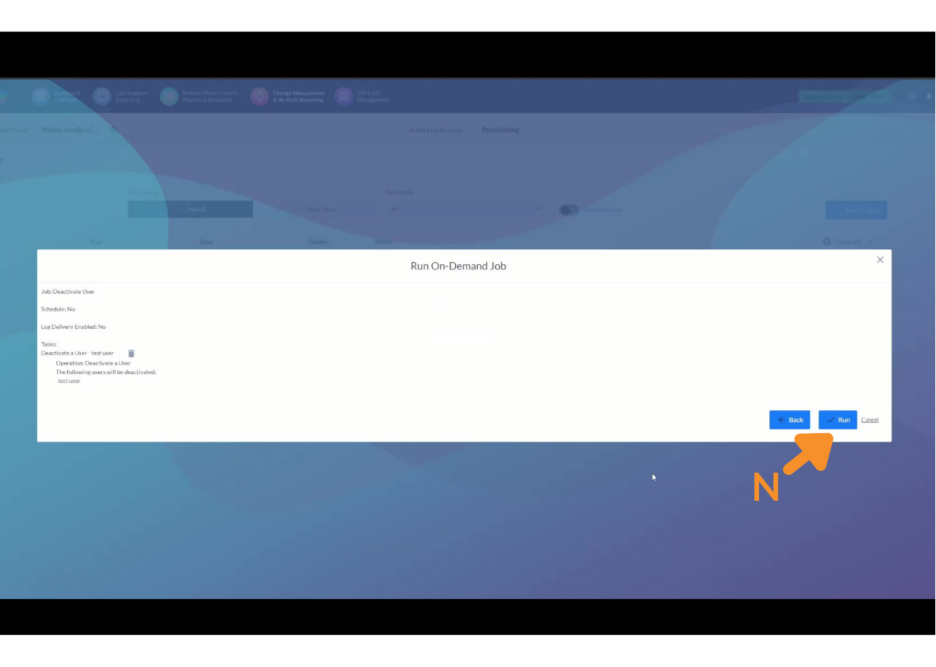
N. Click Run.
O. Open the History tab and confirm the Deactivate User job completed successfully.
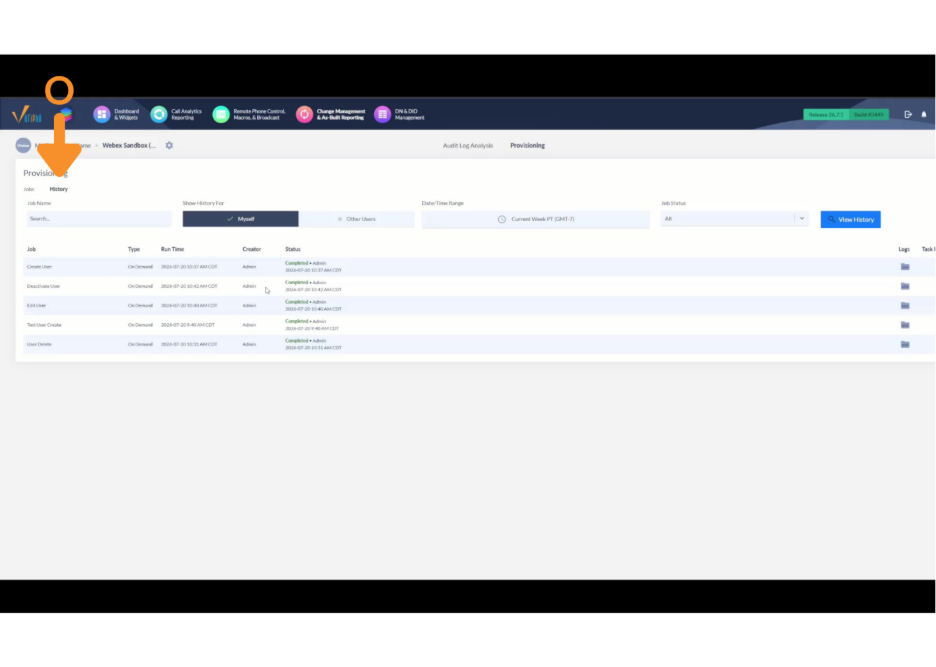
4. Delete a User.
A. Open the Create Job menu.
B. Select On-Demand.
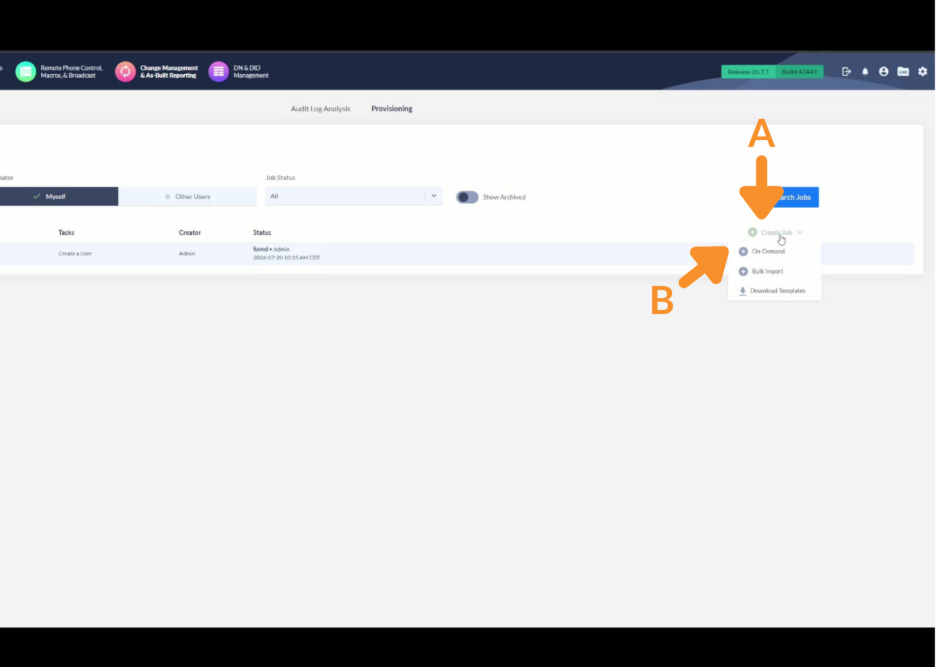
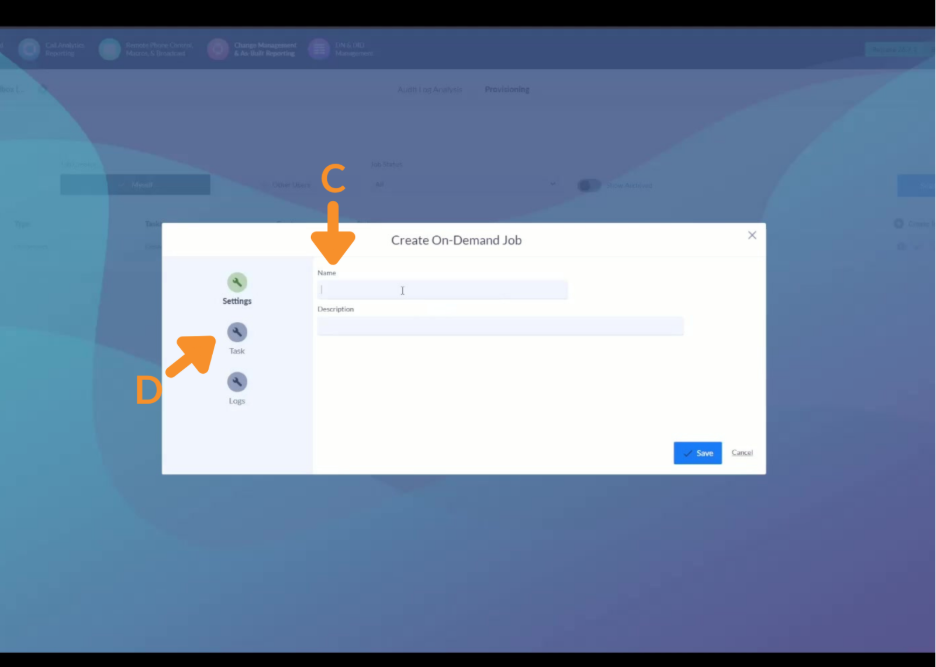
C. In the Settings panel, enter a job Name (e.g., “Delete User”).
D. Open the Task tab.
E. Set Action to Delete.
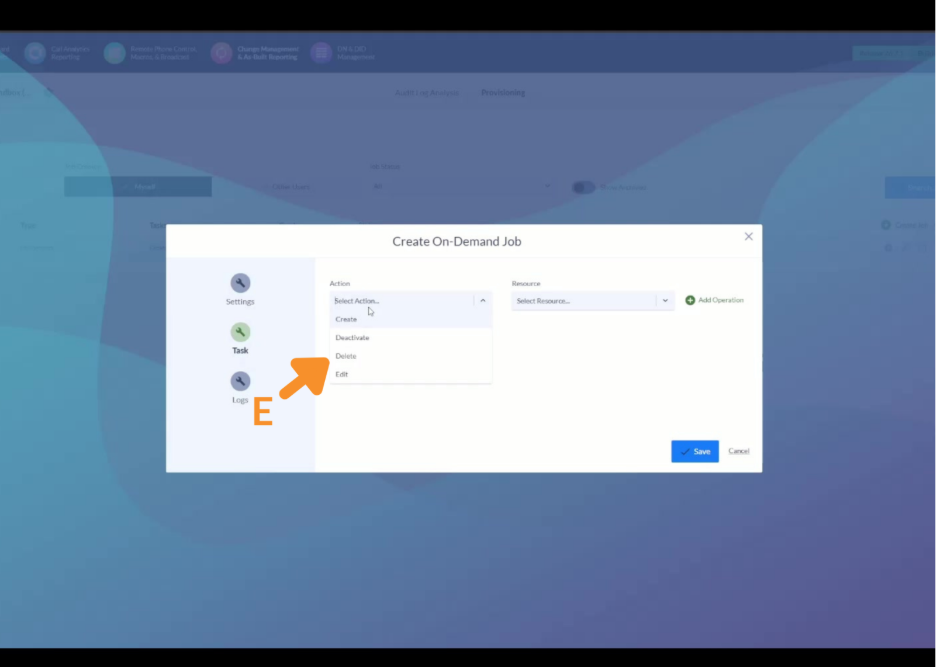
F. Set Resource to User.
- Delete is the only operation available for a user.
G. Click Add Operation.
H. Click Save.
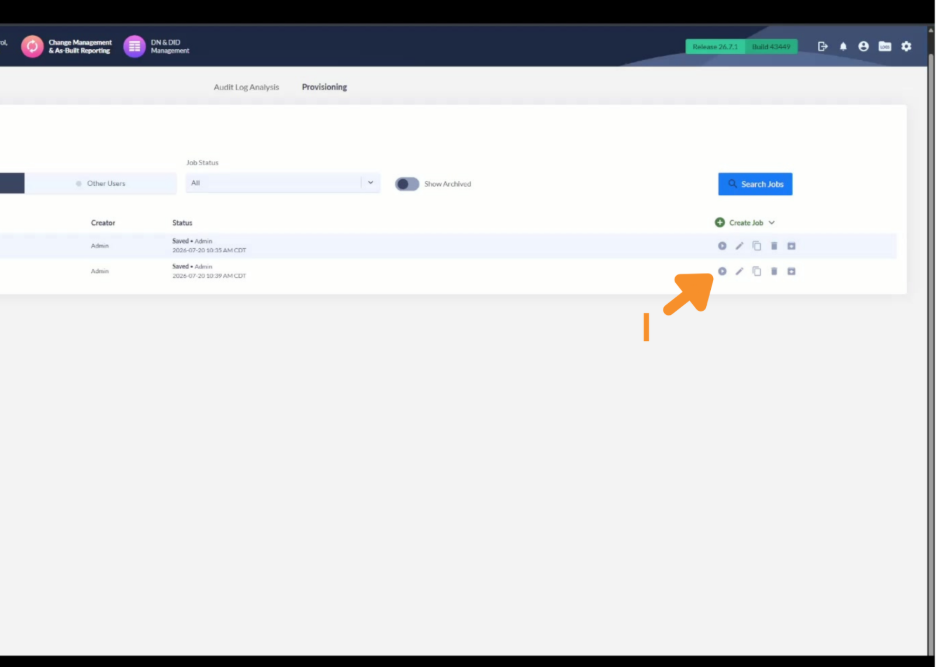
I. On the job row, click the run button.
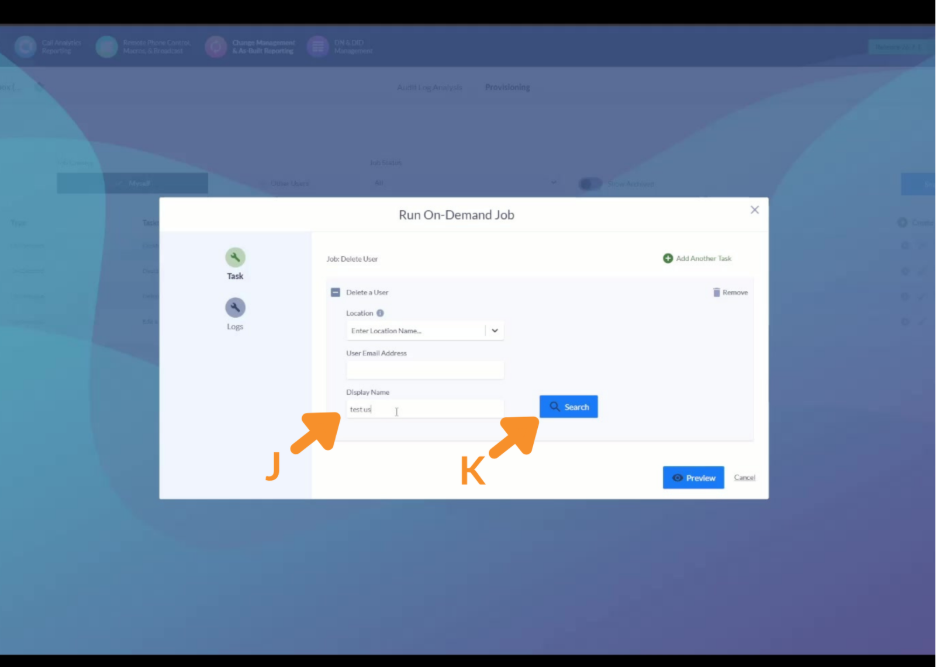
J. Enter the user’s Display Name in the lookup field.
K. Click Search.
L. Click the + button to add the user as the target.
M. Click Preview to confirm the deletion target.
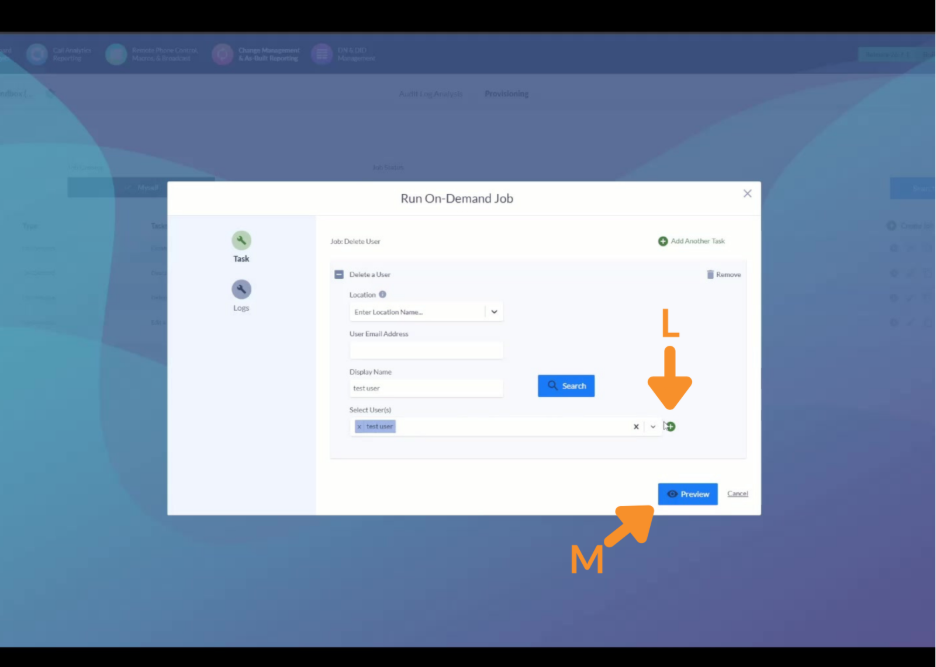
N. Click Run. This permanently deletes the user.
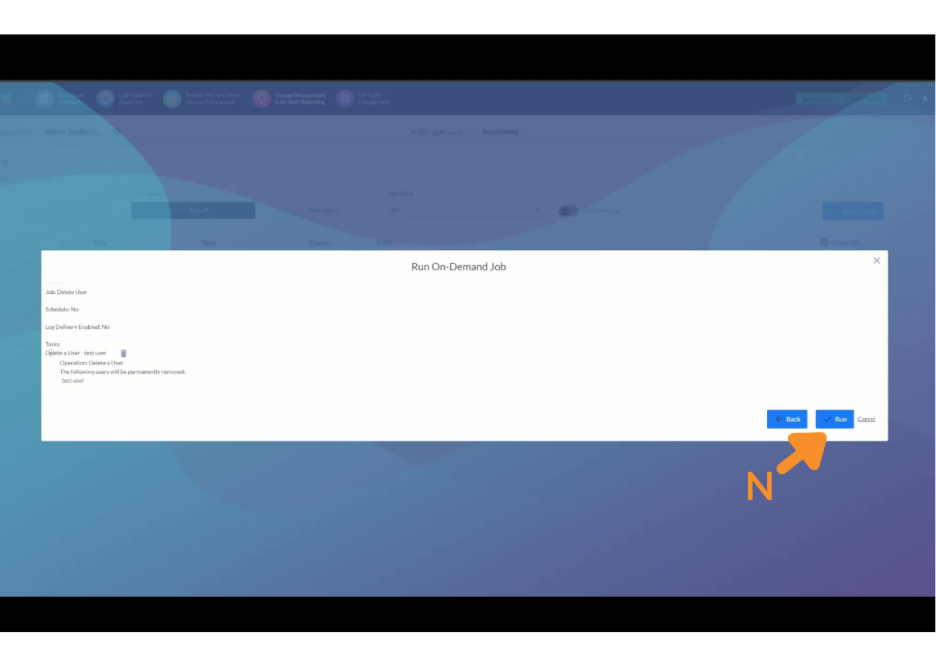
O. Open the History tab and confirm the Delete User job completed successfully.
5. Configure Log Delivery for All Users (Optional).
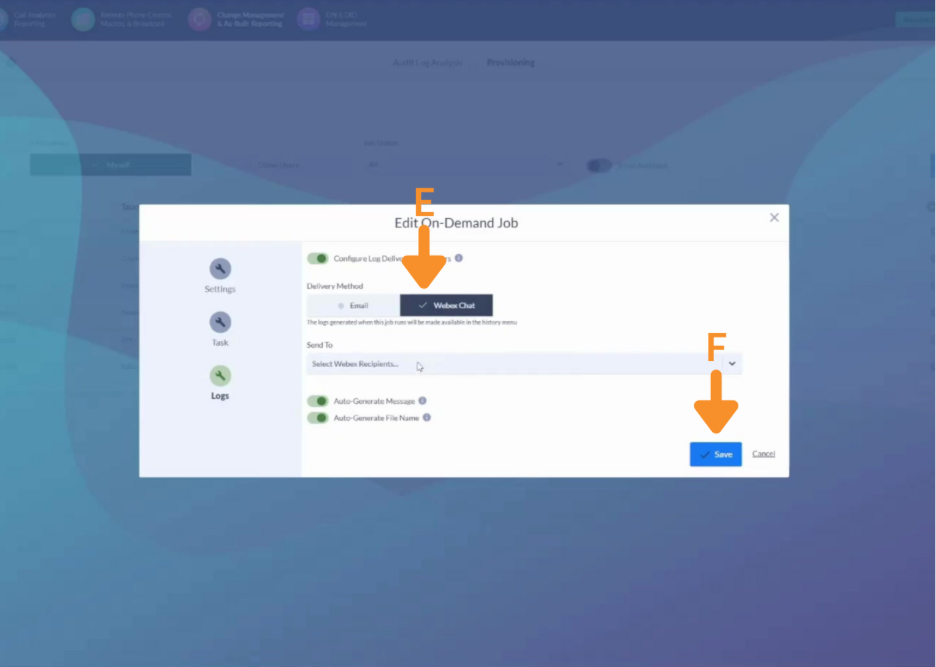
Log delivery can be set on any on-demand job — Create, Edit, Deactivate, or Delete — to notify a chosen recipient whenever the job runs. This is useful for tracking who is creating, editing, or removing users.
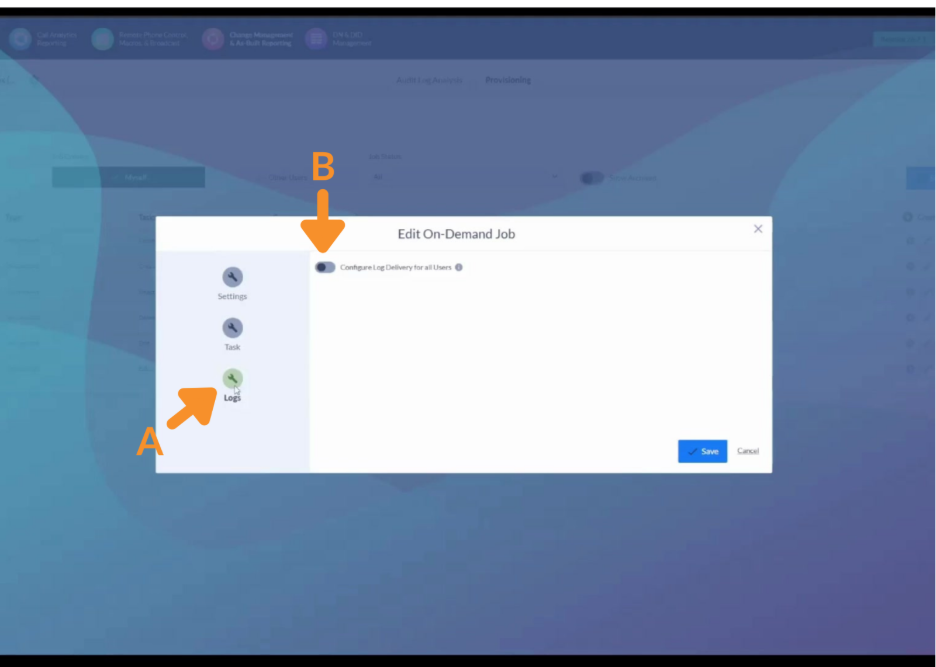
A. In the job’s modal, open the Logs tab.
B. Enable Configure Log Delivery for all Users.
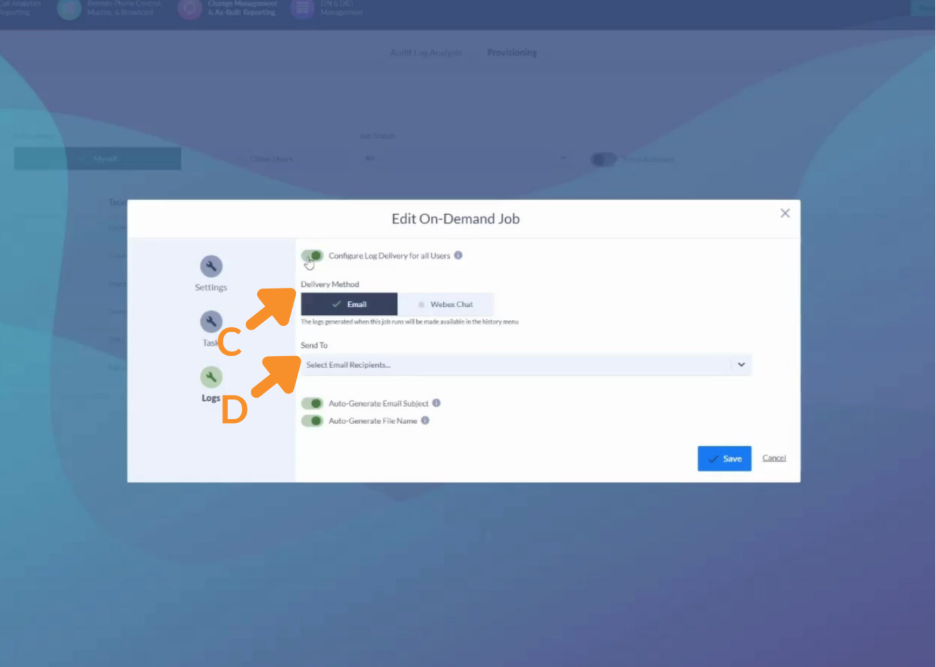
C. Under Delivery Method, choose Email or Webex Chat.
D. For Email, add recipients in Select Email Recipients… The Auto-Generate Email Subject and Auto-Generate File Name toggles are on by default.
E. For Webex Chat, add recipients in Select Webex Recipients… The Auto-Generate Message and Auto-Generate File Name toggles are on by default.
F. Click Save.
Still Need Help?
Email our support team at support@variphy.com or click the button below to access our ticket portal.
Please provide details about your question or issue, including any applicable screenshots, reports, or Variphy application log files.
