
Applies to:
- Organizations using Colleen AI Voice Agent to answer and transfer inbound calls.
- Administrators connecting a Webex Calling, Cisco CUCM, or file-based directory to their voice agent.
Common Causes or Issues
- Let your voice agent transfer callers to anyone in your organization by name or department.
- Pull your directory straight from your Webex Calling account.
- Connect your on-prem Cisco CUCM server with a connection credential.
- Upload a CSV, TSV, XLSX, or ZIP file when you don’t use Webex Calling or CUCM, starting from a downloadable template.
Interactive Walkthrough
How to Connect Your Company Directory
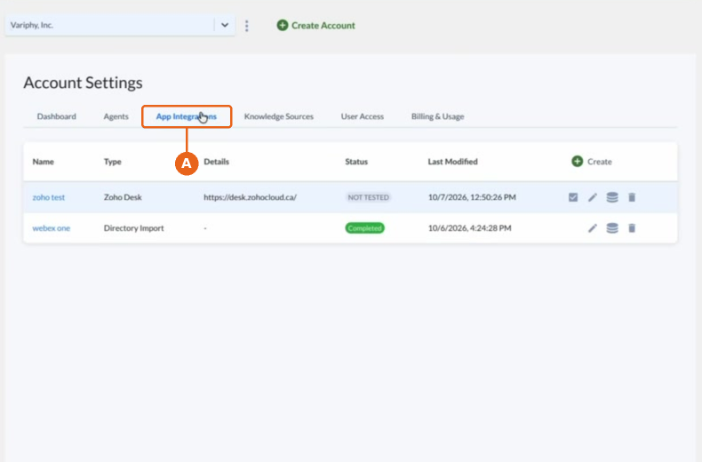
1. Open the App Integrations tab.
A. In Colleen AI Voice Agent, go to Account Settings and click the App Integrations tab.
Option 1: Connect Webex Calling
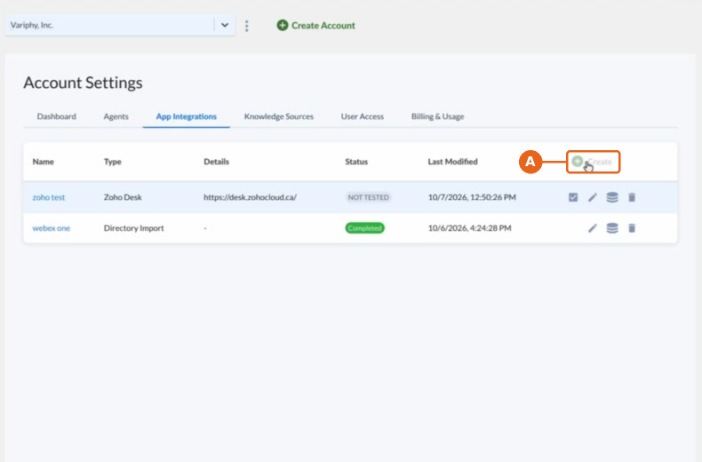
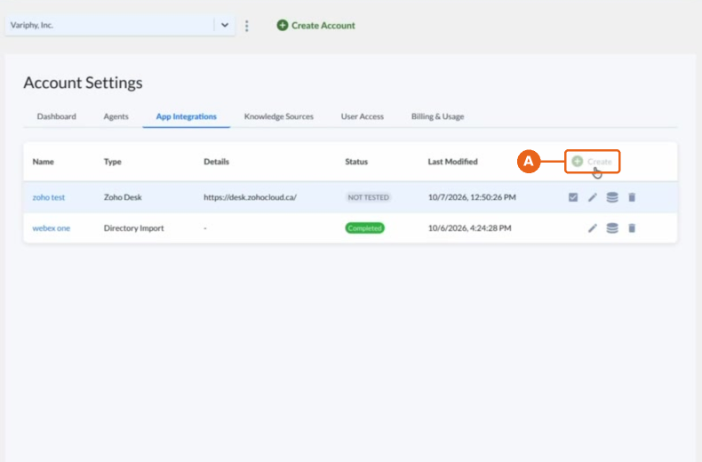
1. Click “Create”.
A. On the App Integrations tab, click Create.
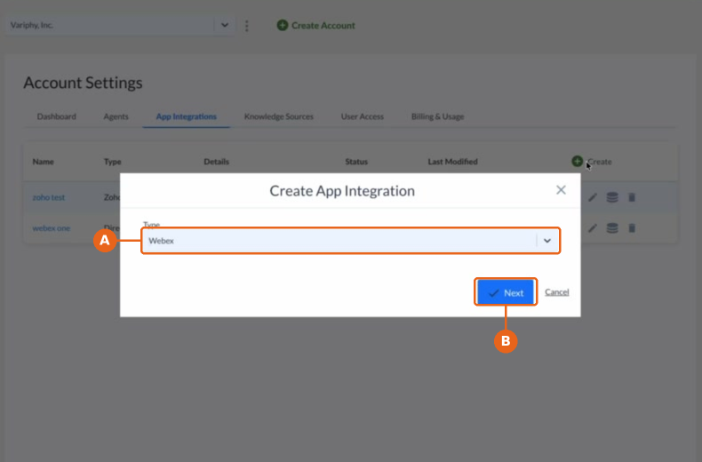
2. Select “Webex” and continue.
A. In Create App Integration, select Webex from the Type list.
B. Click Next.
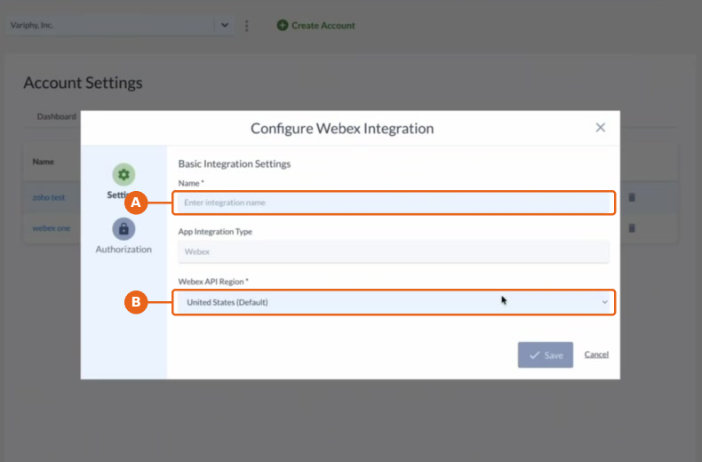
3. Name the integration.
A. In Configure Webex Integration, enter a Name you’ll recognize.
B. Confirm the Webex API Region. The default is United States (Default).
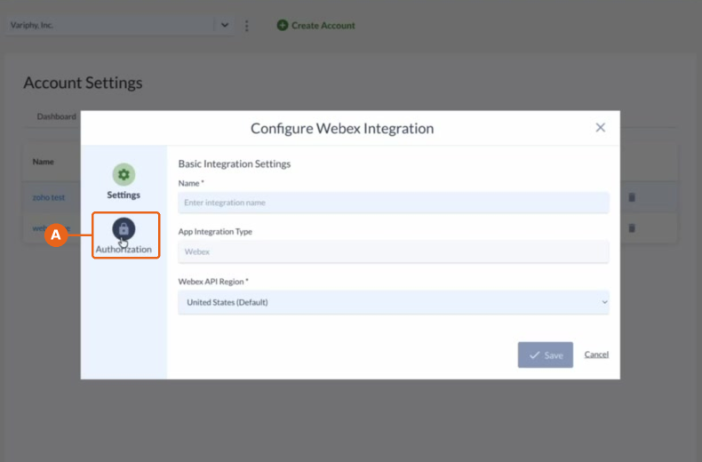
4. Open “Authorization”.
A. In the left sidebar, click Authorization.
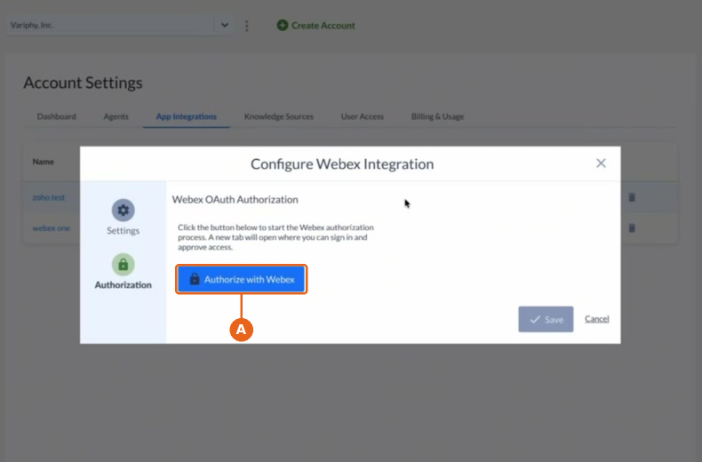
5. Click “Authorize with Webex”.
A. Under Webex OAuth Authorization, click Authorize with Webex. A new tab opens. Sign in to Webex and approve access so your voice agent can use your Webex Calling directory.
Option 2: Connect Cisco CUCM
1. Start a CUCM integration.
A. On the App Integrations tab, click Create.
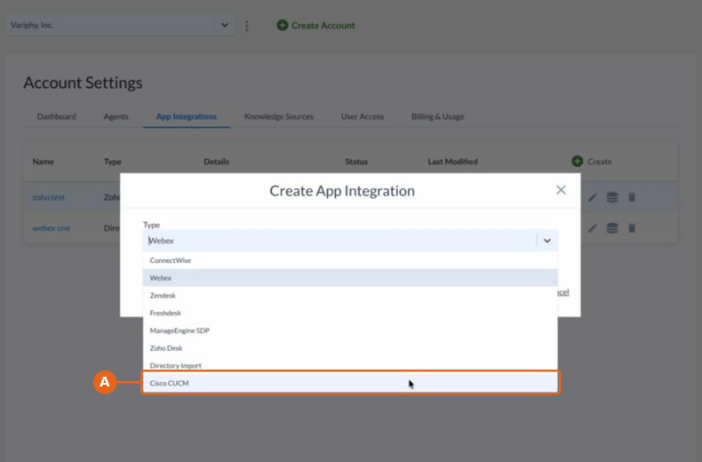
2. Select “Cisco CUCM”.
A. In Create App Integration, open the Type list and select Cisco CUCM. Click Next.
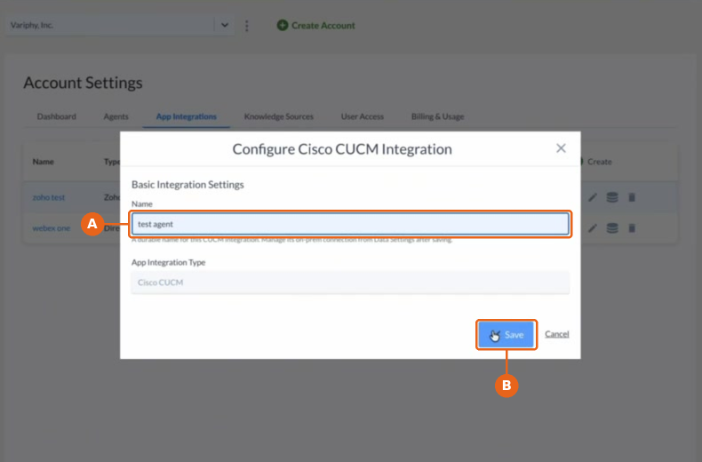
3. Enter a name and save.
A. In Configure Cisco CUCM Integration, enter a Name. Use a durable name. You’ll manage the on-prem connection after saving.
B. Click Save. The integration appears in the list with a Not connected status.
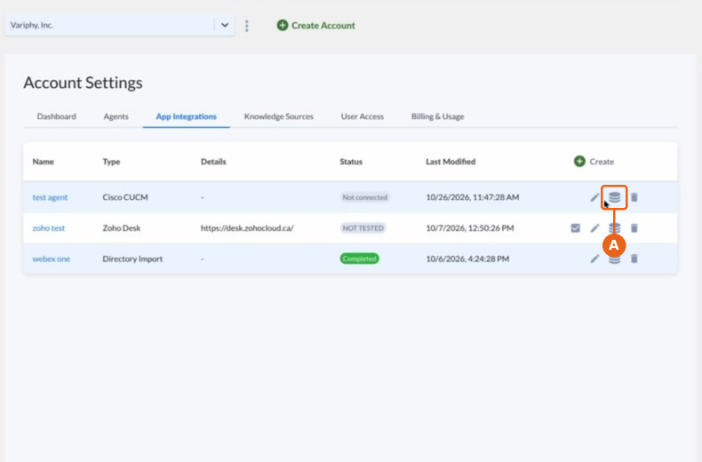
4. Open the connection settings.
A. In the row for your new Cisco CUCM integration, click the database icon.
B. The Cisco CUCM — [integration name] window opens. Under On-Prem Connection, you’ll see:
- Status
- Instance
- Connected Since
- Last Heartbeat
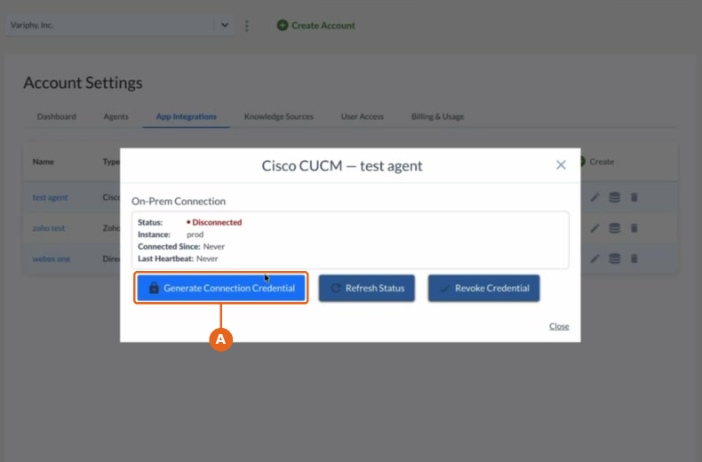
5. Click “Generate Connection Credential”.
A. Click Generate Connection Credential to create the credential that links your on-prem CUCM server to your voice agent.
B. Click Refresh Status to update the connection status.
Option 3: Upload a directory file
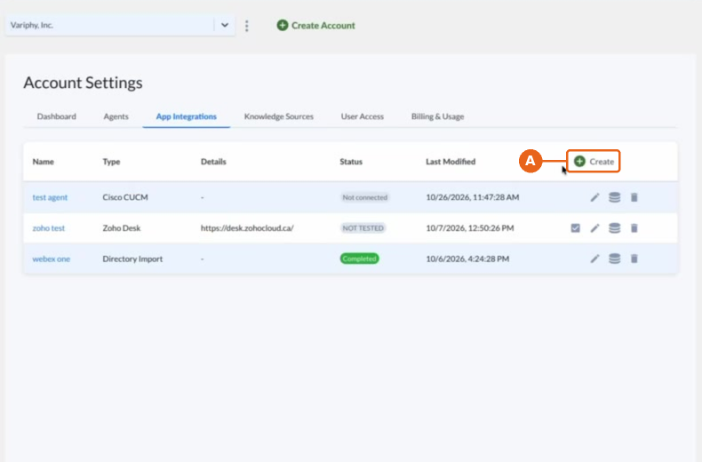
1. Start a Directory Import.
A. On the App Integrations tab, click Create.
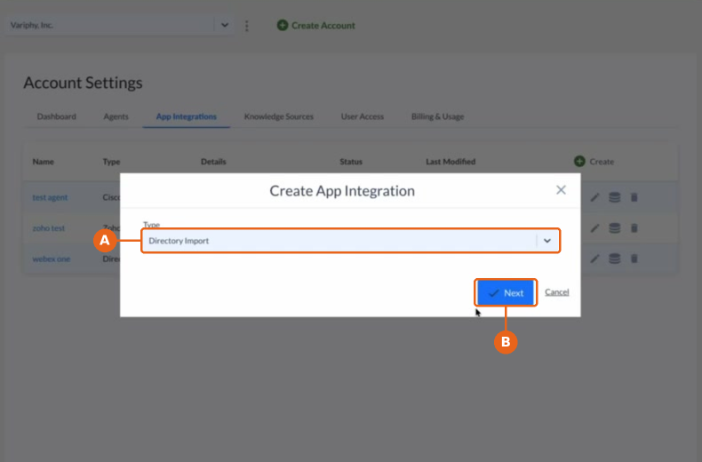
2. Select “Directory Import”.
A. In Create App Integration, select Directory Import from the Type list.
B. Click Next.
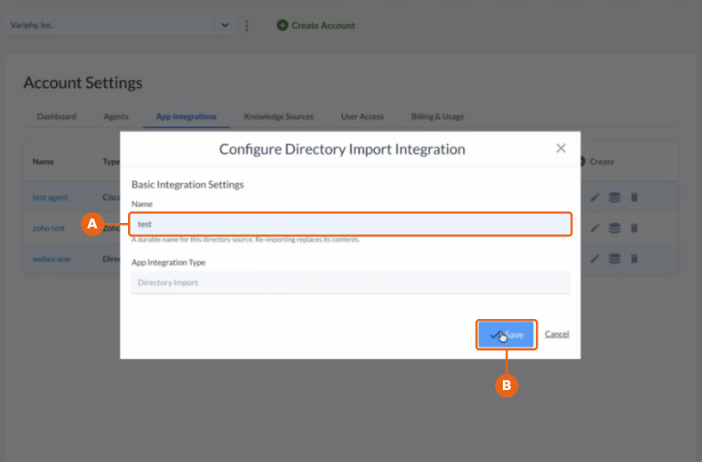
3. Name your directory import.
A. In Configure Directory Import Integration, enter a Name.
B. Click Save. The Directory Import — [integration name] window opens.
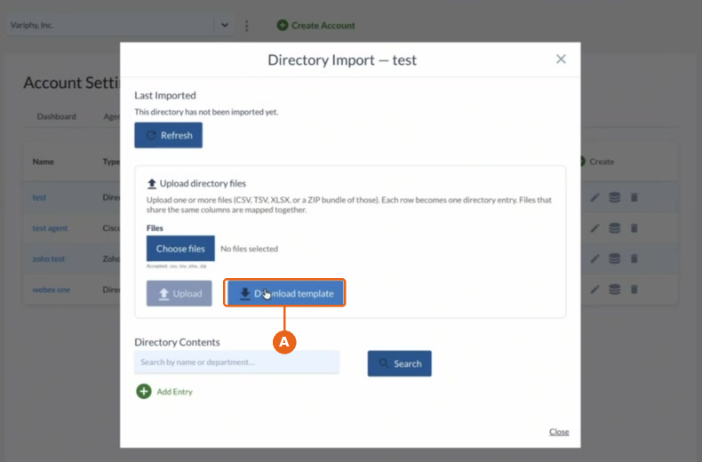
4. Click “Download template”.
A. Under Upload directory files, click Download template.
B. Add your directory to the template. Each row becomes one directory entry.
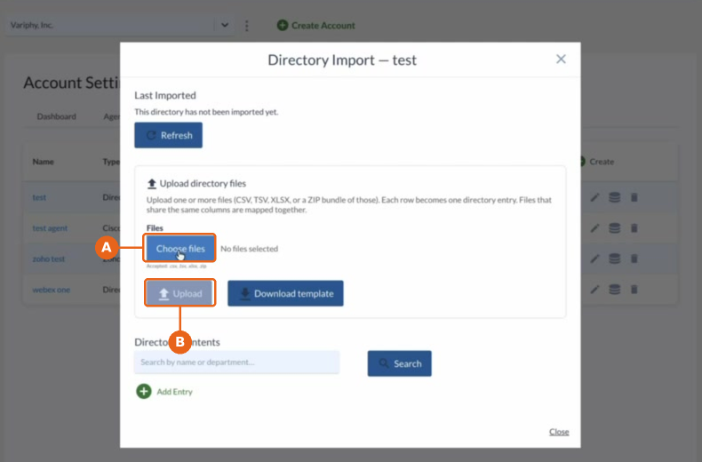
5. Choose your directory files.
A. Click Choose files and select one or more files. Supported formats:
- CSV
- TSV
- XLSX
- ZIP bundle of those files
B. Click Upload. Files that share the same columns are mapped together.
Once your directory is synced, your voice agent can:
- Transfer callers to anyone in your organization by name.
- Transfer callers to a department.
Still Need Help?
Email our support team at support@variphy.com or click the button below to access our ticket portal.
Please provide details about your question or issue, including any applicable screenshots, reports, or Variphy application log files.
