
Applies to:
- Organizations using Variphy Call Analytics for Webex Calling, release 26.10.1 and later.
- Administrators who track users with custom attributes in Control Hub.
- Teams that need more reporting structure than the Department field gives them.
Common Causes or Issues
- Report on calls by a business unit, cost center, or region that Webex Calling stores only as a custom attribute.
- Custom attributes show as numbers (Custom Attribute 1, 2, and so on) until you give them names in a custom label set.
Interactive Walkthrough
- How to Report on Custom User Attributes in Webex Calling
- 1. Check your custom attributes in Control Hub.
- 2. Open your Webex organization in Variphy.
- 3. Include custom attributes in the sync.
- 4. Name your attributes with a custom label set.
- 5. Search call history by a custom attribute.
- 6. Review the attribute values in your results.
- 7. Group a report by a custom attribute.
- 8. Add custom attribute columns to a report.
How to Report on Custom User Attributes in Webex Calling
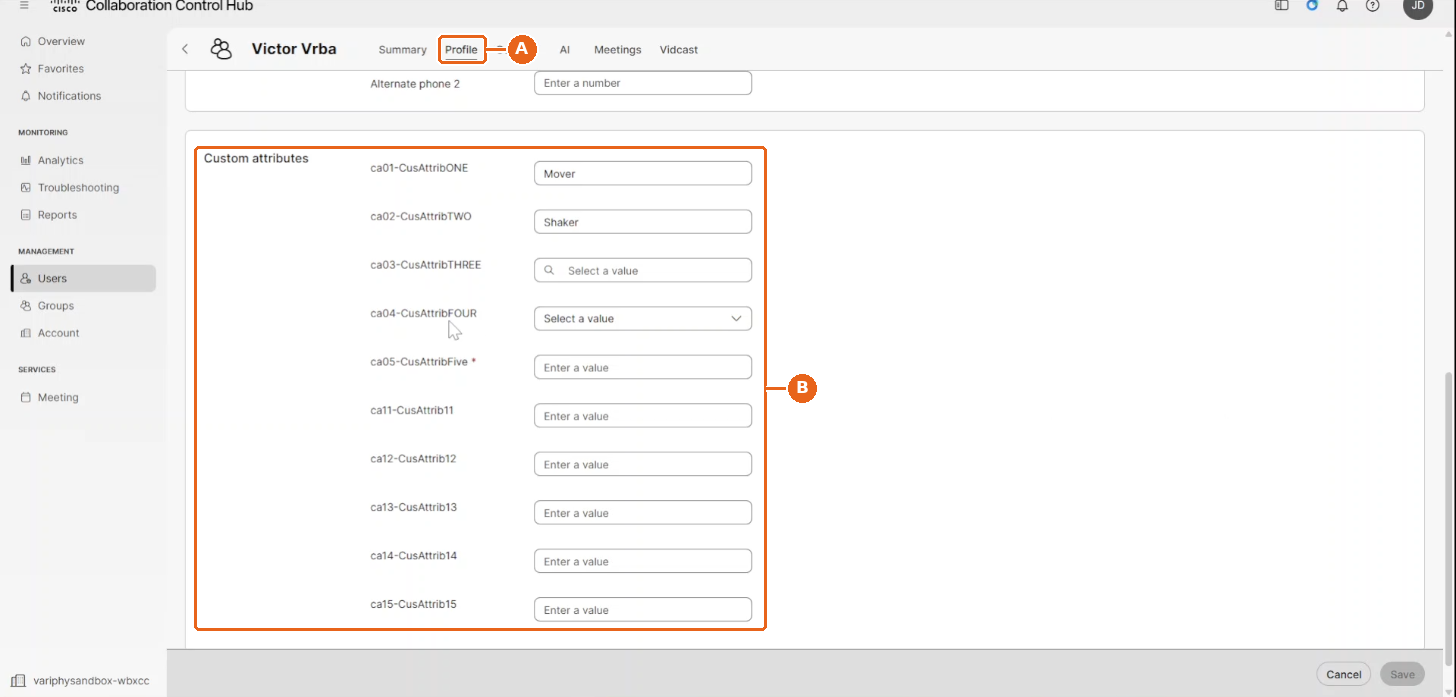
1. Check your custom attributes in Control Hub.
Custom attributes are set up in Control Hub under Organization Settings > User Attributes. Your organization can create up to 15.
A. In Control Hub, go to Users, select a user, and open the Profile tab.
B. Under Custom attributes, check the values for that user. Note which attribute number (1 to 15) holds each field.
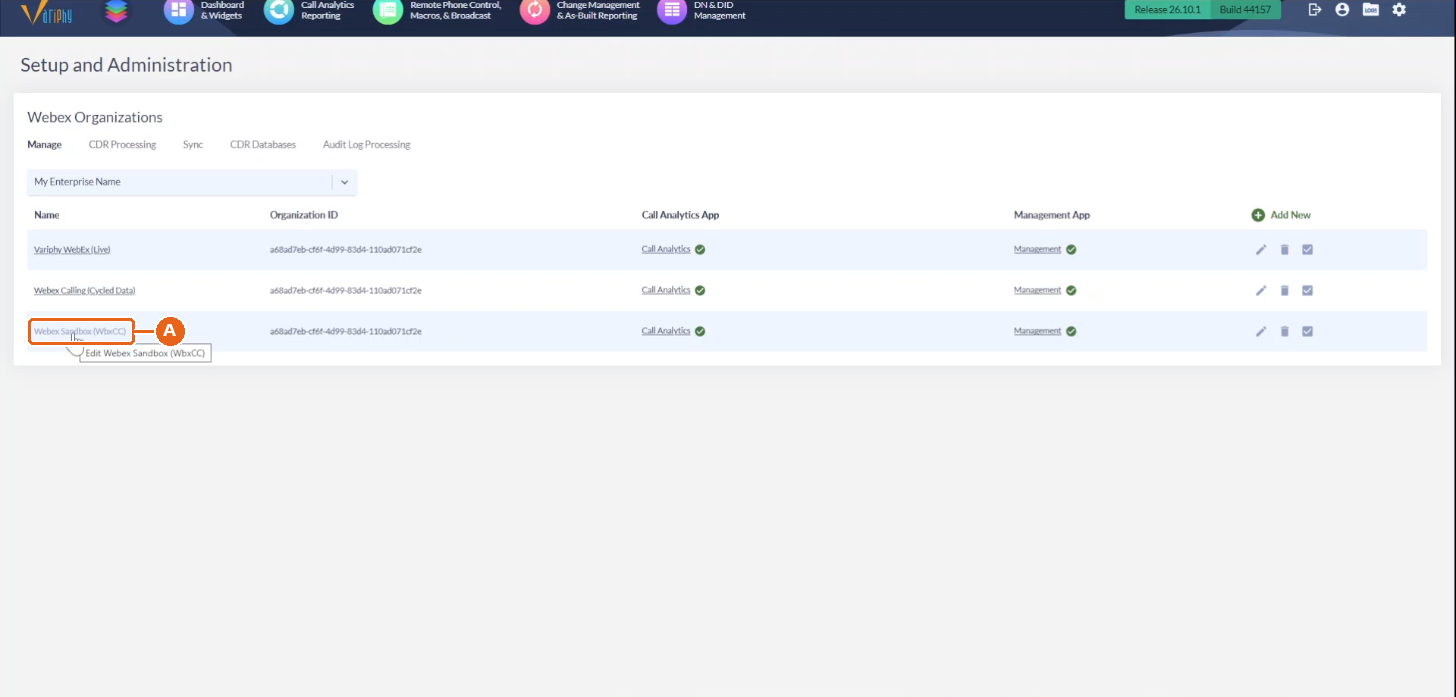
2. Open your Webex organization in Variphy.
A. Go to Setup and Administration > Webex Organizations > Manage, and click the name of your organization.
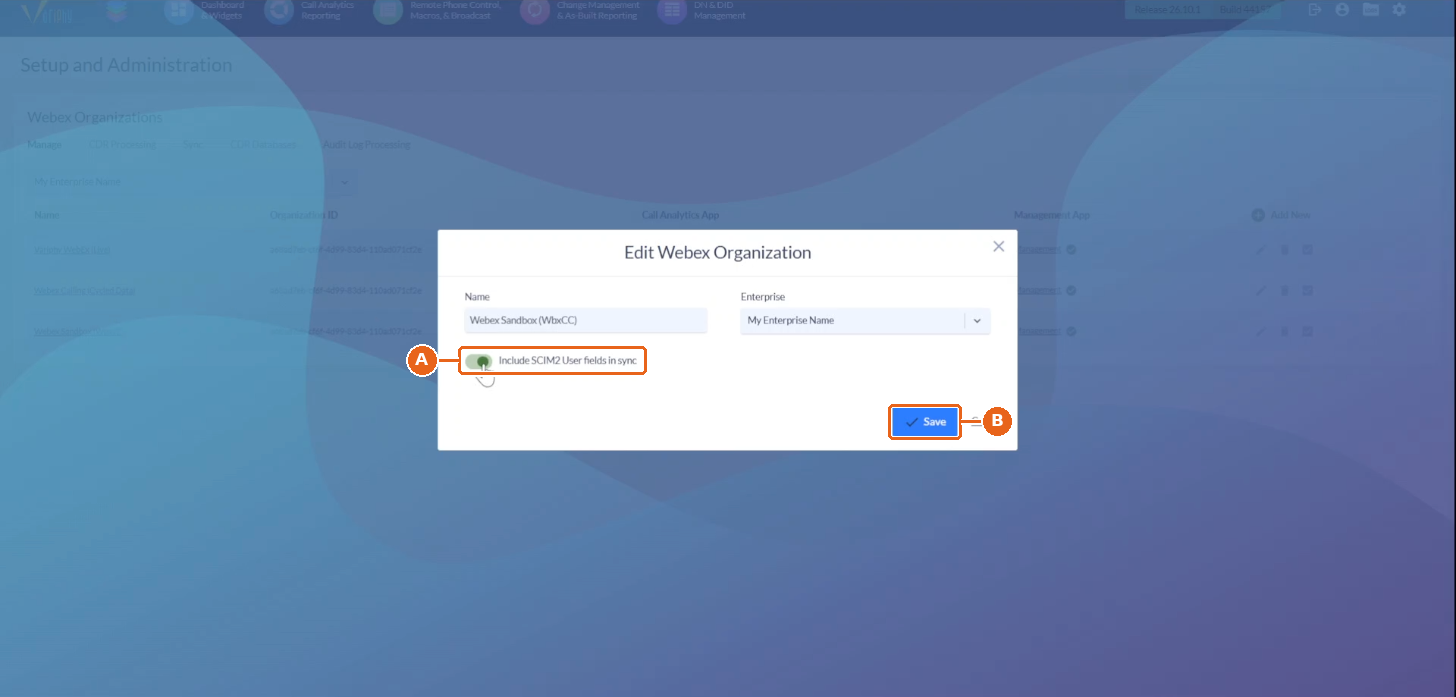
3. Include custom attributes in the sync.
A. Turn on Include SCIM2 User fields in sync.
B. Click Save.
Variphy pulls the attribute values for your licensed users on the next sync. To see when that runs, open the Sync tab and check Next Scheduled Sync.
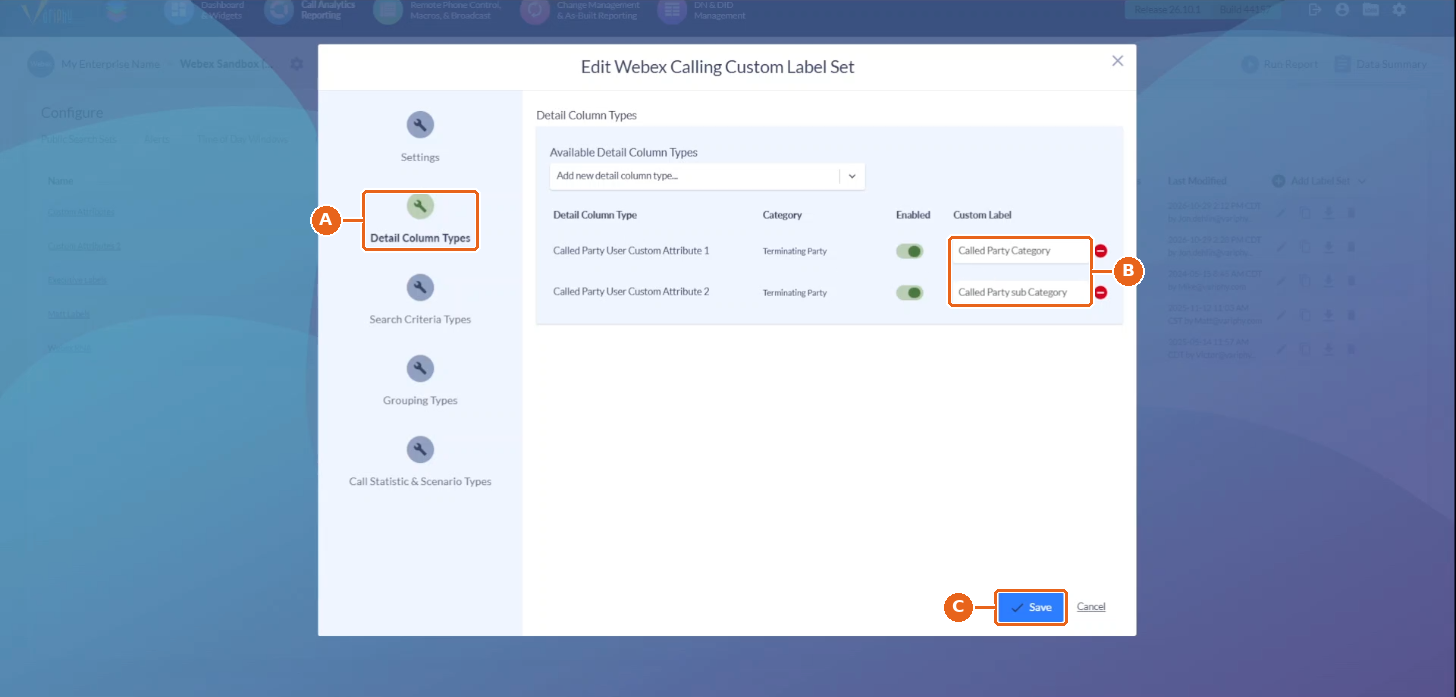
4. Name your attributes with a custom label set.
Webex Calling shares attribute values with Variphy, not attribute names, so name each attribute you use in a custom label set.
A. In Call Analytics Reporting, go to Configure, open your Webex Calling custom label set, and select Detail Column Types.
B. From Add new detail column type, add each custom attribute and enter its name under Custom Label. Repeat in Search Criteria Types and Grouping Types.
C. Click Save.
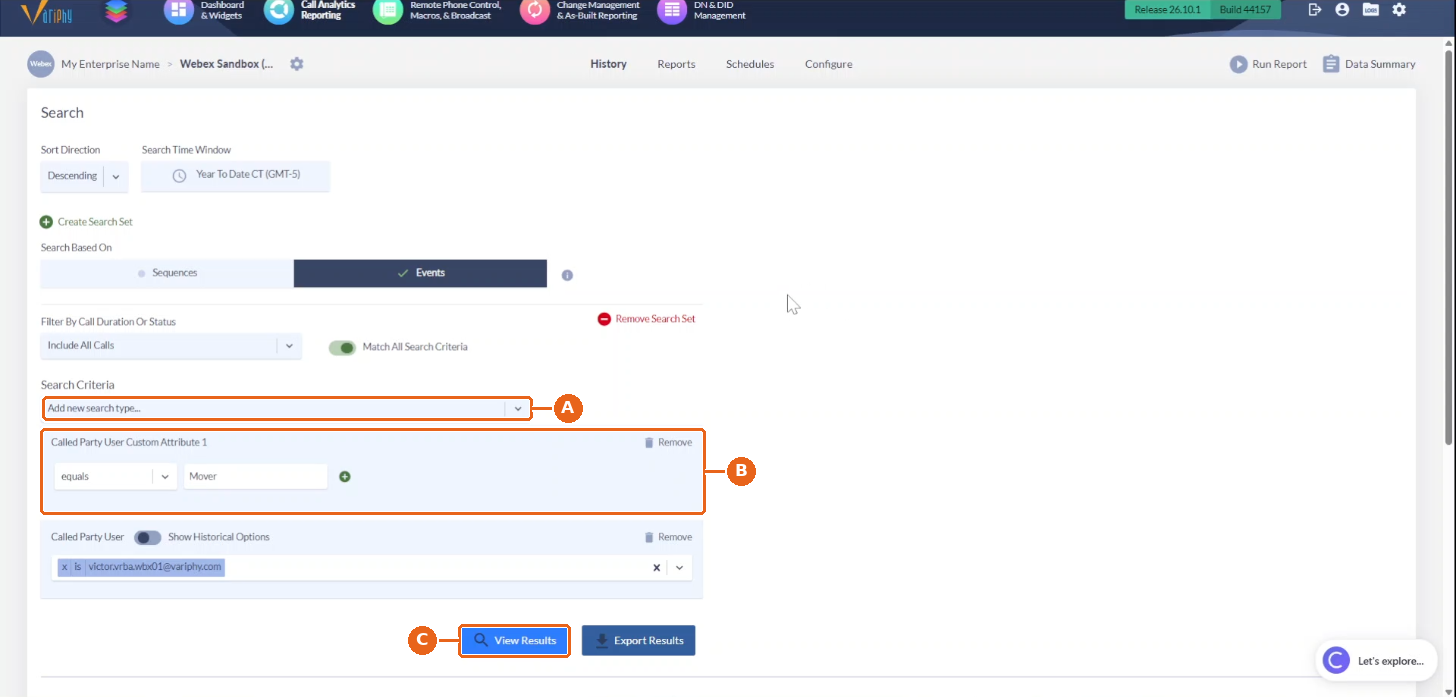
5. Search call history by a custom attribute.
A. On the History tab, open Add new search type and pick a custom attribute. Each one comes in three versions: Calling Party, Called Party, and Calling or Called Party User Custom Attribute.
B. Choose an operator, such as equals, and enter the value. Criteria are free-form, so you can use wildcards.
C. Click View Results.
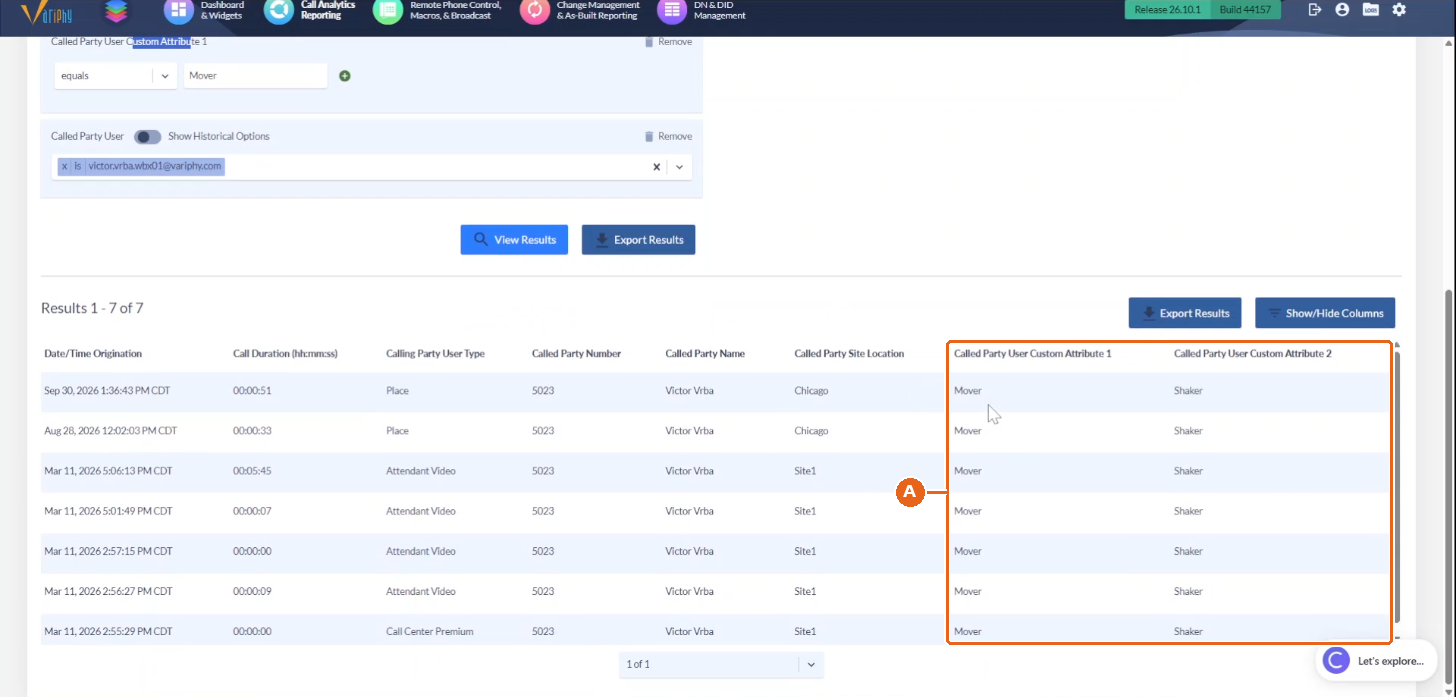
6. Review the attribute values in your results.
A. The custom attribute columns show the values of the Webex user on each call. If a party isn’t a Webex user, the column is blank.
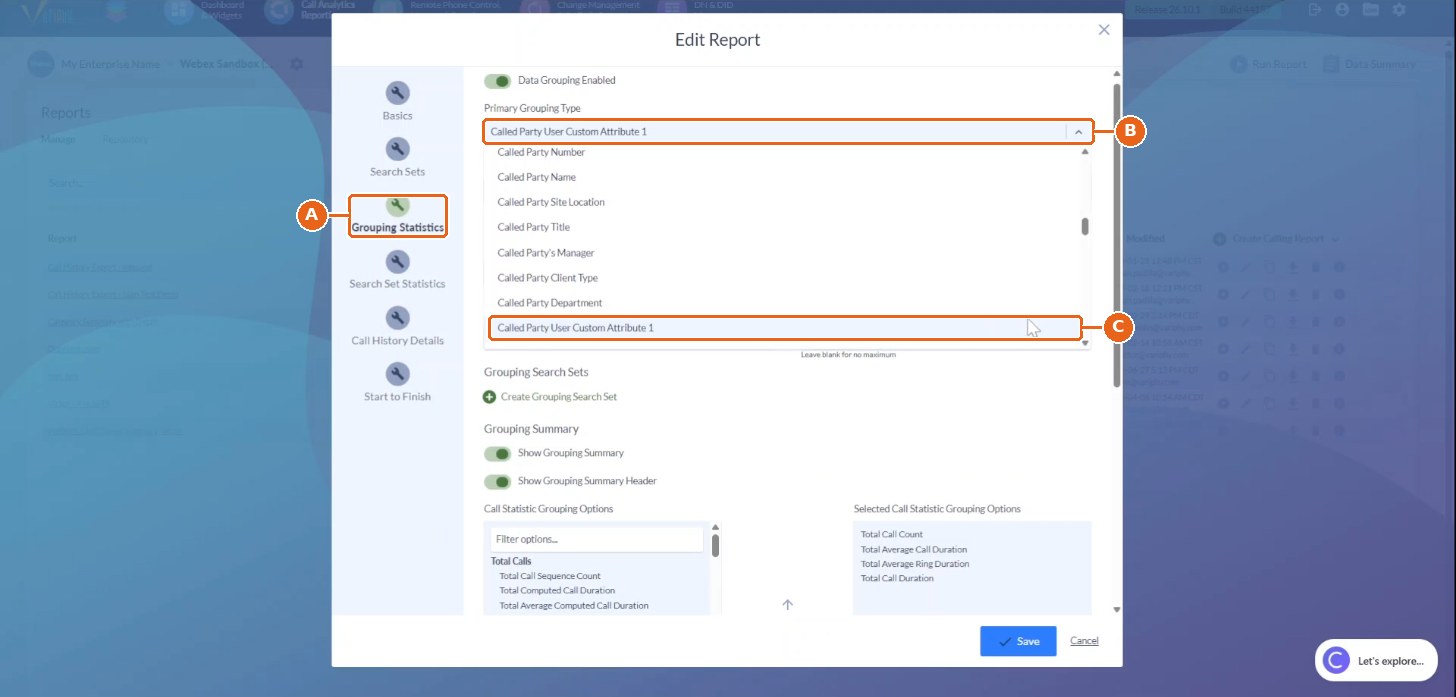
7. Group a report by a custom attribute.
A. On the Reports tab, edit a report and select Grouping Statistics.
B. Open Primary Grouping Type.
C. Pick a custom attribute, then click Save.
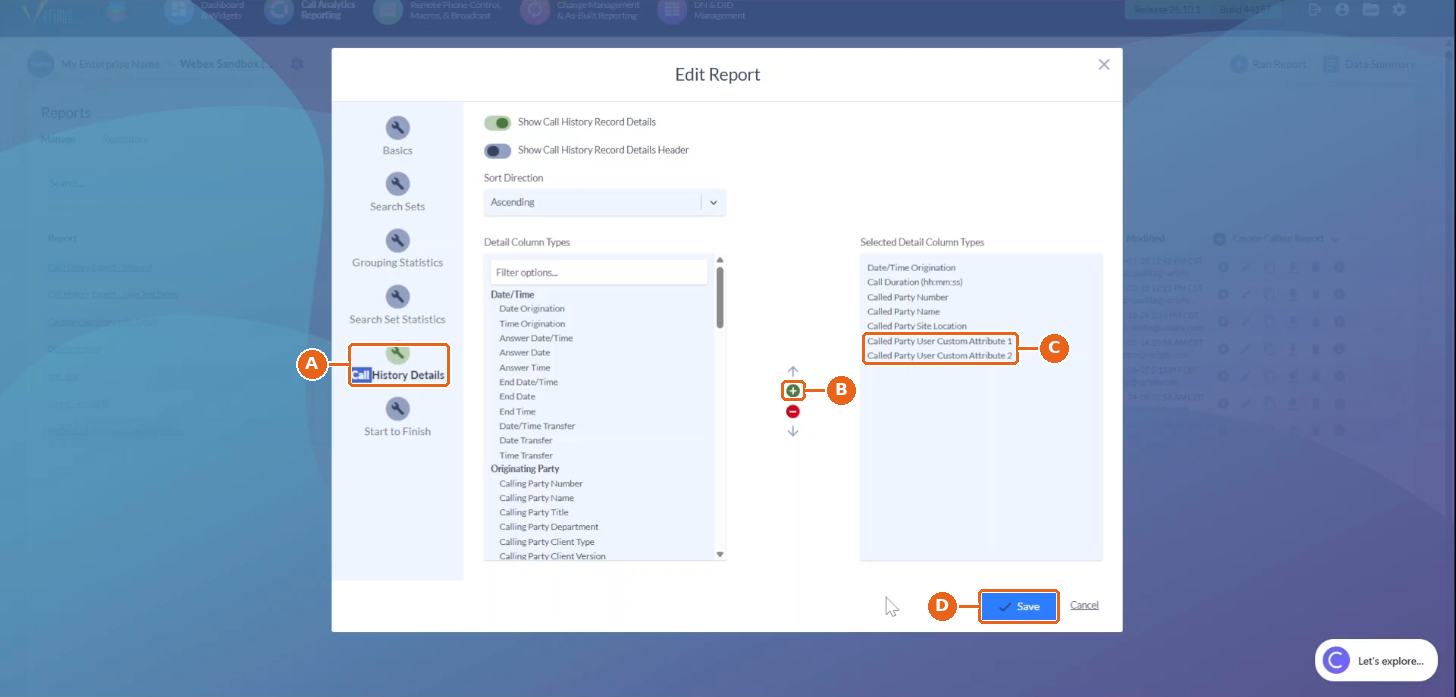
8. Add custom attribute columns to a report.
A. In Edit Report, select Call History Details.
B. Select a custom attribute under Detail Column Types and click the green plus to add it.
C. Check that it appears under Selected Detail Column Types.
D. Click Save.
With custom user attributes in Variphy, you can:
- Search calls by up to 15 custom attributes for the calling party, the called party, or either one.
- Group reports by any custom attribute.
- Add calling party and called party custom attribute columns to call history details.
Still Need Help?
Email our support team at support@variphy.com or click the button below to access our ticket portal.
Please provide details about your question or issue, including any applicable screenshots, reports, or Variphy application log files.
