
Applies to:
- Organizations using the Colleen AI Voice Agent to answer inbound calls.
- Administrators configuring what happens automatically after each call ends.
- Support teams that want call summaries emailed or tickets logged in their help desk.
Common Causes or Issues
- Email a summary of every call to the people who need to follow up.
- Customize the email subject and body with dynamic call details like caller name, issue summary, and transcript.
- Create support tickets automatically in ConnectWise, Freshdesk, ManageEngine, Zoho Desk, or Zendesk.
- Limit ticket creation to calls transferred to a department, so resolved or abandoned calls don’t create tickets.
Interactive Walkthrough
- 1. Open the Agents tab.
- 2. Edit your agent.
- 3. Select Wrap-Up Actions.
- 4. Enable email sending.
- 5. Enter recipient emails.
- 6. Customize the email template.
- 7. Review ticketing integrations.
- 8. Open App Integrations.
- 9. Click Create.
- 10. Select your help desk.
- 11. Enter your credentials.
- 12. Turn on ticket creation.
1. Open the Agents tab.
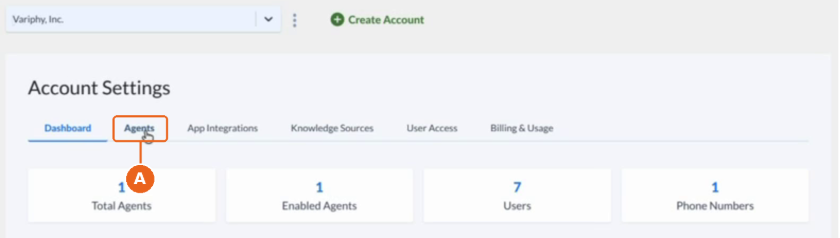
A. In the Colleen AI Voice Agent portal, go to Account Settings and click Agents.
2. Edit your agent.
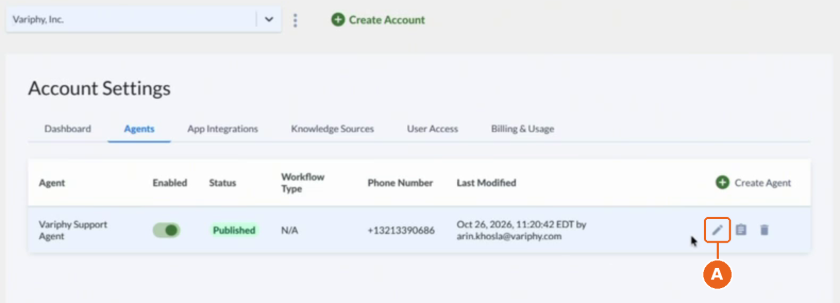
A. Find the agent you want to configure. Wrap-up actions are set per agent.
B. Click the pencil icon in that agent’s row to open Configure Agent.
3. Select Wrap-Up Actions.
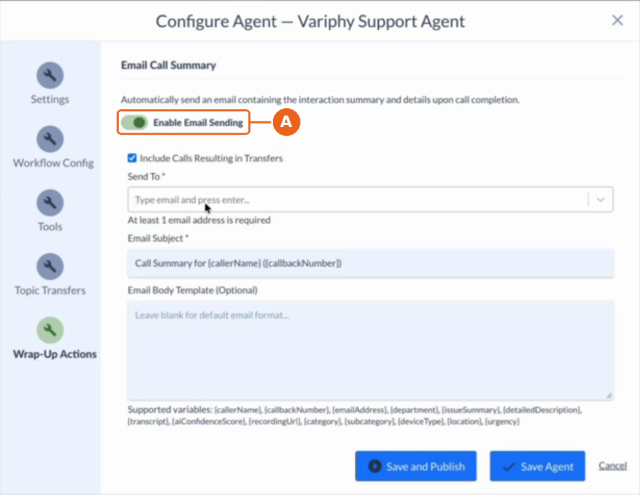
A. In the left menu of Configure Agent, click Wrap-Up Actions.
4. Enable email sending.
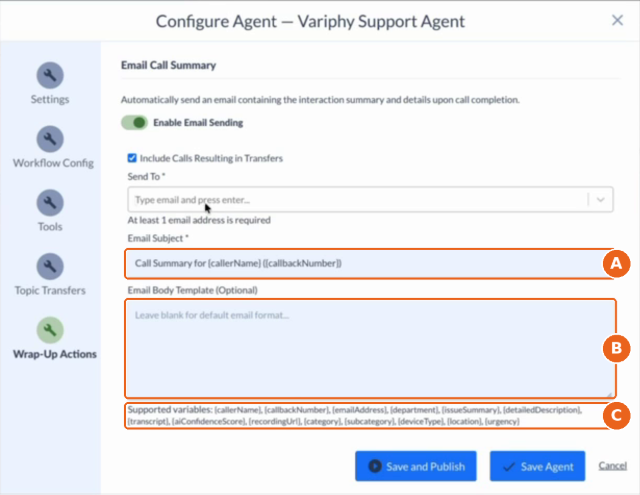
A. Under Email Call Summary, turn on the Enable Email Sending toggle. Your agent will send an email with the interaction summary and call details when each call completes.
5. Enter recipient emails.
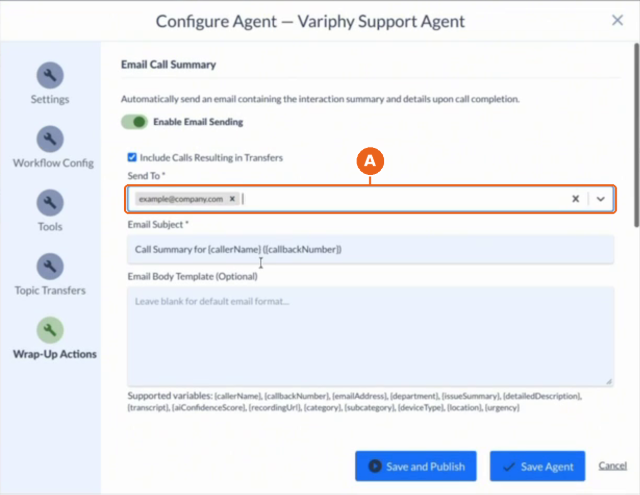
A. In the Send To field, type an email address and press Enter.
B. Repeat for each additional recipient. At least one email address is required.
6. Customize the email template.
A. Edit the Email Subject if needed. The default is Call Summary for {callerName} ({callbackNumber}).
B. Enter a custom body in Email Body Template (Optional), or leave it blank to use the default email format.
C. Add any of the Supported variables to the subject or body:
- {callerName}, {callbackNumber}, {emailAddress}
- {department}, {issueSummary}, {detailedDescription}
- {transcript}, {aiConfidenceScore}, {recordingUrl}
- {category}, {subcategory}, {deviceType}, {location}, {urgency}
Need a variable that isn’t listed? Contact the Variphy team to request it.
7. Review ticketing integrations.
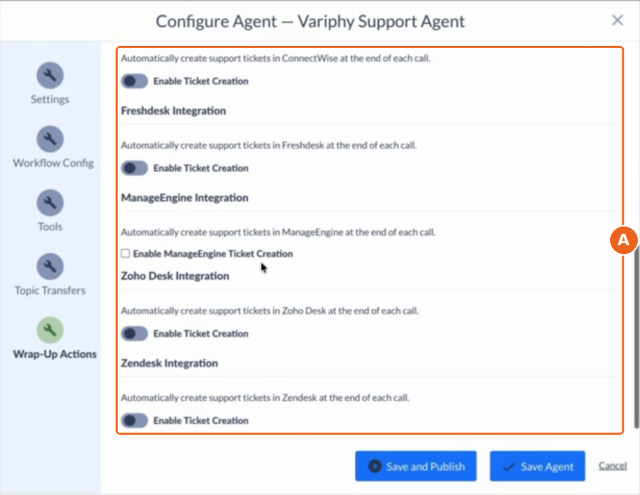
A. Scroll down to see the ticketing integrations your agent supports:
- ConnectWise Integration
- Freshdesk Integration
- ManageEngine Integration
- Zoho Desk Integration
- Zendesk Integration
B. Each integration needs an active connection in App Integrations before it can create tickets. If you turn one on before connecting it, you’ll see a message asking you to configure an integration in App Integrations first.
8. Open App Integrations.
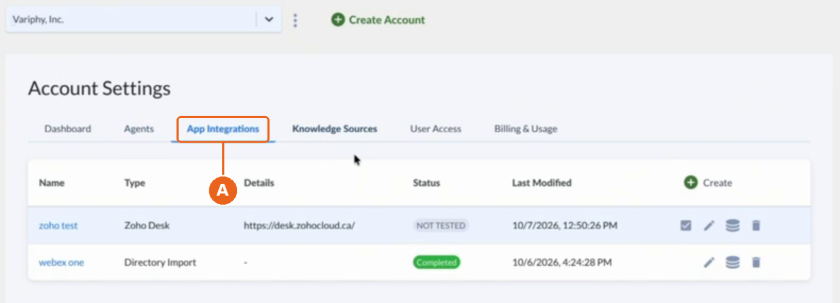
A. Close Configure Agent, then click the App Integrations tab in Account Settings.
9. Click Create.
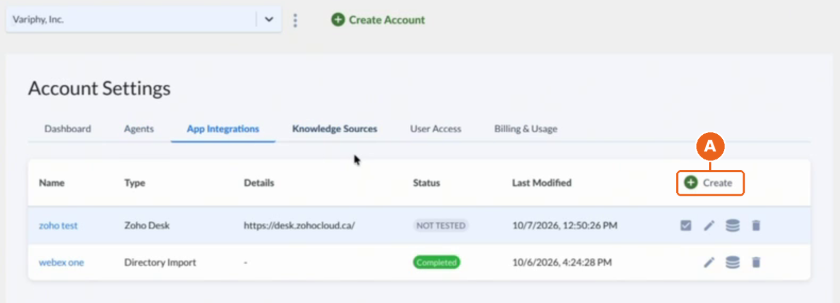
A. Click Create to add a new integration.
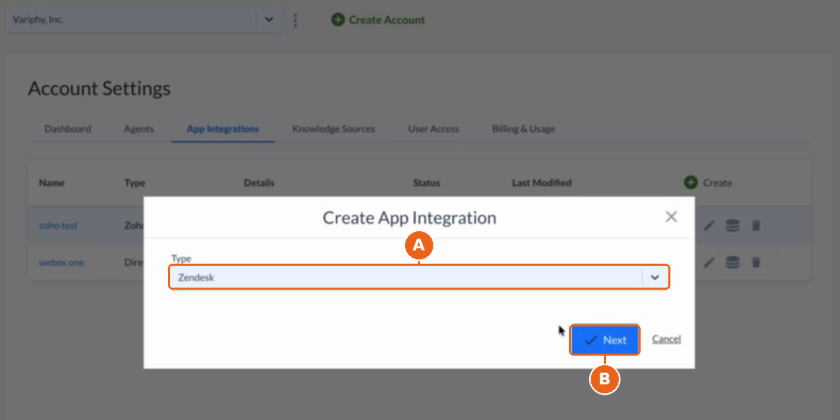
10. Select your help desk.
A. In Create App Integration, open the Type list and select your help desk platform:
- ConnectWise
- Freshdesk
- ManageEngine SDP
- Zoho Desk
- Zendesk
B. Click Next.
11. Enter your credentials.
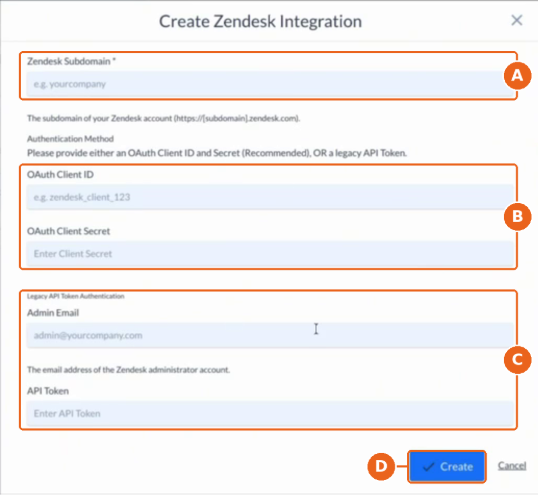
A. Enter your Zendesk Subdomain (the subdomain of your Zendesk account, https://[subdomain].zendesk.com).
B. Enter your OAuth Client ID and OAuth Client Secret (recommended).
C. Or, under Legacy API Token Authentication, enter the Admin Email of your Zendesk administrator account and an API Token.
D. Click Create.
The fields shown here are for Zendesk. Other platforms ask for the credentials that platform requires.
12. Turn on ticket creation.
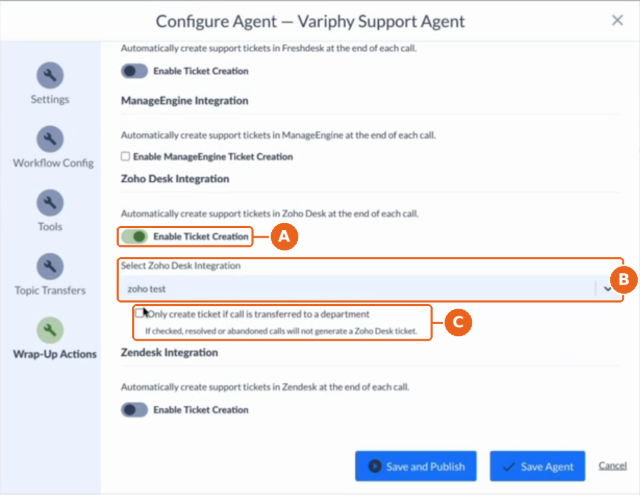
A. Return to your agent’s Wrap-Up Actions and turn on Enable Ticket Creation for your connected integration.
B. Select your integration from the Select [Platform] Integration list (e.g., Select Zoho Desk Integration).
C. Optionally, check Only create ticket if call is transferred to a department. When checked, resolved or abandoned calls won’t generate a ticket.
Still Need Help?
Email our support team at support@variphy.com or click the button below to access our ticket portal.
Please provide details about your question or issue, including any applicable screenshots, reports, or Variphy application log files.
